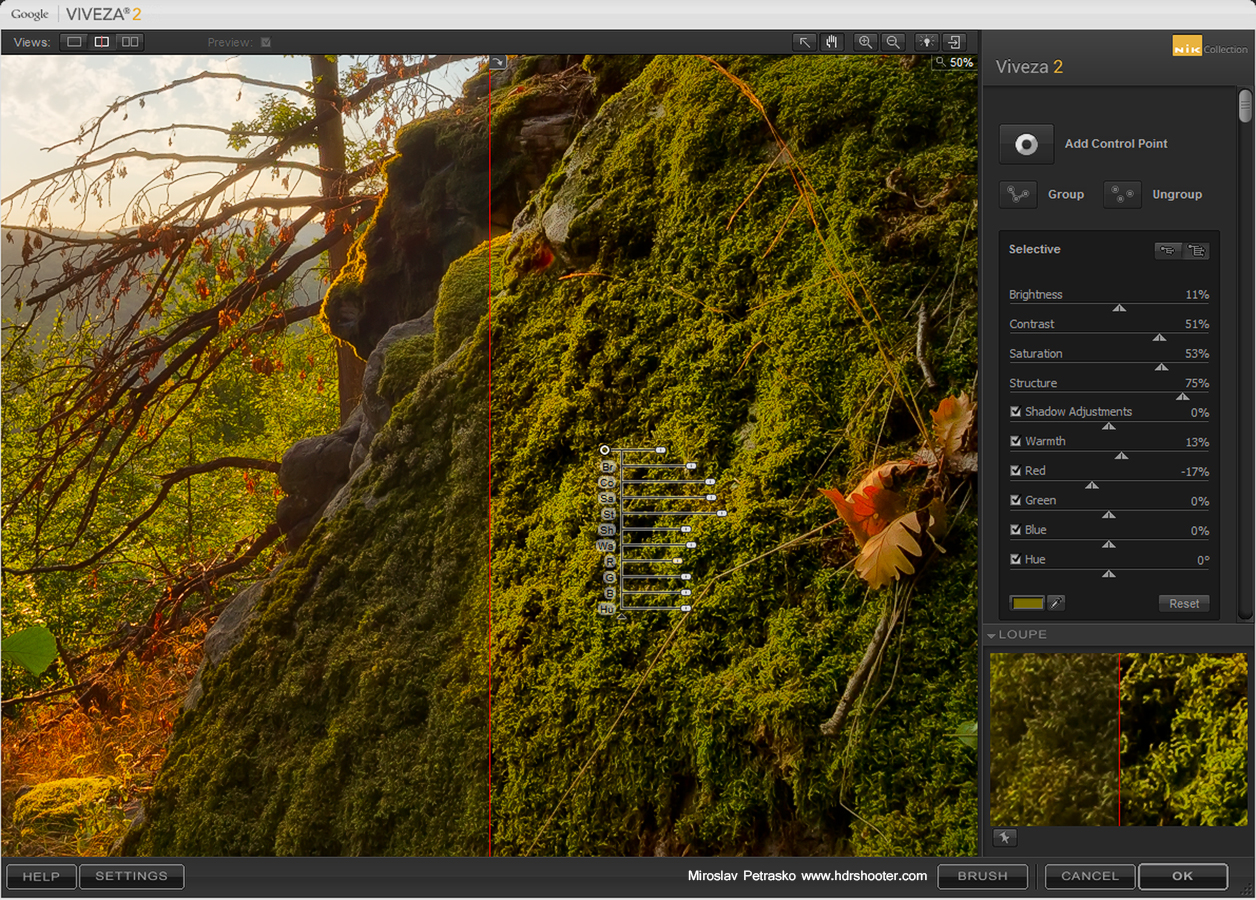
Compared to Nik Color Efex or Silver Efex, this one is a little different. Where others are a group of different filters, or a group of presets of one filter. This one is a tool to adjust the basics of a photo. You get only four basic sliders (Brightness, Contrast, Saturation and Structure) and 6 additional sliders (Shadows, Warminth, Hue and the Red, Green and Blue channel adjustment). The list is finished with a curves adjustment, you can use on any of the channels.

nik-viveza-1

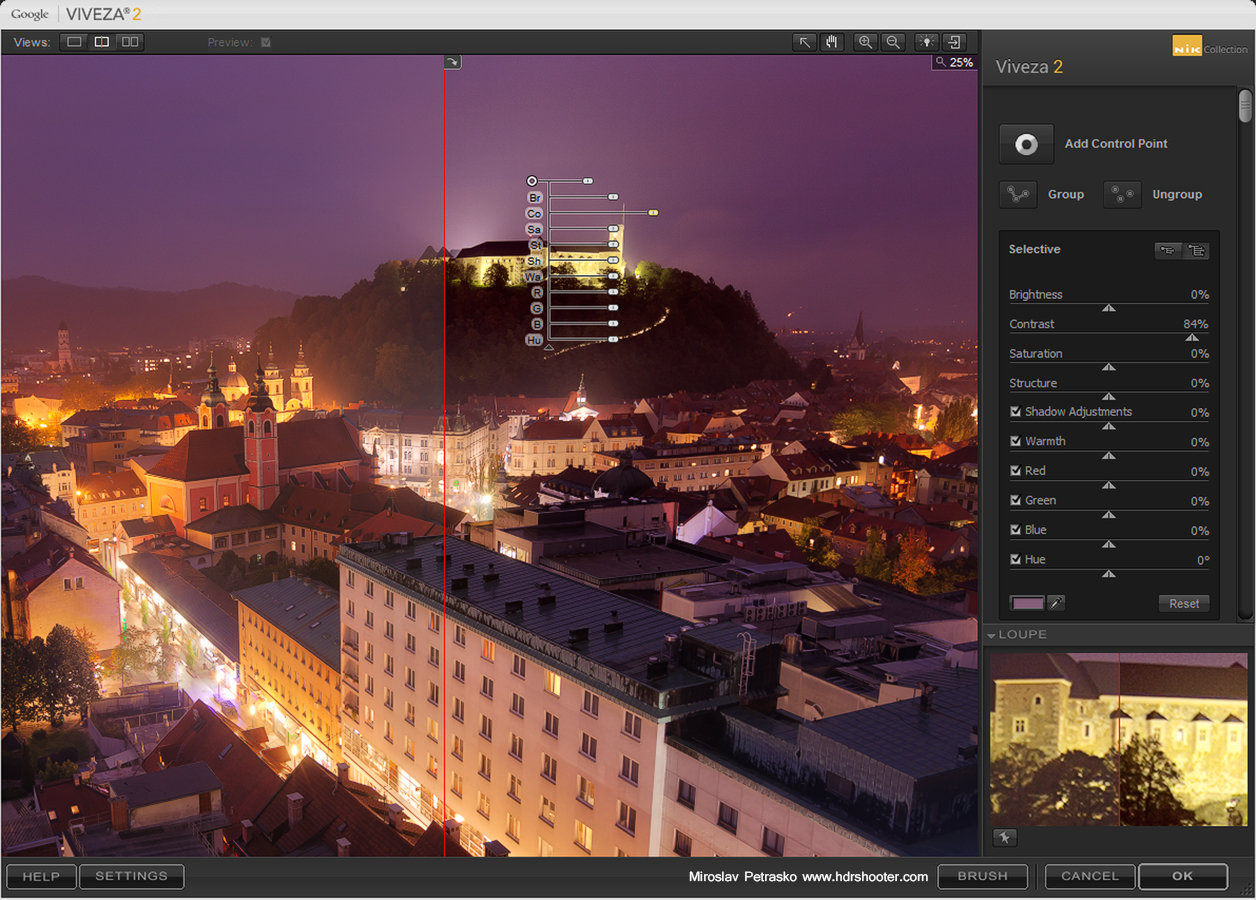
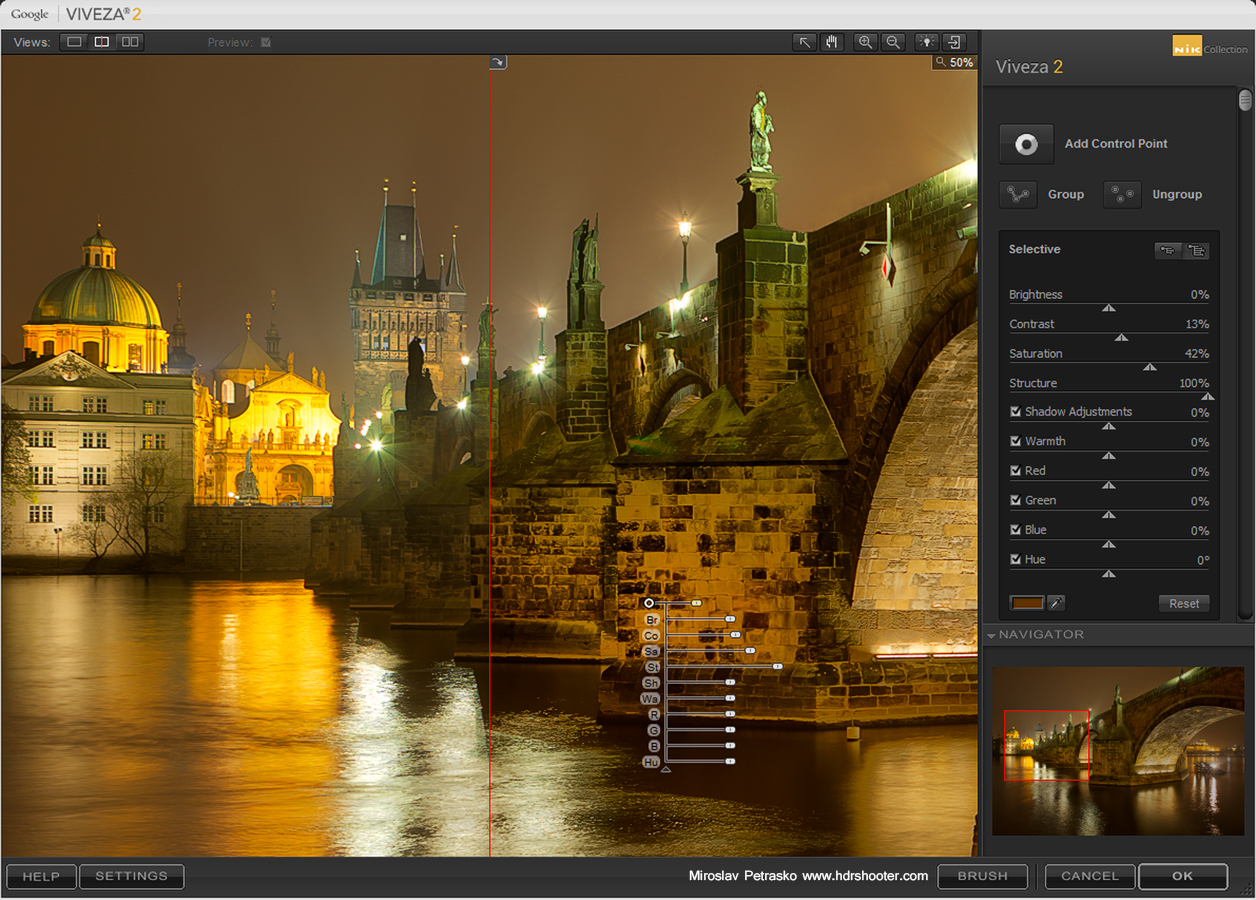
So as I said, the Viveza only has a basic set of tools. But it has one trick up it’s sleeve. It allows you to add control points to your photo. Once a control point is dragged onto a photo, it creates and automatic selection, based on the color it was placed on. Once this is done, you have all the mentioned sliders available for that specific point. So you don’t affect the whole photo, but jut the selected part. It’s similar to using Color range in Photoshop to define your selections.

nik-viveza-2

You can also affect the radius around the point, in which this selection is made. Don’t be surprised if the effect is also outside the radius, as the area is determined by both, the radius and the similarity of colors.

Another nice thing is, that you can group points into groups and so are able to affect multiple parts of the image at once.

nik-viveza-3
Overall Viveza can make you editing process faster, as it takes away the need to mask out areas for where you want to apply an adjustment. I suggest you give it a try.

For additional information on Viveza, you can visit the Nik collection site here http://www.google.com/nikcollection/. Google does not offer any discount codes there, but if you look around, you maybe find one of the old ones, and can get the collection for a little cheaper :)

View all my other reviews here.

Another week just passed, and again I’m getting to another process post. So as always I will show you how I edited one of my recent photos. For today I chosen this photo from Austria, from this stunning sunset at the Neusidler see. So to get to this final photo, I did the following
Crazy skies

As always I started in Lightroom, where I corrected the lens distortion and removed Chromatic aberrations. After that I exported all the files as 16bit Tiff files.
crazy-skies-lightroom
Then I took them and loaded in Photomatix Pro 5. I used the Contrast Optimizer to get a nice even image, a good start for additional blending.
crazy-skies-photomatix
After that I loaded the Photomatix result together with the original exposures into layers in Photoshop, and continues as follows (layers numbered from bottom up):
1. Photomatix result
2. recovered detail in the water from the 0EV exposure
3. recovered detail in the sky from the -1EV exposure
4. brightened the pillars from the +2EV exposure
5. used Color Efex Pro Contrast to add more color and contrast to the photo
crazy-skies-color-efex
6+7. added glow (view my glow tutorial for details)
8. color balance to make the photo a little warmer
9. used Color Efex Glamour glow to soften the colors a little
10. used Color Efex Detail extractor, to get more detail in the sky and water
11. used Color Efex Darken/Lighten Center to add a vignette. This should have been the last point, but in the end I did few more edits on the photo.
12. curves to add more contrast
13. a little more Color Efex Pro contrast, as I felt the photo needed more local contrast
14. noise reduction using Imagenomic Noiseware
15. added more color to the sunset
16. finished with a little more contrast
crazy-skies-photoshop
Not maybe the nicest use of layers, but it got me to the finished photo. Please continue to the full post to see the original 0EV shot and the Photomatix result.

FREE EBOOK!!!
Subscribe to my newsletter and get a free Capturing fireworks ebook. 
Subscribe