Few weeks ago I posted an article about how to use manual focusing, and today, let’s look at the second part of every photo, how to determine the base exposure. I will go over how I do it, so this may not be the best, or the exactly right way, but it always worked fine for me. Also, this is how I determine the exposure for HDR series, not for single exposures. For those I usually let the camera decide, with the default metering, and I just tweak the exposure up or down as needed.
 I will show this on my Canon camera, so this may not work as exactly on different cameras. Also this is not so easy to explain, so feel free to ask if there are any questions.
Using the live view
Same as with manual focusing, I also determine the exposure in live view. Most cameras have only few modes how to determine the exposure, and these fall into two categories. Either there look at the whole image, or they look only at the center of the image and base the exposure on that. In neither of those you can specify a specific point for the camera to look at, without moving the camera. So neither of those works for my workflow.
What I do is to get the composition (usually through the viewfinder), go into live view, focus, set the exposure and take the shots. So how to get the exposure for a specific area? Simple. But first be sure to be in the Manual mode (M), so you can set it, not the camera.
Choosing the exposure area
So to get the exposure for a certain area, go into Live view, and you will see a square on your screen. This is the square you zoom into when you zoom in live view, but it also determines the area for the exposure. If you try to move it around, you will see that the image on the screen changes brightness based on where the square is. So it always adapts, to show the proper exposure for that area.

Dark area selected

Bright area selected
So using this, you can choose the area for the exposure. Now you just need to find the values for this. To do this, you have to half press the shutter button and let go. What this does is, that it meters the exposure (normally it also focuses, but usually this is not done in live view, and also if you use manual focusing, this is turned off). After this is done, the camera will start showing the exposure under the live view (the small scale from -2 to +2). You can now change the aperture and time, to move the exposure to the 0EV position on the scale.

Which area to choose?
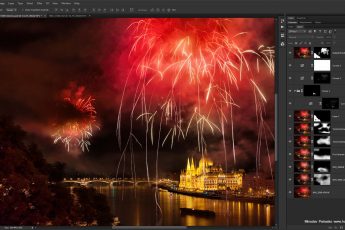
So now you know how to get an exposure for a specific area of a photo. Now the next decision is to choose the area of the photo. I tend to select the darkest area of the scene. This is because I want to have a good starting point, that is easy to find. Trying to find the middle exposure is just much harder, than just going directly for the darkest one. In the photos in this post, I outlined the areas I chosen for the exposure. There are of course also scenes, with very even brightness, then the area does not madder.
So when I do that, I know, the 0EV will have nicely exposed shadow areas. From this point, I usually take the -2EV to +2EV, but usually just the +1EV is enough. As the shadows are nicely exposed in the 0EV, the +1Ev give enough detail in them and the +2EV is just to be safe, as in some scenes, there are very dark shadows, that cant be selected in live view.
For the brightest areas, the -2EV is usually plenty enough, but when shooting into the sun, I tend to also include the -3EV (very rarely the -4EV)
One of course can go also the other way, trying to choose the brightest spot, but in my experience, it’s easier to find the darkest one. Also, by selecting the darkest spot, you get a brighter image on the screen, which makes for easier focusing.

What to choose when taking only three exposures?
When using Magic lantern, it’s very easy to just take the number of exposures one needs. But when only doing 3 with the AEB of a camera and using my approach to choosing the base exposure, I would suggest setting it a little lower than 0EV (so the line is a little to the left). This is because, as I mentioned, the +2EV is not really that important, as the photo is already exposed for the shadows. So pushing it a little lower, lets say -2.5EV, -0.5EV and 1.5EV series, will give you a better result.
So this is how I choose the exposure. Not the simplest way, but after years of doing it this way, it take me seconds to focus and select the exposure. The more one does it, the faster it goes :)
Feel free to ask if you have any questions, and to find out more how to create HDR photos, check out my HDR tutorial and my video tutorial series Master Exposure Blending.