Free HDR video tutorial

Free HDR video tutorial

MASTER EXPOSURE BLENDING

Find the best ones

Find the best ones

TOP PHOTOGRAPHY SPOTS

Free wallpapers

Free wallpapers

HIGH-RESOLUTION WALLPAPERS

TK Actions

One of the best resources to help you with luminosity masking is the page by Tony Kuyper. He offers a lot of tutorials and descriptions for how to create them and use them. He also offers his own Photoshop panel, designed to help you use Luminosity masking in a very simple way. For all interested in the subject, I suggest you visit his tutorial page. for more information.

Autumn Sun

A little simpler photo than my usual ones, but I liked the how the sunset looked so much, that I’m posting it. I haven’t had much chances to take photos of nature this year, so at least like this I can balance the content of my blog. Of course it’s another thing I have to correct the next one. I actually started making a list of what everything I want to add tho this blog, reviews, guides and other contest, and the list is quite big already. Let’s see if the year is long enough :)

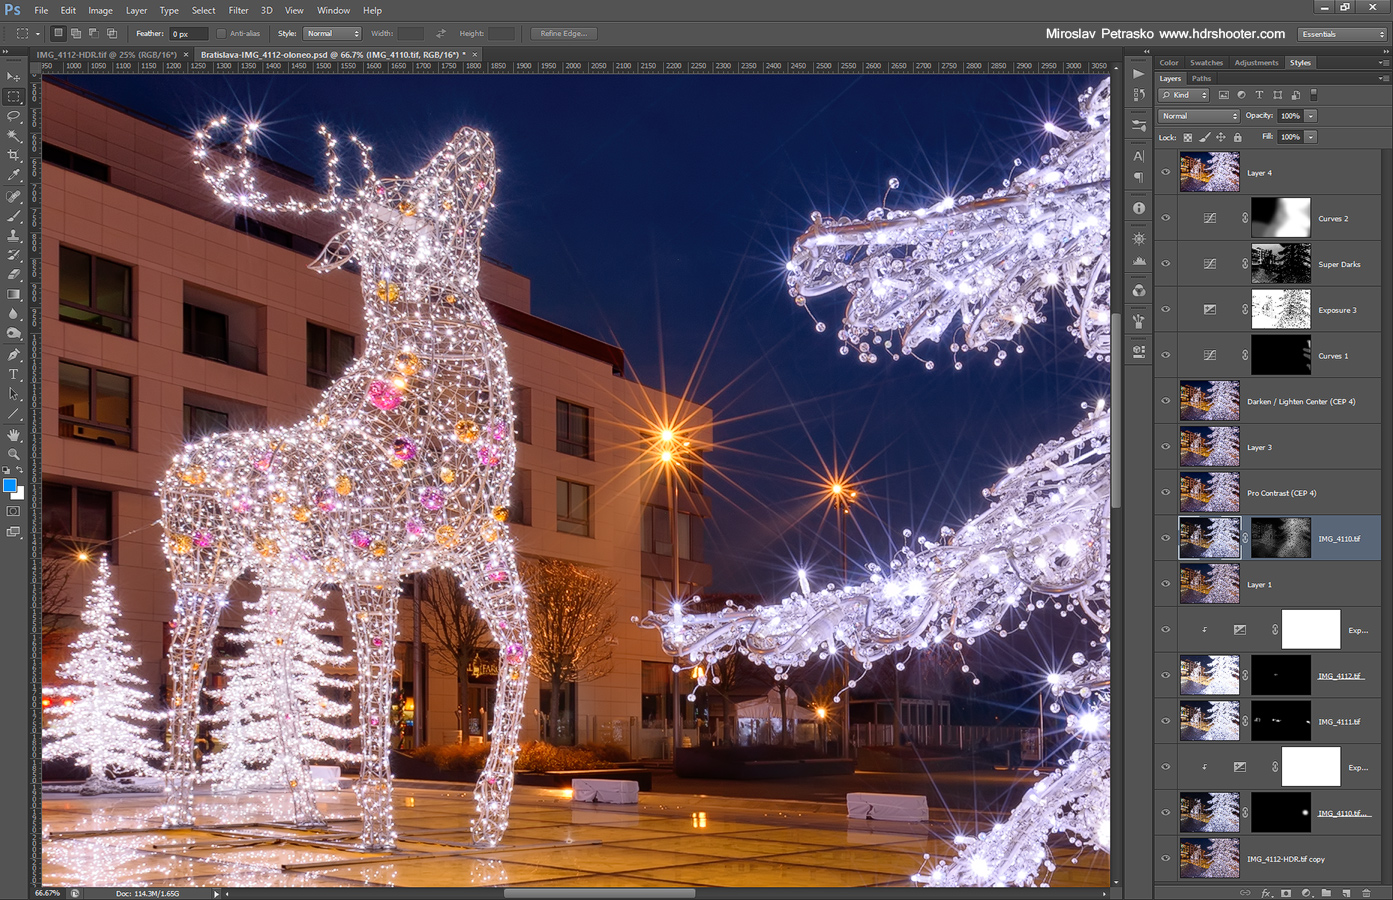
This photo is a manual blend from two shots, one for the sky, one for the trees. Edited fully in Photoshop.
Autumn Sun

This week I moved the process post to Wednesday, as you know, it was Christmas yesterday :) And so I also thought I show you a photo with Christmas decorations in it. So to get to this final photo:

Sparkling lights

I started as always in Lightroom. I removed chromatic aberrations and lens distortion. After that I corrected the horizon, as it was not completely straight. Then I synced the settings to all of the brackets and exported them as 16-bit Tiff files.

Sparkling-lights-lightroom

My next step was to merge them into a HDR file in Oloneo Photoengine. I changed the TM Strengths to even out the exposure and then added a bit of contrast and adjusted the temperature of the image. I saved the result as another 16-bit Tiff file.

Sparkling-lights-oloneo-process

I continued by loading the Photoengine result and the original files into layers in Photoshop (by using Bridge to load them). Once there I did the following adjustments (layers numbered from bottom up):
1. Oloneo Photoengine result
2+3. 0EV exposure brightened by one stop and then used to remove a moving person from the photo
4. +1EV to correct ghosting in few areas
5+6. +2EV exposure darkened by 1 stop and then used to remove more ghosting
7. merged the first layers and removed multiple persons from the photo using content aware and other retouching tools. I also removed all the dust spots that were visible.
8. used 0EV exposure with a brights luminosity mas to brighten the tree
9. Color Efex Pro contrast to recover photo contrast lost in HDR blending.
10. Noise reduction using Imagenomic Noiseware
11. Color Efex Darken/Lighten center, to create a vignette effect.
12. Curves used to darken few parts of the corners, that were still too bright
13. Added more exposure to most of the image to brighten it up. The additional brightness was not applied to the brightest parts of the image.
14. Brightened the extreme dark areas of the photo
15. Used curves to add more contrast to the tree

I also used the Perspective Crop tool, to correct the distortion of the photo, as the tree was falling in the original one.

Sparkling-lights-process

Please continue to the full post to see the oringinal 0EV exposure and the Oloneo Photoengine result. Or you can continue to the photo post, to see the camera info and where this photo was taken.

As every year, I’m adding a selection of my favorite shots I took during this year. And what should be a better day for this than on Christmas :). But first of all Merry Christmas to you all.

I visited few new countries (more than last year, but not as much as I would like) this year, and I think I got some great photos. So let’s get the new year started and hopefully it will be filled with a lot of great photos, taken at even better locations :)

Here you can see my favorites from 20122011 and 2010 :)

And here are my favorites from 2013
The perfect sunset
Sunrise at the bridge
The setting sun in Bratislava
Paris sunrise
Big Ben
Photo & Video Sharing by SmugMug
Blue hour by the Charles Bridge
The mirror world
Photo & Video Sharing by SmugMug
St. Stephen's Day Celebrations
Birmingham bus

Going home

As it is Christmas tomorrow, I will be visiting my parents for the next few days. That just means that if you send me a message and I don’t reply, don’t be surprised :) I will get to all of it once I’m back. And don’t worry, the blog will have a new post everyday, as usually.
pod-4

The Green pod – review

The Green pod is a small addition to any photographers gear, that can help you get stable shots in areas where you can’t use a tripod. It helped me many times. Check out my full review of the Green pod here.

Lost in a reflection

It’s quite hard to make a week worth of posts in two days. But somehow I never get to have a big enough photo reserve, so I can leave for a week without having to do a lot of preparation before hand. Maybe if I traveled more. Will have to try it next year. More travels and more photos, that is my current goal :)

But for now, here is another photo taken at the Kuchajda lake in Bratislava. This is a HDR created from 5 shots in Oloneo Photoengine (you can see my review of it here) and finished in Photoshop.
Lost in a reflection

Leave something dark

How about a little photo tip today. One of the problems you very often see in HDR photos and also in non-HDR photos, is that everything is of the same brightness. If you not count the occasions where this is a desired effect (it’s sometimes used in portraits to give the result a soft feel) this makes the photo look very flat and boring. The reason is, you have to have a contrast between the dark areas of the photo and the bright areas. But if you use a tone-mapping program, like Photomatix or Oloneo Photoengine, you can easily get a result where all contrast is lost. This is quite often the result I go for, as it gives me a good start for further edits. But one should never leave a photo like that as the final result.

As the title says, don’t fear to leave some of the pixels black, and also, some of the pixels white. HDR expands the dynamic range, but your goal should not be to capture it all, but to create a pleasant photo for the viewer. And leaving some bright lights and shadows can help very much to achieve this.

Crazy sharp castle

I hope you can see on the photo, how crazy sharp it is. That’s because I took it with the Canon 70-200mm F2.8 lens. Compared to my other lenses, it creates the sharpest results. I don’t carry it with me so often, as it’s very heavy, but the results are usually worth it. This is of course the Prague castle, as seen during the sunset from the Vysehrad area. I took the big lens with me just for this that day, as it’s quite far away, and I needed to zoom in.

This is a HDR from 5 exposures, created in Oloneo Photoengine and then blended with original shots in Photoshop.
Crazy sharp castle

FREE EBOOK!!!
Subscribe to my newsletter and get a free Capturing fireworks ebook. 
Subscribe