Few more hours
Only few more hours to join my HDR editing contest, sponsored by OLONEO. So don’t forget to send or submit your entry. And for those who miss it, don’t worry, you still can join giveaway, which will be running for one more week. To join, please visit the contest page here: https://www.hdrshooter.com/2013/11/18/photo-contest-sponsored-by-oloneo/
Determining the sun position
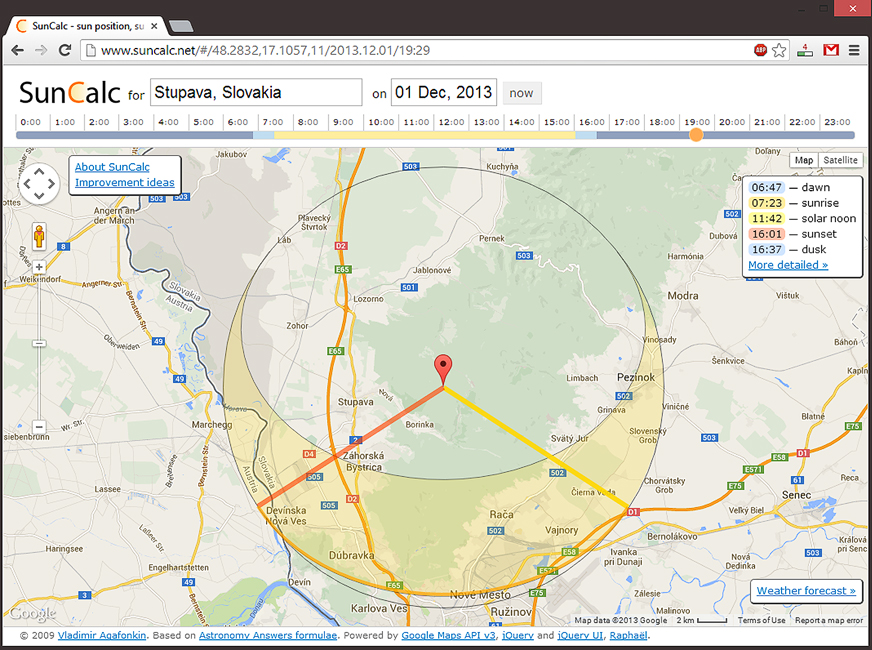
One thing that you need to know, as a landscape photographer, is the sun position. There are many tools to find it out, so I thought I share with you the ones I use. When I’m on my desktop, I use Suncalc.net. It’s very straightforward, clean and easy to use.
When I’m on the road, or already on the spot, I use one one of these two apps for Android. Either Sundroid or The Photographer’s Ephemeris. Both give me the same information about the suns position, but Sundroid also includes information on moon and planets position. But the interface is a little more cumbersome. So I use them both.
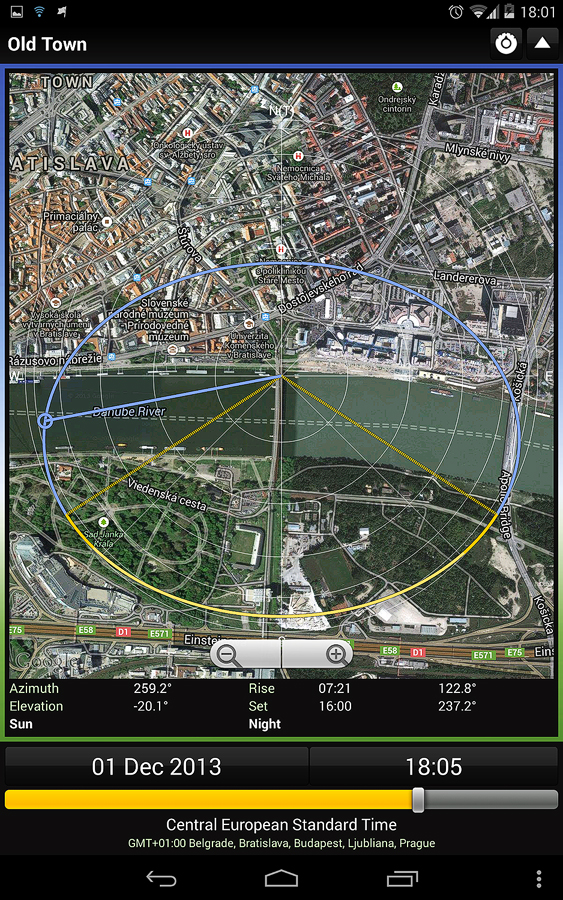
Sundroid
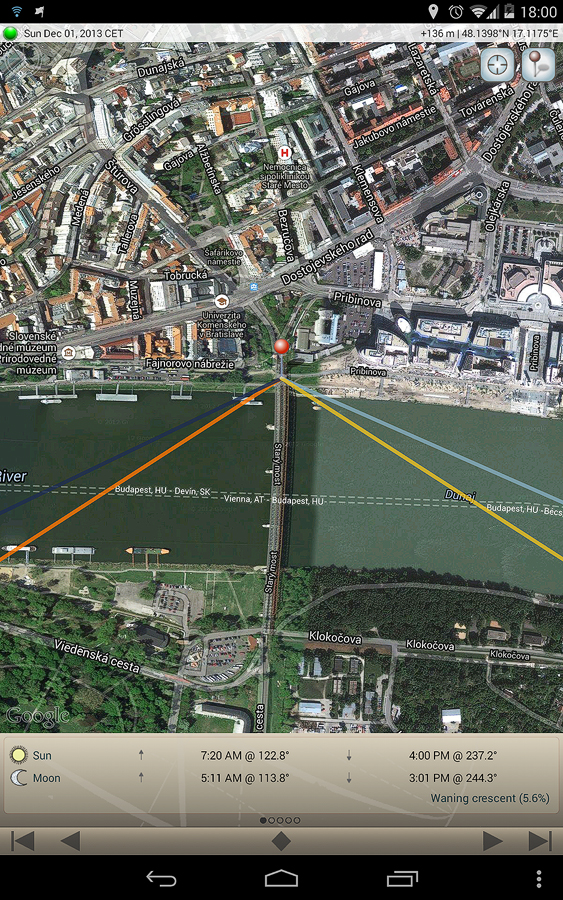
The Photographer’s Ephemeris
Which one do you prefer? Or any tips for even better ones?
In the bar
I’ve been out taking photos again today, but as I haven’t posted any interior shots for a long time, I thought I post one today. So here is a photo from the Mirror bar in Carlton hotel in Bratislava. It’s a really nice small bar, perfect to get a coffer and a cake :). Maybe for my next business meeting.
This photo is a combination of all the techniques I use. I created a HDR in Oloneo Photoengine, one in Photomatix Pro 5 and then I blended these two together with the original exposures I had. I had to also tone down the colors a lot, as the combination of red carped, red walls and reddish/brown wood gave everything a really strong red color.

All rights reserved, this photo is a property of Carlton Property s.r.o. Please do not use without permission.