Free HDR video tutorial

Free HDR video tutorial

MASTER EXPOSURE BLENDING

Find the best ones

Find the best ones

TOP PHOTOGRAPHY SPOTS

Free wallpapers

Free wallpapers

HIGH-RESOLUTION WALLPAPERS

New wallpapers

Maybe some of you have noticed, but there was a new update to the wallpapers section, with three new Paris wallpapers. So if you like them, feel free to download them from the wallpapers page.

Big ben 1920x1200 Perfect sunset in Paris 1920x1200 Long exposure shot 1920x1200

Dresden reflection

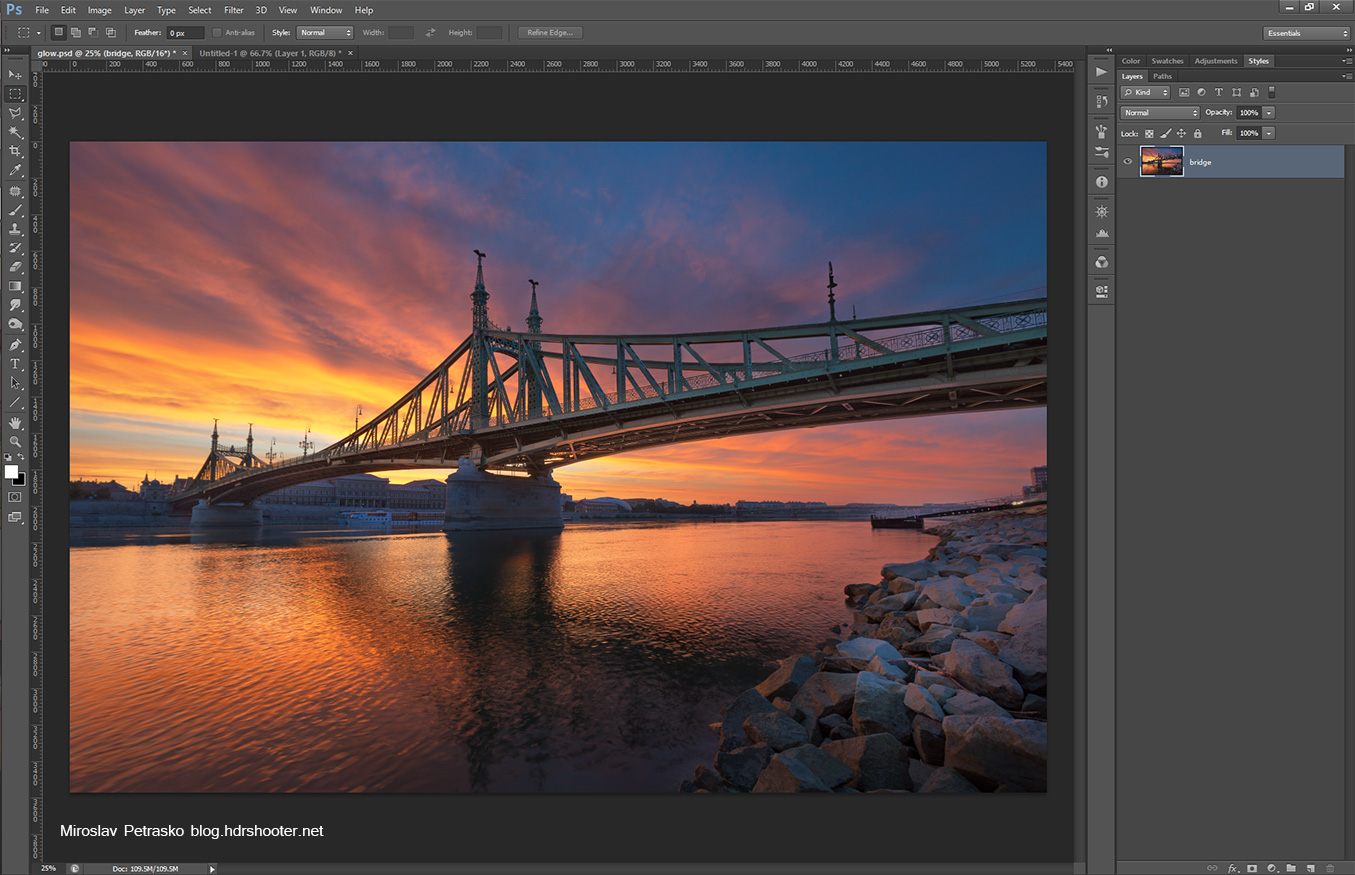
The daily photo for today is from Dresden. I spend only one day there and even so I had only a shot time with nice light. It changed 4 time during one day between a clear sky and a cloudy sky with a heavy rain. So I got the best of the few minutes during the blue hour I could really shoot and I chosen the best location in the city, right by the water, with all the lovely reflection. There was of course the same problem with passing ships, as it is in every city on a river, but right around the sunset they all left, so I was at least a little lucky :)

This is a manual blend from 5 shots.
Dresden reflection

One of the steps I do almost in each photo post-processing is adding a little bit of glow to the photo. Glow softens the photo, adds contrast and saturation and overall makes the photo more pleasant to the eye.

There are multiple ways you can add glow to your photos (for instance Glamour glow preset in the Color effex pro plugin), but I personally prefer to do it just using Photoshop. It’s very simple and requires only two layers to apply. I went step by step in my description, but for those who are lazy to go through it, I also created a Photoshop action for you, which does all of this for you. You can download the action from here:

HDRshooter glow Photoshop Action

So lets take a look at this photo (I suggest clicking on the photos to see them bigger, to see the difference better):

glow-0 glow-25 glow-50

The first one has no glow added, the second one has the glow on 25% and the third one on 50%. You can see the difference in contrast, softness and color here. You can also see that glow will darken the very dark areas and brighten the very bright areas, so this is something one has to take into account here.

How to add glow?

So how do you add this glow. Lets start with a photo in Photoshop:
glow-01

Our fist step is to duplicate this photo (if you have a file with multiple layers, just merge them into one new layer). To duplicate, right click on the layer and select duplicate layer
glow-02
glow-03

Next select the new layer and blur it. Gaussian blur works very well here. I usually go for a 30px blur, but it greatly depends on the size of your image. For my 20Mpix images, 30px works well. If your images are smaller, you should use less blur, for bigger images you can use more.
glow-04
glow-05

Now we have to change the blending mode of this layer. While the layer is still selected change it to soft light
glow-06

You can see the photo now completely changed, but it a little bit to dark, so we need to brighten the effect. I use for that a new adjustment layer. You can use anyone, but I prefer Curves, as I can add more contrast if needed. So choose new adjustment layer and curves
glow-08

And then change the blending mode of this new layer to screen. This will brighten everything under it by one stop.
glow-09
glow-10

The result is now better, but the curves layer effects everything under it, and we need it to just effect the glow layer. To do this, right click onto it and choose Create clipping mask.
glow-11
glow-12

As a last step we need to change the opacity of the glow layer. The higher, the stronger the effect is
glow-13

You can also add a layer mask to the glow layer, and only paint it onto the areas where you want it (or remove it from the areas where you don’t need it).

And that’s all. The photo now has a nicer contrast, nice glow and much richer colors. It can happen that the photo will be a little to dark after this, but that’s can be easily corrected.

Feel free to ask any questions and don’t forget to download the provided action :)

Today I have for you another processing post. They seem to be quite popular, so I will continue with them. I really hope they are helpfull to some of you or at least intereting :)

So for today I chosen one of my favorite photos, one from the Bojnice castle. The light difference here was very high, with the castle brightly lit and the stone wall in front of the camera haveing no light at all.
Path around the Bojnice Castle
So to get to the image I took 10 brackets overall. First I a 5 exposure shot of the castle. I saw that the wall was still too dark on the +2EV exposure, so I changed the ISO from 100 to 1600 and did a second series just for the wall (I could have done it also without the ISO change, but it would take very long exposures to get any light there)

After that I exported all the images from Lightroom into photoshop, while only adding a little vibrance and some noise reduction.

Then I continuead as follows (numbered from bottom up)

1. 0EV exposure, from teh darker series
2. -1EV exposure to darken the sky and the castle
3. -2EV exposure to darkent the castle
4 to 7. -1EV to +2EV exposure from teh bright series to brighten the foreground and the wall
8. -1EV exposure from the dark series to correct few areas with a bad contrast
9. Color effex pro Tonal contrast to add more detail to few areas
10. Darkened the lights with a luminance mask
11. Color effex pro Pro contrast to add more local contrast to the photo
12+13. I retouched a little stand that was next to the castle, it really bothered me there :)
14. Added contrast to the basic midtones
15+16. Added more glow
16. Darkened the bright lights
17. Removed the greeen color cast from the bright lights
18. Desatureated the most saturated colors (mask created with TK Actions)
19. Darkened the very bright lights
Process

Feel free to ask any questions about this

Continue to the full post to see the original 0EV exposures from both series of brackets.

I know, I know, another shot of the bridge. It was just such a beautiful sunrise, that I just edit one photo after another from it :) Hope nobody minds.

This is a HDR from 5 shots created in Oloneo Photoengine and then blended with few of the original exposures in Photoshop.
Sunrise at the bridge

As I mentioned yesterday, I had few more photos of the Liberty bridge prepared. Most of them are from the sunrise, but this one is from the evening blue hour. You can actually very easily determine if its evening or morning just by looking at the water. If the reflection is nice, it’s morning, it its not nice it’s evening. There are so many ships on the Danube, that the almost water never gets calm in the evening.

This is a manual blend from 7 shots.
Evening by the Liberty Bridge

FREE EBOOK!!!
Subscribe to my newsletter and get a free Capturing fireworks ebook. 
Subscribe