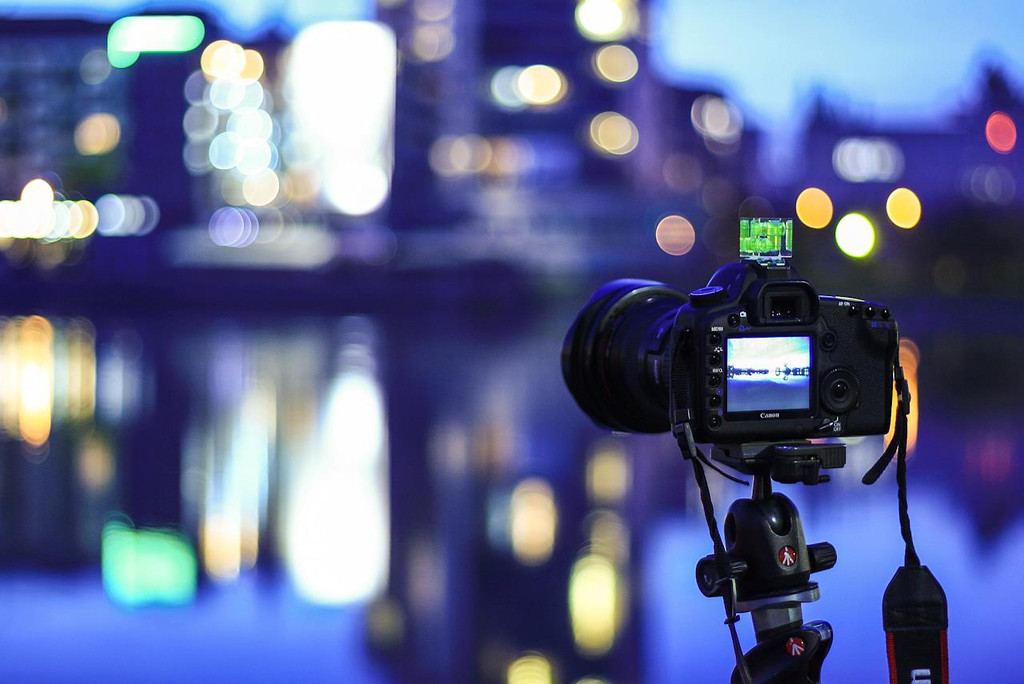
I really like using Magic lantern. I makes taking HDR series so much easier. And to show you more of it, today I will go through the HDR bracketing settings that it has, and what every setting does. You will find all these settings under HDR Bracketing in the Shoot menu.

Frames

The first setting determines the number of frames Magic lantern takes. You can go from 2 up to 9 frames. There is also a Autodetect option, you may use if you want more, or are just not sure how many you need. To use Autodetect, you have to turn it on, and than take one shot. Magic lantern will look at that photo, determine how much of it is underexposed and how much is overexposed (it will show you this information as % of the total photo). Then it will taken another photo, base on the EV increment setting, and another, until it has one with the underexposed areas and one with overexposed with 0%

There are two things to take into account when using Autodetect. First is that this process is slower than just using a predefined number of exposures, as the software has to check the photo after it was taken. Secondly, Autodetect takes into account the sequence order, so it will only take additional photos in the order of the sequence.

Magic Lanters
Magic Lanters


EV increment

This is a simple one. It determines whats the to the previous photo in the series. 1EV is double the exposure. If you want to capture a bigger dynamic range, that is possible with the 9 brackets Magic lantern allows, you can simply use a bigger EV increment.

Sequence

Choosing your sequence, will determine how you set up the first shot in your series. You can start with the darkest (sequence 0 + ++), the middle exposure (0 – + — ++) or from the brightest (0 – –). Your settings will always be used as the 0 exposure in the sequence. Same for Autodetect, if you for instance use the sequence 0 + ++, it will Autodetect only towards brighter exposures, as it presumes you set up for the darkest one. I personally like the 0 + ++ sequence, and I just set up my first shot to be underexposed by 2 or 3 stops, based on how many exposures I want to take.

2-second delay

This is same as the normal 2 second delay you have in the camera. It nice to have this setting also here, very handy to turn it one when turning on HDR bracketing, if you don’t use a remote and don’t want to shake your camera.

Magic Lanters
Magic Lanters


ISO shifting

What ISO shifting does, is to change the iso instead of using a long exposures. This may help if you are taking the series handheld, as the resulting photos will be with faster exposures, but a little noisier. This is exactly the same as setting up Auto-ISO while using the in camera Auto Exposure Bracketing. You can also choose here, if you want full or half ISO shifting. This will influence how much is applied.

Post scripts

I don’t use this one at all. Post scripts determines if a script file should be created for the series, which you can use in a problam called Enfuse. This is a similar problam to Photomatix or Photoengine, with a little different results.

Magic Lanters
Magic Lanters

 
So this is all for the HDR Bracketing settings. Next time I will go over Long exposure and Intervalometer settings.

There are many ways to add more detail to a photo. Today I’m going to show you one very popular, that can be done all just in Photoshop, without the need for any plugins at all. Of course if you have Color efex or Topaz adjust, you can use those, or any other plugin that gives similar effects. But let’s look at the Photoshop way.

This is a very easy process, so let’s get started.

1. Start by loading the photo you want to edit into Photoshop.
2. Then continue by duplicating the photo into a new layer. Just drag the background layer onto the new layer button (in the bottom right), or go under Layer/Duplicate layer. Select the new layer and change the blending mode to Vivid light.

Adding detail to a photo

 
3. Now still with the new layer selected, invert it. Either by hitting Ctrl+I or by going under Image/Adjustment/Invert. You will see a very grey image, but don’t worry :)
4. Next we need to apply Gaussian blur to this layer. So go under Filter/Blur/Gaussian blur and play with the radius, until you see the amount of detail you need. If you see too much halo around objects, try using a small smaller value. Hit OK to confirm.

Adding detail to a photo

 
5. Now we need to create a new layer, that contains all the onse we already have. Just hit Ctrl+Shift+Alt+E and it will be created for you. Select the new layer and change the blending mode to Soft light.
6. The last step we need to do, is delete the middle layer (the one set to Vivid light) as we don’t need it anymore, and it’s just in the way.

Adding detail to a photo

 
And thats all. I would suggest adding a mask onto the result, and just using it on the places you need it, not on the whole image. Feel free to ask if you have any questions to this :)

From time to time one needs to process a bigger number of photos with the exact same settings. I may be a huge panorama, HDR time-lapse, or something different. In those cases, the batch processing in Photoengine can come really handy. And today I will show you how to use it.

So first thing first, you need to have all the photos you want to process ready. That means that if you have them in Lightroom, first correct any camera problems (distortions, chromatic abberations, vignetting and similar), and then export them either as tiff or jpg files depending on the quality you require. You should export everything in a single folder, with nothing else in it.

Once this is done, you can continue in Photoengine. But before choosing batch, you need to create a preset, so the program knows which adjustments to apply to the photos. For this just choose any of the series, add them to the project and click on Create tonemapped HDR project.

Batch process in Photoengine

Now tweak the settings until you like the result. These are the settings that we will be applying to all the photos. Once satisfied, choose Add under presets. In the new window, name you preset whatever you want. Here I chosen the name Panorama, as that’s what I’m processing here. Save the preset by clicking OK.

Batch process in Photoengine

 
Now you need to close this project, so choose File/Close. You don’t need to save the result, as we already have what we need, the preset.

To batch all the files, now choose File/Batch. In the window that opens, you have to select a few things:

  1. the source directory – where Photoengine will look for the files
  2. destination directory – where you want to save the results (is the same as source by default)
  3. file format and quality – how the result will be saved, either jpg or tiff
  4. number of exposures – how many exposures will be processed at once. In my case, it’s 5. Note that all have to have the same number of exposures, or the batch will not produce correct results
  5. auto align – if PhotoEngine should try to auto align the brackets, only if you took them handheld
  6. use preset – check this option, and then choose the saved preset from the list on the right

And thats all. once you confirm with OK, Photoengine will go through all the files in the folder and merge them all into tonemapped HDR files with your settings applied.

Batch process in Photoengine

 
For panoramas I like to use the other method mostly. That is to first create the panoramas from brackets, and then merge them in PhotoEngine. But there are situations, like for instance a 360 degree panorama, where this approach, by batching all the exposures first, is much better, as Photoengine does not support 360 images, and will crate an ugly break in them.

Feel free to ask any questions if something is not explayned properly.

There are so many different cameras and so many modes one can set on them. But not many of those are on each camera and even less are useful for HDR. So today, I will look at those main one (or I should say, the one you should use) and how they work together with HDR. All other modes, the ones I don’t mention here, like night photo, scenery, portrait and so on, are really only for people not interested in photography, as using the basic modes, will give you much better control and results than those.

Behind_the_camera-XL

Program mode – P

I would call this beginner mode. As each photo setup consist from the aperture, shutter speed and ISO setting, this one sets two of those for you. The only one you can change is ISO. As I said, it’s great for beginners and for snapshots. One should leave this mode as soon as possible. This mode is not at all suitable for HDR bracketing, as it will change the apperture in between shots, and so change the DOF (depth of field). You will not be able to blend photos like that, as parts that are sharp in one exposure, can be completely out of focus in another one.

Shutter priority – Tv (S)

Shutter priority has a little more specialized use that the other modes. From the three settings you set up two, ISO and shutter speed. This is useful when you want to archive a particular length for your exposure. For instance you want to freeze the action, so you use a short exposure. Or you want a nice soft water, so you use a long one. The camera always adjust the apperture automatically, so you get the exposure time you need (be careful, as the camera may adjust to the closes available, as there is not such a huge variation in apertures as in shutter speeds). This mode is not usable for HDR, as again, the aperture is changes, and so the DOF.
thirds

Aperture priority – Av (A)

Next one, Aperture priority, is an opposite to the Shutter priority. Here you can change the Aperture and ISO, and the camera adjust the shutter speed for you. This is probably the most useful mode in photography in general and also in HDR. As the aperture never changes, the DOF stays the same for all exposures and you can use the Automatic exposure bracketing in the camera, to get an exposure series automatically. It’s also great for hand-held shots, as you can set up a bigger aperture and so shorten the exposure lengths. If handheld you can also turn on auto-ISO, as that when combined with exposure bracketing, will bump up the ISO instead of taking a longer exposure ans so give you a better chance for a sharp photo.

Manual mode – M

As the name already suggests, here you set up all three values, the shutter speed, the aperture and also ISO. This mode give the most control, but also requires a little more time to set up a shot. One can use the Manual mode for HDR series, but only when setting every shot manually, or using a separate way to take the photo. Here I mean ways like using a promote or Magic lantern firmware. If you are only using the internal exposure bracketing, the manual mode is not the best, and you are better off with Aperture priority.

So what to take from this? If you are begging in Photography, go for Program mode, but try to move to Aperture priority as soon as possible. If you are starting with HDR, go for Aperture priority and if you are trying to get more control and use advanced tools, go for Manual mode every time :)

I already put up articles about most software I use, but not yet that much about Photoshop. So today, let’s look at few random tips for Photoshop.

Fade adjustment

This is one small feature that is great for when you are doing retouching. What it does, in simple terms, is allows you to set the opacity on your last used adjustments. So if you for instance use the Patch tool, to replace a part of your image, and you feel that the changes is too strong, you can use the Fade adjustment and tone it down.

To use this, right after you do the adjustment, go under Edit/Fade, and choose the percentage you need. But beware, it works only on the last adjustment, so if you do something else after that, the adjustment will no longer be available.

Hide selection

This is a must when you do Luminance masking or any other manual blending. The marching ants of selection can be so in the way, and making it hard to blend correctly. So you have to know that you can hide them, and actually do that very often.

To hide the marching ants, you have to go under View/Extras (or Ctrl+H) to toggle the visibility. Again, a little note, remember if they are hidden or not, as it’s very easy to forget that you have a selection active, when it’s not visible.

PhotoshopSelection in the way
PhotoshopChange workspace

Save your workspace

This is one thing I never used until I got a huge monitor. I can arrange and safe different setups for Photoshop and then just switch between them. I have one for when I use Photoshop in full-screen, one when only using it in a smaller window. This just makes switching so much easier.

To do this, just setup you Photoshop workspace as you like, and then choose the workspace drop-down and create a new workspace. Once you have all the ones you want, you can switch between them by choosing them from the same drop-down menu.

Use Last filter

Sometimes you just need to use the same filter over and over. Either for different layers, or different image. To make this easier, there is a simple solution in Photoshop. By choosing Filter/Last filter (or Ctrl+F), the last filter will be used on the actually selected layer.

And even better, this does not just work with Photoshop filters, but also with additional ones, like Color Efex or Noiseware. Choosing it, will use the same filter, with exactly the same settings as you used last time.

PhotoshopAlign layers
PhotoshopPerspective crop

Align layers

One thing one needs to do a lot, is to align layers. Especially if one take photos handheld for HDR. There are many ways to align layers, but one of them is to just use the internal Auto-align. This works quite well most of the times, but don’t expect miracles.

To use auto-align, just select the layers you want to align, and choose Edit/Auto-align layers. If you have taken photos from the tripod, I suggest using reposition instead of auto mode. It’s so there are no distortion in the separate layers only movement.

Correct distortion by cropping

Cropping is a very useful tool in Photoshop. But you can use it for more than just cropping the image. You can use it to extend the canvas of you image, just by cropping it for a bigger size than it was, or you can even correct perspective distortion by cropping.

To do that, you have to choose the Perspective crop tool from the tool bar. Once you select the area with it, you can move every corner separately to select the area that will be stretched into a rectangle image. So just move them inside and confirm by Enter and you are done :)

Page 16 of 26« First ...101516171820... Last »
FREE EBOOK!!!
Subscribe to my newsletter and get a free Capturing fireworks ebook. 
Subscribe