Today I have for you another processing post. They seem to be quite popular, so I will continue with them. I really hope they are helpfull to some of you or at least intereting :)
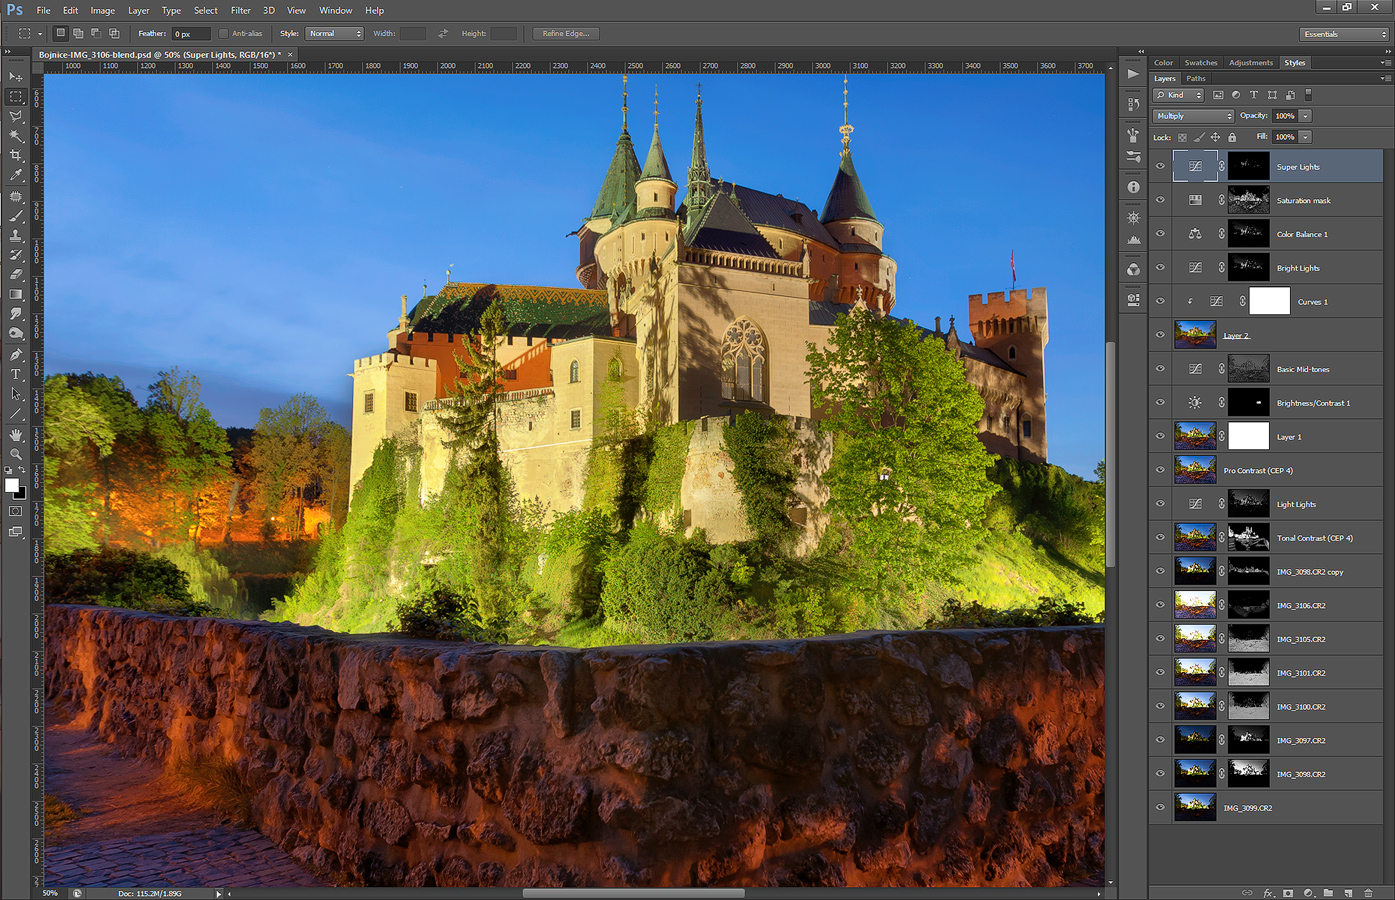
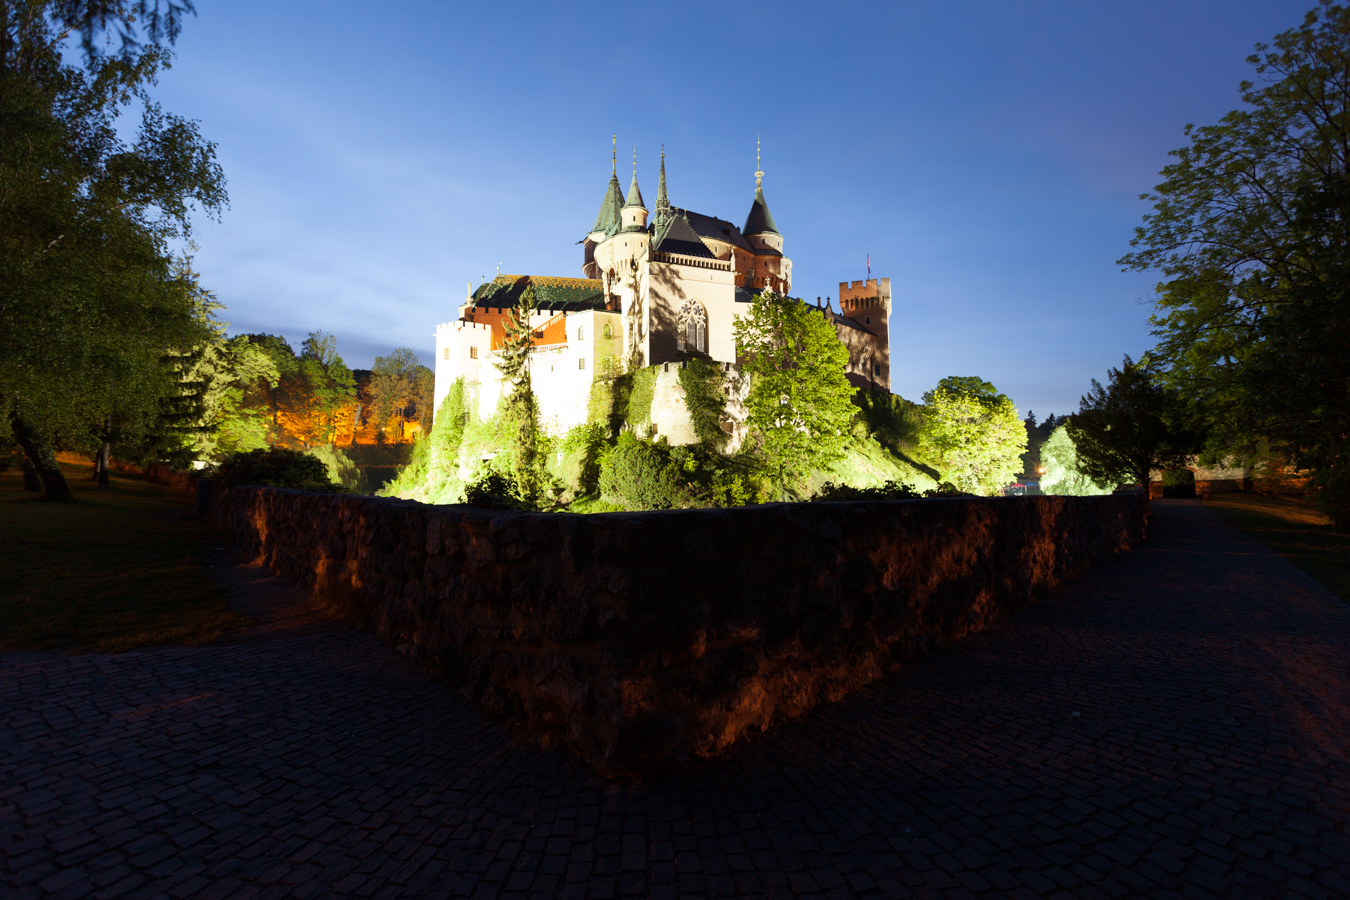
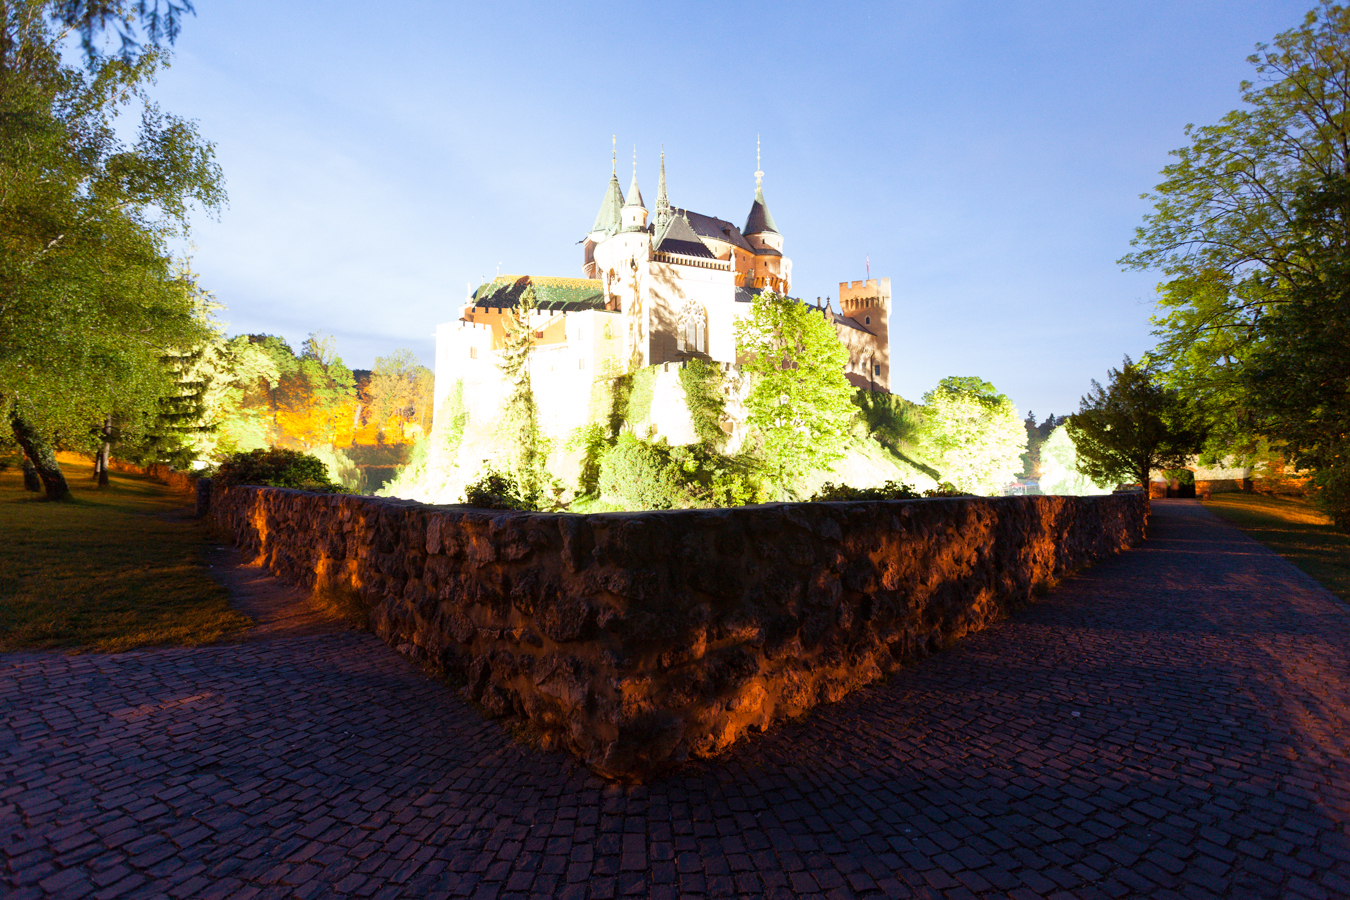
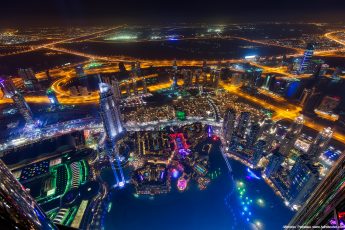
So for today I chosen one of my favorite photos, one from the Bojnice castle. The light difference here was very high, with the castle brightly lit and the stone wall in front of the camera haveing no light at all.

So to get to the image I took 10 brackets overall. First I a 5 exposure shot of the castle. I saw that the wall was still too dark on the +2EV exposure, so I changed the ISO from 100 to 1600 and did a second series just for the wall (I could have done it also without the ISO change, but it would take very long exposures to get any light there)
After that I exported all the images from Lightroom into photoshop, while only adding a little vibrance and some noise reduction.
Then I continuead as follows (numbered from bottom up)
1. 0EV exposure, from teh darker series
2. -1EV exposure to darken the sky and the castle
3. -2EV exposure to darkent the castle
4 to 7. -1EV to +2EV exposure from teh bright series to brighten the foreground and the wall
8. -1EV exposure from the dark series to correct few areas with a bad contrast
9. Color effex pro Tonal contrast to add more detail to few areas
10. Darkened the lights with a luminance mask
11. Color effex pro Pro contrast to add more local contrast to the photo
12+13. I retouched a little stand that was next to the castle, it really bothered me there :)
14. Added contrast to the basic midtones
15+16. Added more glow
16. Darkened the bright lights
17. Removed the greeen color cast from the bright lights
18. Desatureated the most saturated colors (mask created with TK Actions)
19. Darkened the very bright lights
Feel free to ask any questions about this
Continue to the full post to see the original 0EV exposures from both series of brackets.


Hi, can you tell me something about bottom layers from your photoshop’s post processing? I mean you use -2EV, -1EV…exposure photos and….now I dont know excatly what you are doing.
1. Do you create black mask and use luminosity mask from channel panel or
2. You dont create black mask but use luminosity mask…
3. or?
Thank you.
Hi. I create a black mask, then create a selection I need and brush through it onto the mask
Hi Miroslav, I have a question about blending. When I’m finished with blending the different exposures, the blended Image looks very flat. Is this usual and is the contrast created after that through levels layers etc.? I have some Problems with blending with luminosity masks. Is it easier to blend with Hand painted masks? Or do you recommend luminosity masks only if there are difficult structures like buildings?
Thank you
Yes.. blending can make a photo look very flat. I usually correct it after I’m done with blending. And I prefer the luminance masks selections through which I paint by hand. Just hand painted masks work only by very simple blends.