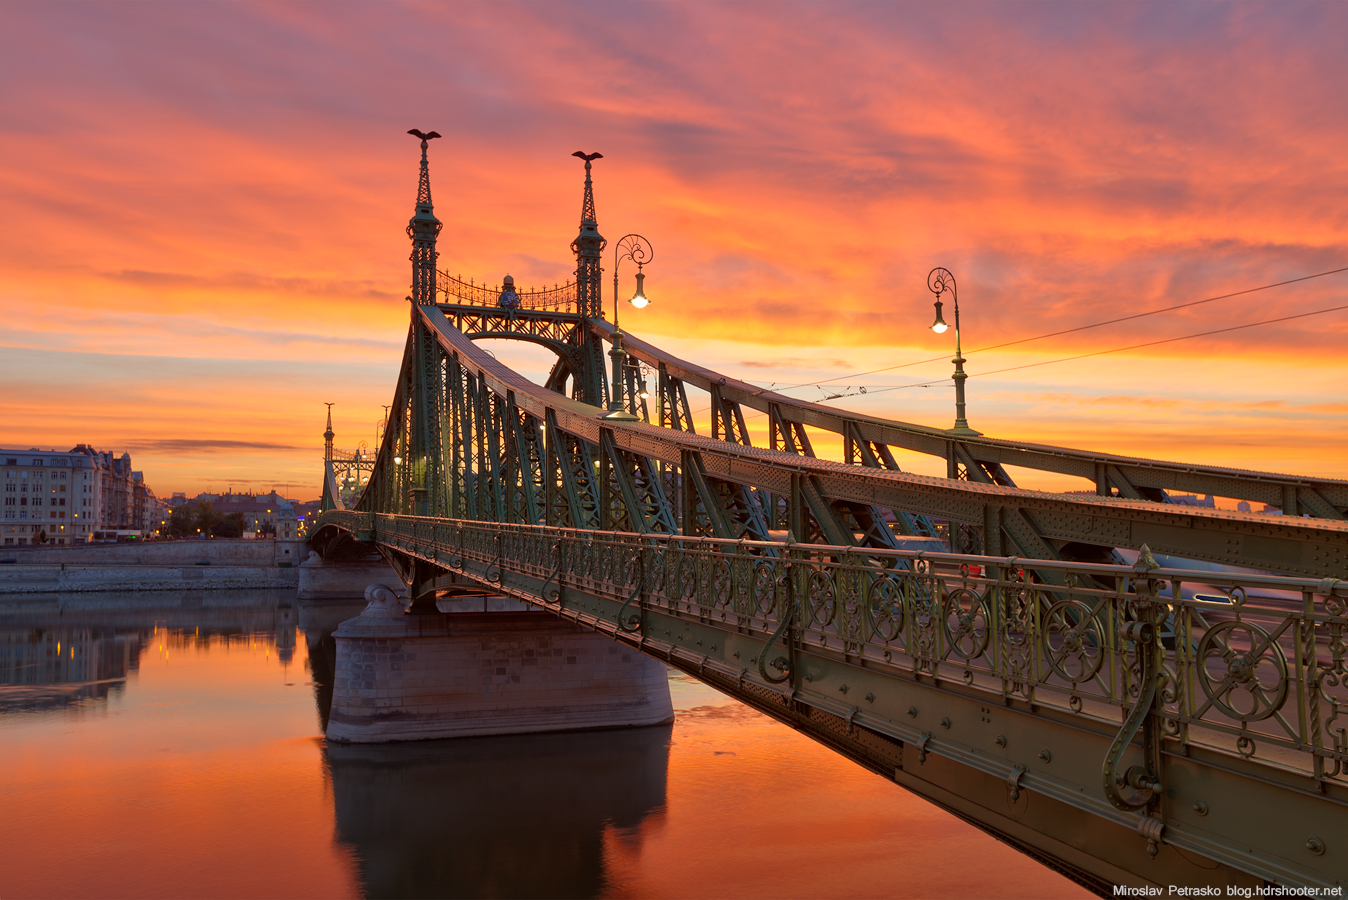
As usually, another Tuesday, another process post. For today I chosen a sunrise photo of the Liberty bridge in Budapest. So let’s get to it :)
To get this final result

I first corrected the lens distortion and white balance in Ligtroom and exported all the files as 16bit tiff image. I loaded them into Oloneo photoengine and merged them. As always, I only change the strength, nothing else. I saved the result as another 16bit tiff file. After that I loaded all the files into Photoshop.
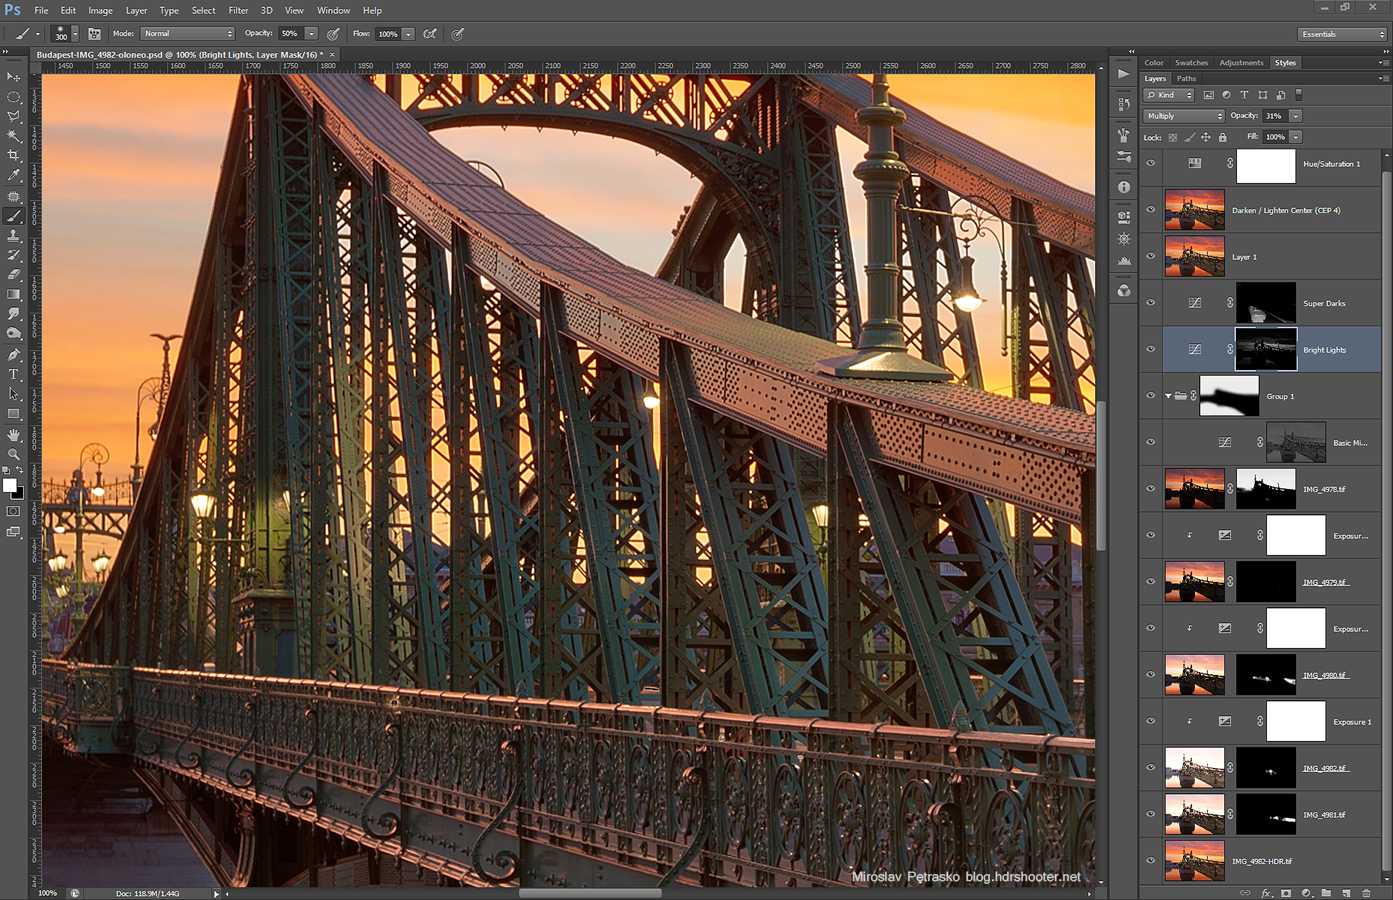
There I did the following (numbered from bottom up):
1. Oloneo result
2. +1EV exposure to get rid of the car in the shot
3+4. +2EV exposure and a exposure layer that darkens it by one stop, which I used to get rid of another part of a car
5+6. 0EV exposure and a exposure layer that brightens it by one stop, which I used to get rid of the rest of the car
7+8. -1EV that has been brightened by 2 stop, to correct a very small part in the image
9. darkened the sky from the -2EV exposure
10+11. added contrast to the basic mid-tones, and then the layer was put into a folder, so I can create a secondary mask, and remove it from the bridge
12. darkened the brightest light
13. brightened the bottom part of the bridge
14. a little bit of noise reduction
15. Color effex Darken/Lighten center to create a vignette
16. toned down the overall saturation of the image
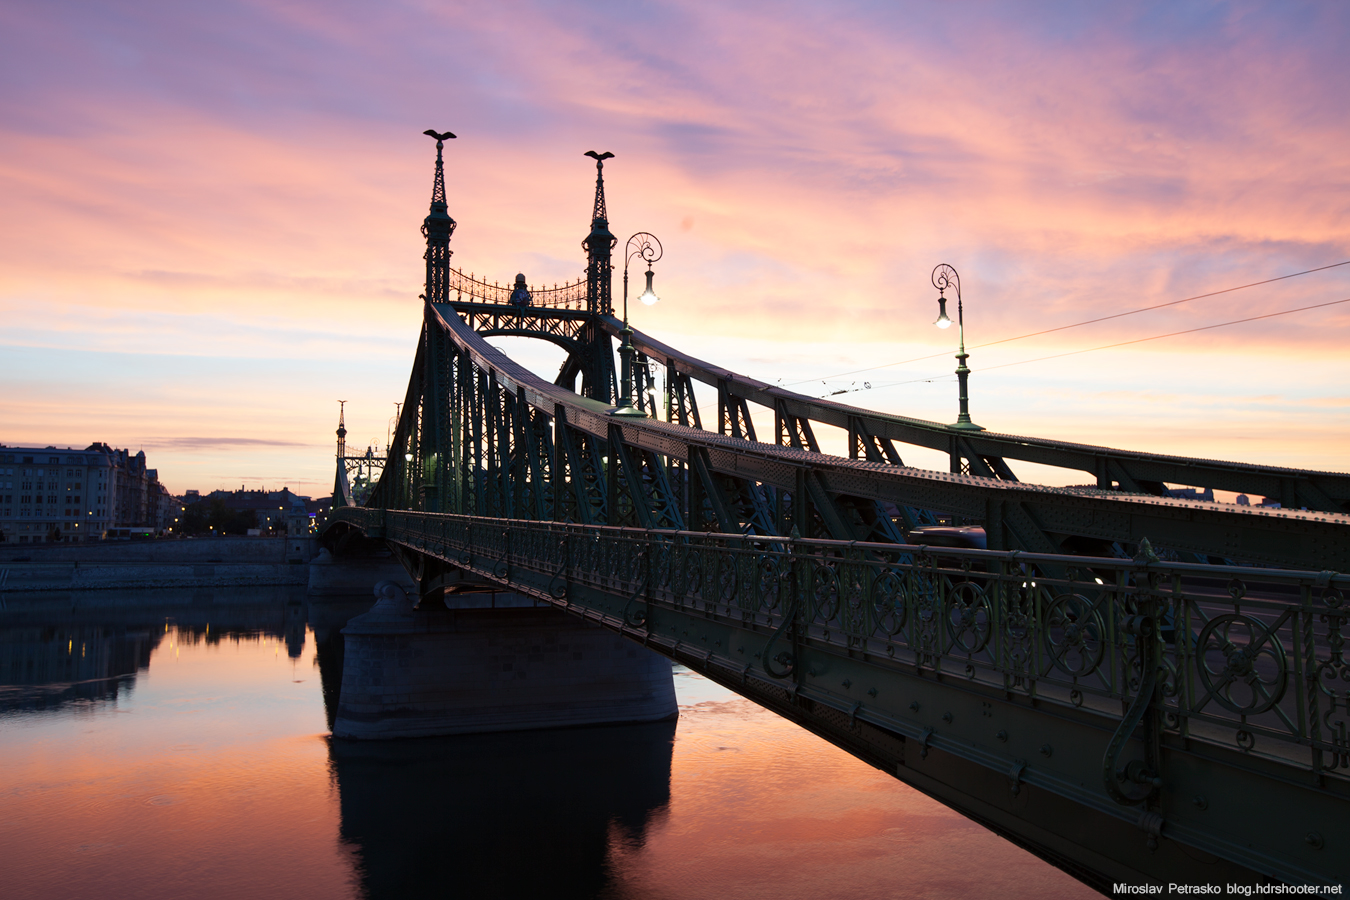
And that’s all. Feel free to ask any question and here is the oloneo result and the original 0EV exposure.


Leave a Comment