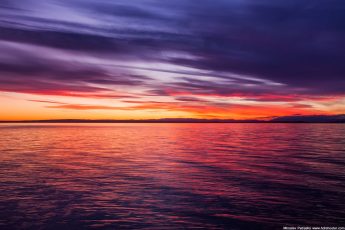
The week again passed so quickly. I feel like it was Tuesday just yesterday. But as it is again Tuesday, as traditionally, there is a process post today. I chosen one of my recent photos, which was edited using manual blending. So here goes.
To get to this photo:

I started as always in Lighroom. Corrected a crooked horizon, removed chromatic aberrations and applied lens correction. After that I loaded all the brackets into Photoshop. I took 5 exposures, but in the end, I used only 3.
When I blend images, I like to start with the exposure with the best sky. The reason for this is, that the sky is the hardest to blend, and you can easily create patches of color that does not fit together. So I try to do as fewer edits there as possible. So my edits were (numbered from bottom up):
1. -1EV exposure, as I like the sky on it
2. 0EV to brighten the buildings and the middle part
3. +1EV to brighten the middle part even more
4. Color Efex pro contrast on the brighter parts of the image
5+6. Added glow to the photo. It boosts the colors and adds more contrast (more in my glow tutorial)
7. The shadows were still too dark, so I brightened them using curves
8. Color Efex detail extractor to get more detail in the clouds. I only painted the effect where I needed it.
9. Noise reduction on the sky
10. Added contrast to the Basic mid-tones
11. More vibrance on the sky.
12. Color Balance to remove a little bit of the red from the photo
13. Overall curves to add a little bit of contrast to the photo
14. Noise reduction on the water, as it still needed some
15. Added back a little bit of uniform noise to the same area, to prevent creation of color banding.
And that was it.

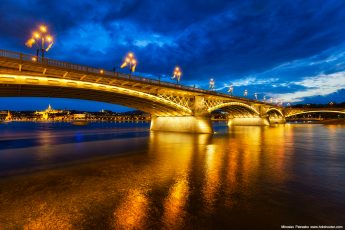
And here you can see the original 0EV from the camera.


Leave a Comment