camera-bracketsToday, I will show you how to take multiple brackets for HDR using the in camera auto exposure of the Sony a7R, and also how to do it manually, by changing the shutter speed on the camera.

The a7R is a little limited with the automatic exposure bracketing. You can do only 3 or 5 images, and the 5 can only be spaced by 0.7EV. Additionally, you can’t do all of them with one shutter button press, and you can’t go over 30 second for the longest exposure.

Having a remote while doing this is a real help. Even if you are using the in camera exposure bracketing, you either have to hold the shutter button pressed, or trigger each time separately. Doing this with a remote will result in no camera shaking. If you don’t have a remote, use the 2 second delay, so the camera stabilizes a little after you pressed the shutter button.

For more exposures, you need to go with manual bracketing (or some other off camera solution, I will go through those at some other time :)). Again, it’s better with a remote, but can be done also without. The steps you need to do is:

1. set the camera to manual
2. choose your ISO and aperture
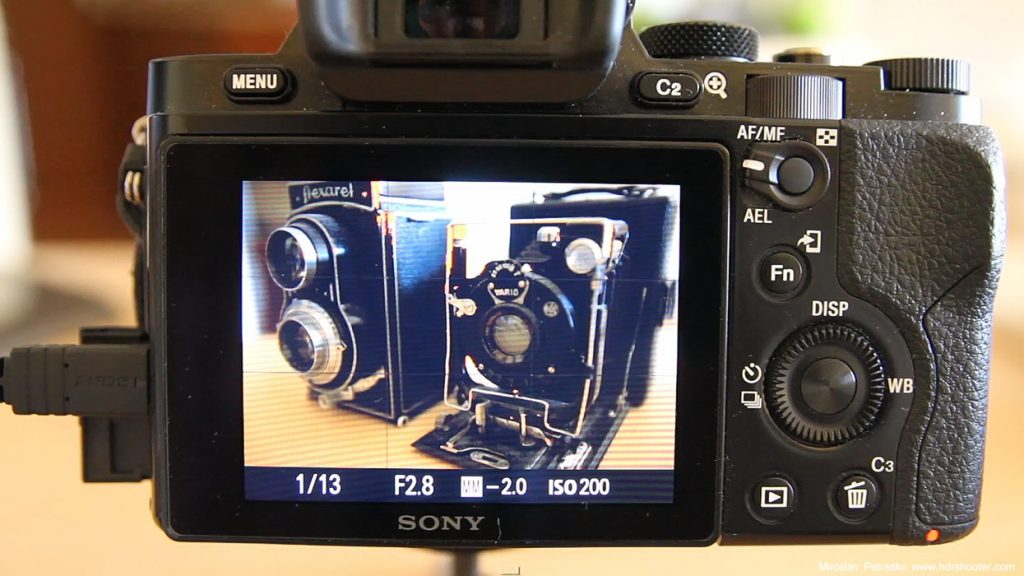
3. set up the shutter speed, so you get the darkest exposure you want ( the camera show only until -2EV, but just split the time in half, and you have -3EV, split again for -4EV ans so on)
4. take the shot (either remote or self timer)
5. double the exposure time (turn the exposure time wheel 3-times)
6. repeat steps 4 and 5 until you have all the exposures you want

A little note to this, the Sony continually meters the scene, and it can show you a different exposure bias as you set. For instance, you can be at 0EV and double the time and the camera only show +0.3EV. You can just ignore that, and just focus on the time. Double the time, change the exposure by 1EV, regardless of what the camera show.

Additional, if you hit on the 30 second limit. For instance, your +1EV is 20 seconds, and you want a +2EV, you would need a 40 second exposure for that. You have two options here. Either switch to the bulb mode, and just use a remote to hold down the shutter button for the 40 seconds, or a much easier way, is to just double the ISO. Doubling the ISO has the same effect as doubling the exposure time, you will brighten the shot by 1EV.

And since the easiest way to show something like this is in a video, here is a video of that :)

I hope it understandable for you, and if you have any questions about it, feel free to ask :)

If you ever created a HDR image, you probably seen this problem in your photos. It’s actually also the biggest thing I don’t like about Oloneo Photoengine. But there is a simple solution :)

What I am talking about, is a visible border around the areas, where the dark and bright parts of the images are merged. There is a small darker border around the dark area, and small brighter border around the bright area. Usually this is around the horizon, where the sky ends. This may be not so visible, but once you resize and sharpen, this may become very noticeable. Here you can see how it looks, and how we will correct this in this guide.

Bright outlines

Not everyone is bothered by this, but I am :) I like when my photos look good also when seen big. So today, I will show you how to easily get rid of this problem in few minutes.

The first thing that comes to mind, how to remove this, is just to use the Clone Stamp tool, and just carefully go around the borders, and paint them over. This works, but it’s very hard to do quickly and without errors. To make this much easier, we will use the blending modes that Photoshop allows for. This works for most cases, there just needs to be a brightness difference between the areas (if you sky is darker than the ground, this will not work that great).

1. Find the area that needs to be corrected (I will explain it on this example). Choose the Clone Stamp tool, choose a soft brush, 100% opacity and Darken blend mode. Now Alt+Click on a close part of the sky to choose the source, and start painting over the bright border. You will notice, that the bright part is painted over, but nothing else. Keep doing this, and also changing the source point, until you paint over the whole bright line.

Bright outlines

2. Once the bright border is gone, we still need to get rid of the darker border under it. To do this, changes the blending mode to lighten, choose a source spot in the dark area, and start painting over the border again. Now, only the darker border is affected, and you will get rid of it very quickly.

Bright outlines

3. And you end up with a photo without any outlines at all. One note, be carefull when removing the bright part around lights, as the darken mode will also darken them. Either use a smaller brush, and go slowly around it, or add a mask to your finished edit, and mask out the area of the light.

Bright outlines

And for those lazy to read through this post (or who didn’t understood the technique completely :)) you can watch the process also in this short video I made.

Feel free to ask any questions, if something is hard to understand :)

It’s quite visible from my photos, that I quite often take at in the early morning and around sunrise. And you may be wondering why I do it, so today I will go through few points why to, or why to not go out to take photos so early in the morning.

Photo & Video Sharing by SmugMug

Why yes

The light is different

You will see that right away. Same as with sunsets and evening blue hours, you have two very distinct times to shoo. But especially in the cities, there are not so many lights on in the morning, so there is much less light pollution. Like this, the light is different, and also the sunrise can create much dominant colors than the sunset.

Additionally, quite often due to the lower temperature during night, the weather conditions change. Quite often, especially when it’s too cloudy in the evening, the clouds break during the night, and you get the best sunrise sky.
Photo & Video Sharing by SmugMug

There are no tourists

This is a huge thing, especially on popular spots. If you don’t want to have people in your photos, going to shoot very early will almost guarantee that you will have none. There are of course few exceptions, like for instance the Charles bridge in Prague, where you will always have someone there, but still, it will be only few instead of hundreds.

You won’t be disturbed

Another great thing is, especially in bigger cities, that early in the morning you wont be stopped from using a tripod. A chance that a security guard will go out and stop you during sunrise, is almost 0.

Long exposures reflectionsVery little traffic

Similar to very few people, you will also get very little traffic, if the sunrise is very early. Again, this will help you having more calmer photos, with few or no cars in them.

Why no

It’s very early

The biggest problem of course is, that you will have to get up very early. One gets absolutely no sleep, especially if you did sunset shooting the day before.

The lights may not be on

This can be a good and also a bad thing. There are normally two kinds of lights in cities. One are street illumination, and the second illuminate landmarks. Int he morning, the landmarks lights are usually off. So no lights shining on castles, statues, towers and similar. This may be great, if the lights were in you way in the evening, but may be bad if you wanted them in the photo.

Fisherman an the BridgeI know..I know.. another one of the Charles bridge. But if you had a photo like this, wouldn't you share it? :)The street lamps are usually great for a photo, but one has to be careful with he timing, as they are also turned off usually moments before sunrise (different in every city).

Places may not be accessible

One quite often problem could be, that some places are just not accessible during morning. There are especially public places, like gardens, parks, viewing platforms and similar, that can be closed during very early morning hours. If you are not sure, better to find out before hand.

Big BenIt’s creepy

This is something one has to get used to, especially if you plan to go out alone. I do it all the time, and it still feels strange sometime. You just have to imagine the situation, where you are alone in a place, that is normally full of people. It’s empty, it’s very quiet and you notice every single movement around you.

Even taking all this into account, I still feel it’s worth it, especially if you are somewhere only for a short amount of time. Going out taking photos also in the morning, will double you chances to get a nice blue hour/sunrise/sunset shot and that that is worth it :)

Btw. all photos in this post are early morning shots :)

Today, I will take a look at noise reduction and Imagenomic noiseware. Imagenomic Noiseware is currently for me the best way to remove noise in my photos. I’ve been using for a long time now, and I haven’t found one that makes cleaner photos yet.

1. Decide if you really need noise reduction

Let’s start with a general thought. Noise reduction is not always needed, and sometimes it can even make you photo worse. It very often can cause a big lose of detail and make the photo look softer. So my tip is, if you can, first look at the photo in the desired size you want to show it, and only then think about if noise reduction is needed (but always use noise reduction on full size photo).

2. Use it selectively

Continuing from the previous point, use noise reduction only on parts of a photo where it’s needed. Especially in two cases, you should think about avoiding it. First is when you have an area with a lot of small detail. Using noise reduction on that can remove all the detail and make the whole area looking just blurry. Secondly, when you have a color gradient (usually the sky) a noise reduction could cause a very ugly color banding. It’s just looks better with noise than with color banding.

3. Use Gaussian blur for a very strong noise

From time to time you will get a very strong noise, especially if you brighten underexposed areas of your photo. For noise like this, no noise reduction will work, as that will create more of a jagged blobs. Easier is just duplicate the layer, blur it with Gaussian blue, and then mask it in where you need it.

4. Remove noise before filters & retouching

If you plan to use special filters on your photo, like Color Efex Pro, or Topaz Adjust, remove the noise first. This is because a lot of these filters work with detail in your photo, and can interpret the noise as additional detail. You don’t want them to make the noise even more visible.

It’s similar for when you do retouching. For instance if you use content aware fill to remove dust spots from the sky in your photo, having the sky noisy, will create a worse result. Photoshop is just not so great when it tries to replicate a noise pattern. It’s much better when replicating a smooth transition.

Noise reductionOnly luminance noise reduction
Noise reductionOnly color noise reduction

5. Know the difference between color and luminance noise

There are two kinds of noise that you can get in your photos. You have have luminance noise and color noise. The luminance noise is what creates the variations in brightness (the small brighter/darker dots all over your photo) and the color noise creates a variation in color (especially with longer exposure)

So when reducing noise, you have to think, if only reducing a certain type of noise, will work better. If you want to protect the detail, do only color noise reduction. If you want to protect the color, do only luminance noise reduction.

In Imagenomic Noiseware (and all other noise reduction programs) you can choose the strength separately for both, so experiment, trying to see which one work better for the specific situation.

Noise reductionNo detail protection
Noise reductionDetail protection used

6. Use detail protection

Again, in most noise reducing programs, you can turn on detail protection. In Imagenomic Noiseware you have this option for Luminance and also Color noise. What it does, is tries to determine what is detail, and what is noise. It’s not perfect, but it does quite a nice job overall. So if you have an area, where the detail is getting lost in the noise, try this.

And that’s all for today, will show you more about noise reduction next time :)

For today I have for you few simple tricks, on how to get more from Nik Color Efex pro plug-in for Photoshop. If you never used it before, you should give it a try, and you can find more about it in my Color Efex pro review.

1. Use multiple effects

You will quickly notice, that if you change the filter selected, you will loose the one that was selected before, and all its settings. So in case you want to use more than one filter on a particular photo, you either have to do one effect at a time, or use the Add Filter button. with it, you can add as many filters as you want at once. I actually prefer to add one filter at a time, as I like to apply a layer mas after each filter, and just use the effect where I need it.

Few tips for Color Efex ProMultiple effects
Few tips for Color Efex ProRecipes

2. Use recipes

Color Efex does not allow to change default settings for the filters. But what you can do, is create the settings you want, and then save them as a recipe. You can even apply multiple filters, and save them all as one recipe. This is particularly great, if you are editing multiple shots from a series, and you want the same effect to be on all of them.

3. Favorite what you use

With so many available filters, there is a very small chance that you will be using them all regularly. So what you can do, is add the ones you like the most to you favorites, and so reduce the list substantially. Just click on the star icon next to the filter, and then choose the favorites group to just see them.

Few tips for Color Efex ProFavorites
Few tips for Color Efex ProShadows & Highlight

4. Protect highlights/shadows

A lot of the filters effect the shadows and the highlights of your photo. A lot of times this is desired, but sometimes it’s not. To avoid this, you can simply adjust the Shadows and Highlights sliders. This should be done gently, as it’s very easy to make them look gray. If this is the result you are getting, it’s better just to use layer masks, and remove the effect from those areas.

5. Use the selective tool

When you install Nik plugins, you will also get the Selective tool. It’s used to run the specific plugins, but it has one specific function you can’t get from the filters menu. If you open the settings here, you have an option to choose, on what is the plugin applied. It’s either the selected layer, or a merged copy of all the layers. If you open the plugin from the filters menu, you can only use it on the selected layer.

Few tips for Color Efex ProSelective tool
Few tips for Color Efex ProControl points

6. Use the control points

As I mentioned before, I prefer to choose where the filter is applied later with a layer mask. But if you want, you can partially effect it directly in Color Efex by using the control points. You have a + and a – control point. Easily just place the point if you want to add the effect only on a specific are or remove it. You can then change the opacity and size for that control point.

One more tip, a little more specific :) If you are running a Windows 10 installation (like I am right now), and Color efex causes Photoshop to crash, there is a simple fix for that. Open Color efex on any photo and under setting/GPU dissable GPU processing. The drivers for Windows 10 are just still in beta and not stable enough.

Page 13 of 26« First ...101213141520... Last »
FREE EBOOK!!!
Subscribe to my newsletter and get a free Capturing fireworks ebook. 
Subscribe