Topaz Labs

Topaz Labs, a well known maker of photography applications and plugins, has been releasing a lot of AI powered software recently. The have the Jpeg to RAW AI, Gigapixel AI, Sharpener AI and Denoise AI. I did take a look at all in the past, and actually been using Gigapixel AI and Denoise AI quite a lot.

Last month, they released their latest AI-powered application, Topaz Adjust AI. And while I had access to a pre-release version, it was right at a time I was very busy, so did not have time to have a look at it. So let’s do it now :)

Topaz Adjust AI

Every Topaz AI application does something different. It resizes, sharpens and similar. Adjust AI does a bit more. It tries to give a nicer, more vibrant or HDR-like look to your photos. So it does not affect only one thing.

Topaz Adjust AI

Compared to other applications from Topaz AI, it also offers much more settings. You have the basic selector, where you can turn the Adjust AI effect on to standard or HDR style. But additional to this, you get all the basic and few advanced photo editing tools. You get brightness sliders, color, contrast, detail, and grain sliders. And to top it off, there is split toning included. This is all here so you can tweak the AI results to your liking.

Additionally, you can use the supplied presets or create your own, and use them directly on your photos.

Using Topaz Adjust AI

Using Topaz Adjust AI is very straightforward. It supports a huge list of file formats, including RAW files. It even can save the results as a DNG file, which is just great.

Topaz Adjust AI

Once you open a file, you either choose a preset or choose one of the AI settings and choose how strong the effect is. Once this is calculated, you can use the additional slider to tweak the result. That’s it.

I tried multiple inputs and the results are a bit all over the place. Some I like, some I did not. This is not a surprise, as they are very dependent on the photo I used.

One strange thing I noticed though, is that when I used RAW files from my camera, the results were very blue. Every single time. If I converted the file first to JPG or TIFF, the problem did not appear.

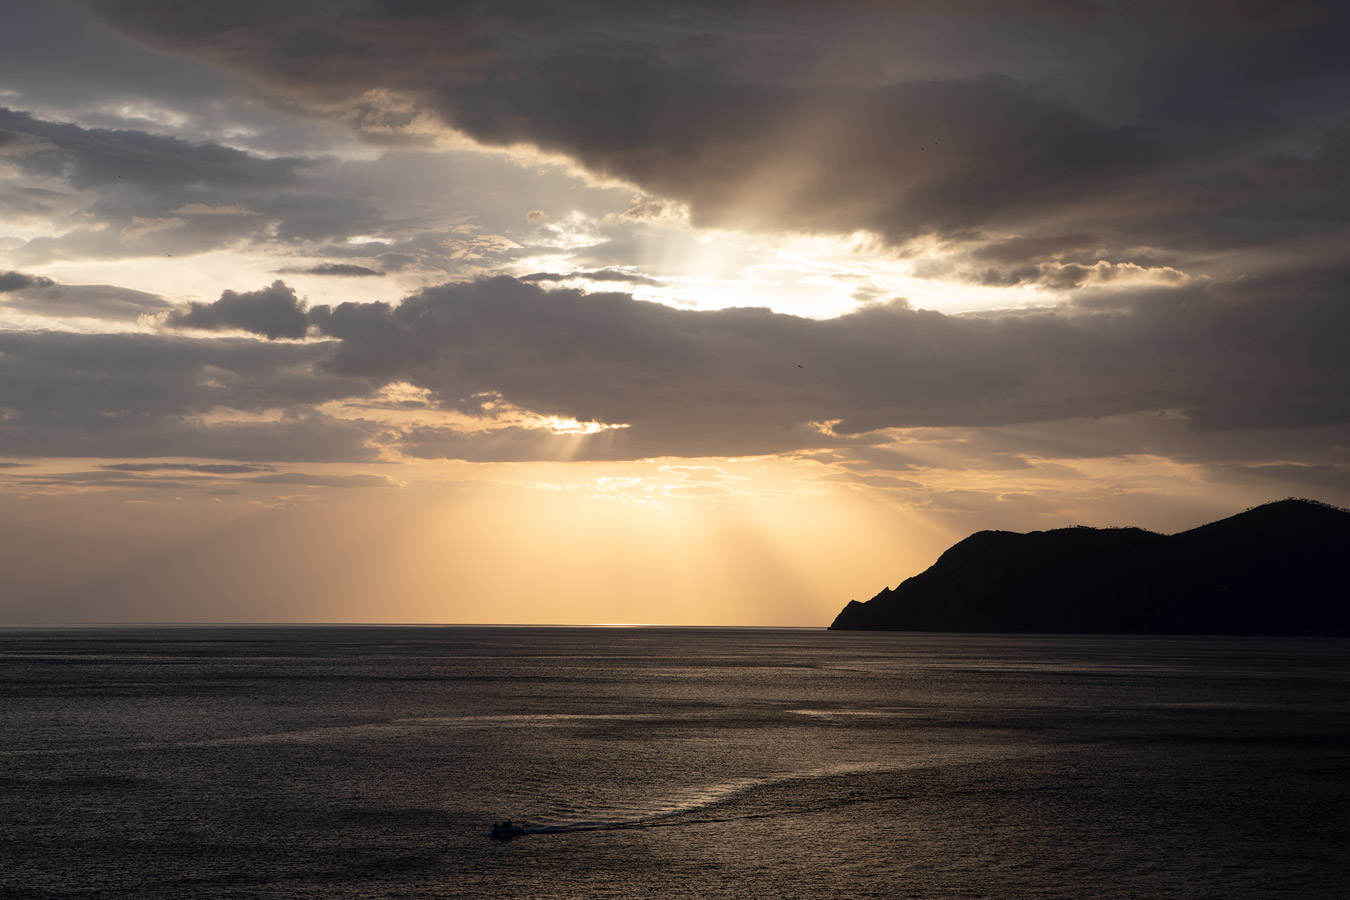
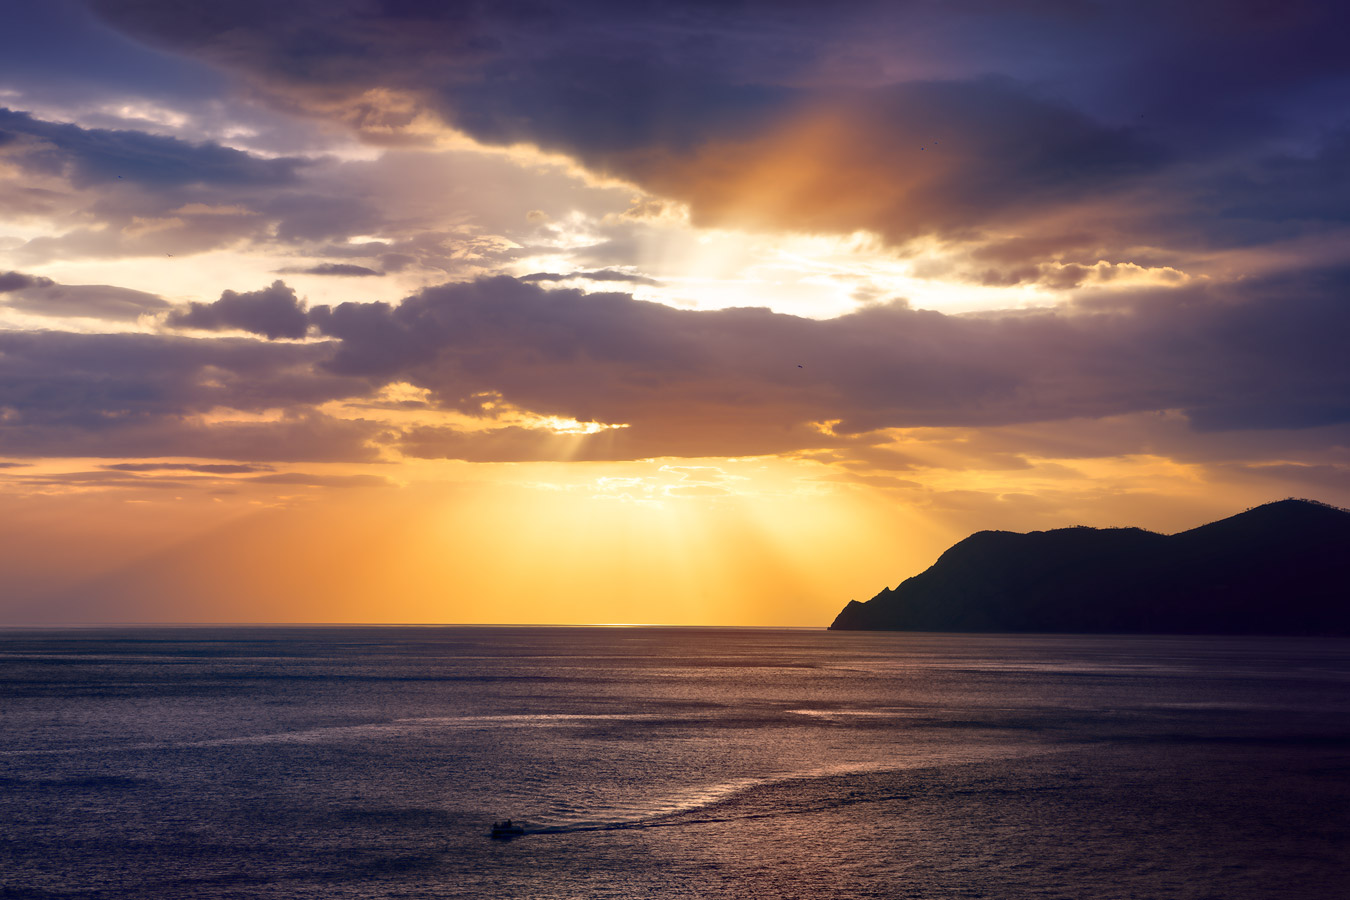
Look at these three versions of the same photos. First one is RAW on standard Adjust AI style, the second is a TIFF on standard style and the last one TIFF on HDR style. You can easily see the blue tint I mentioned.

Sample results

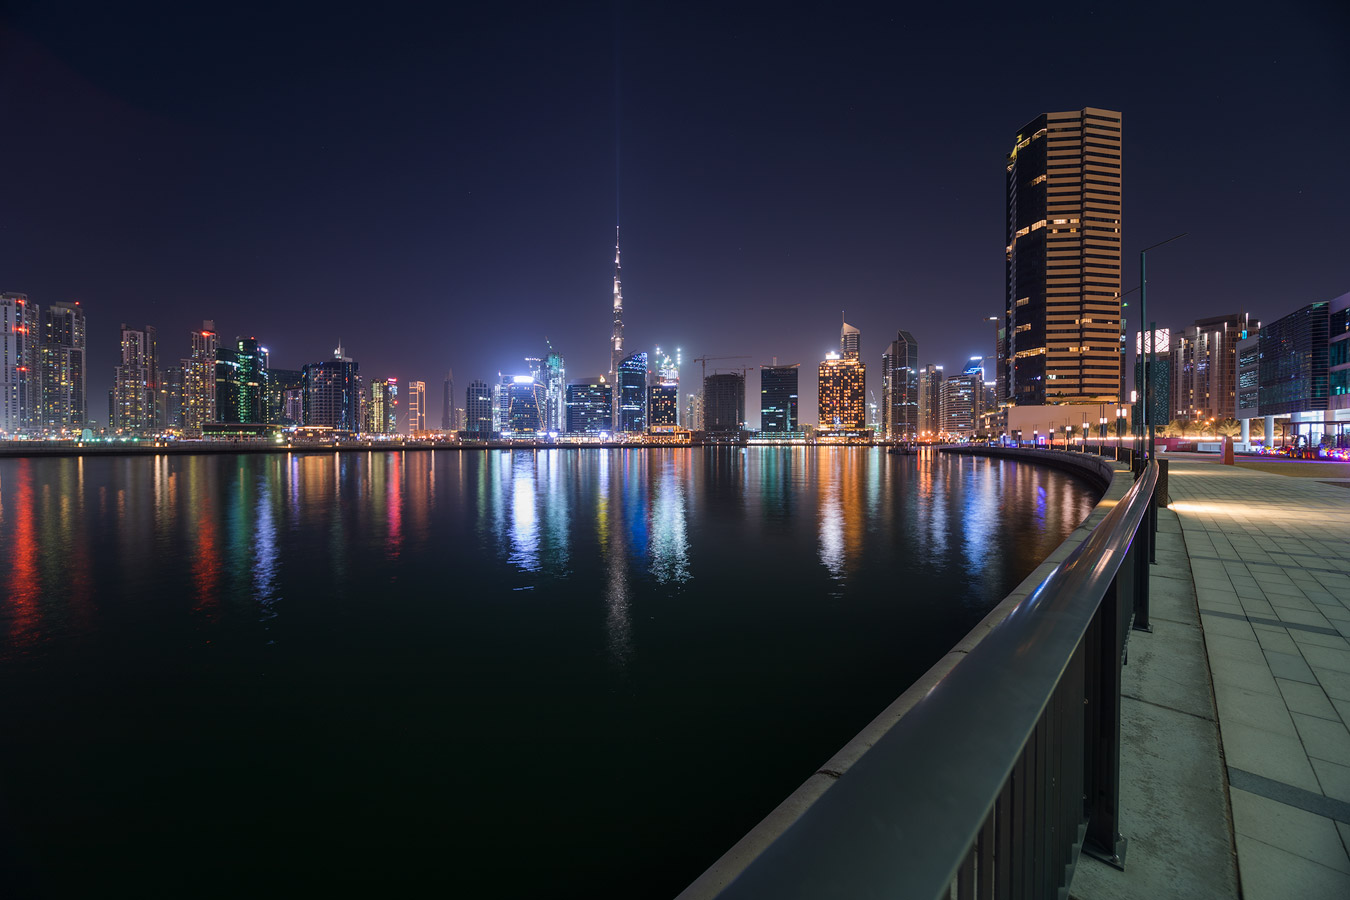
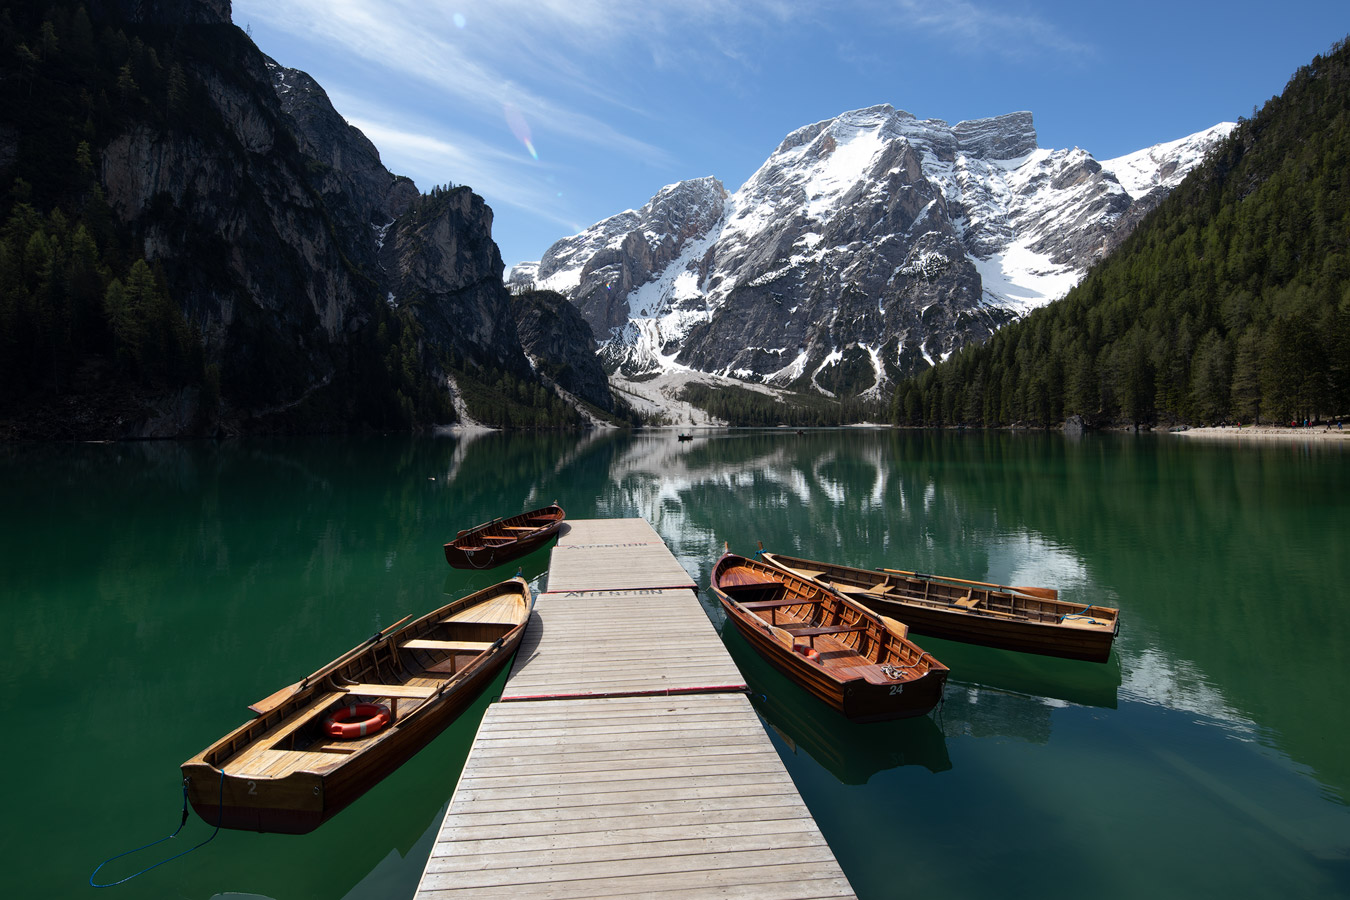
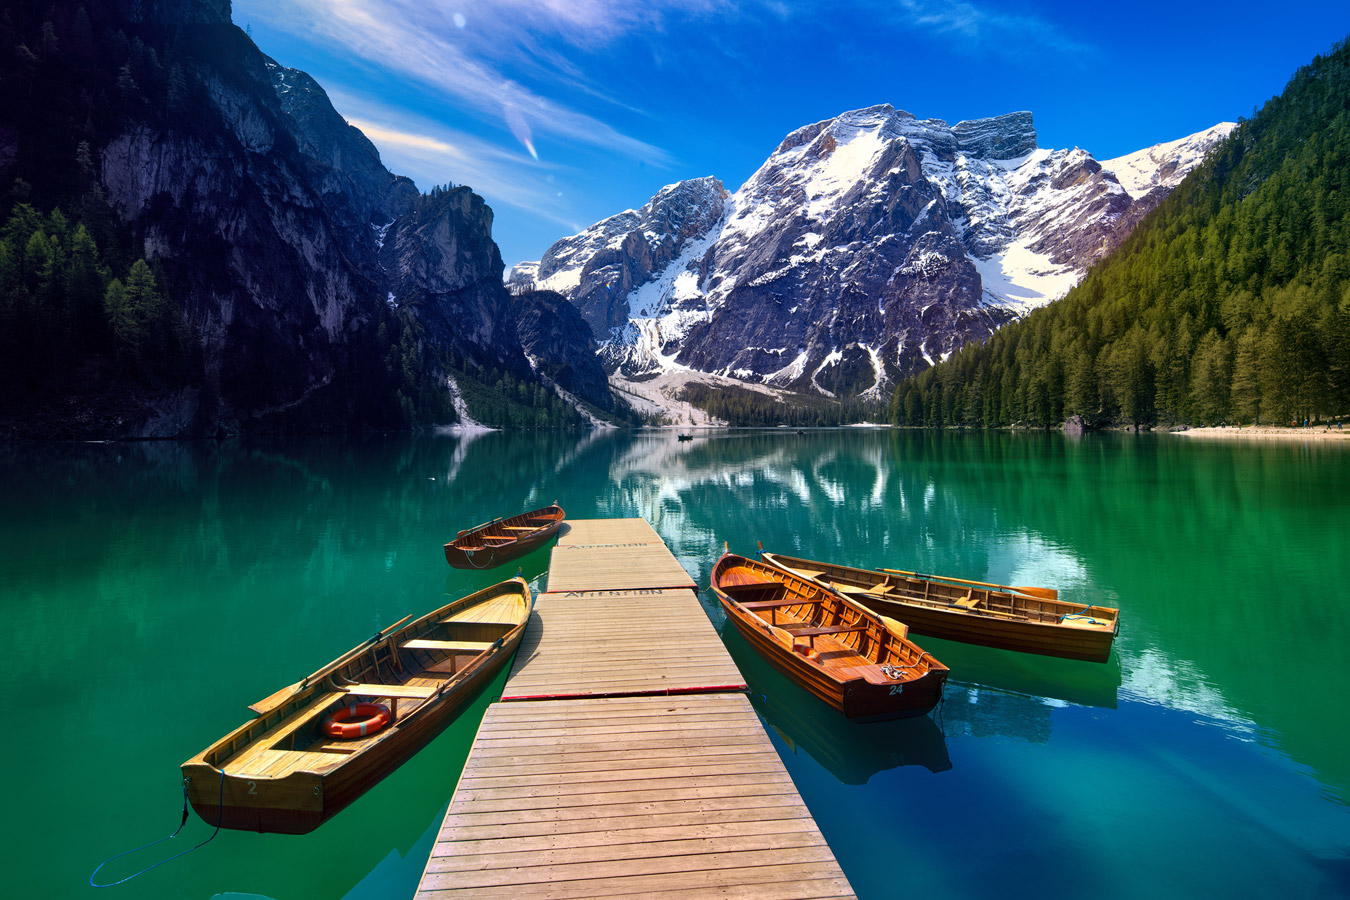
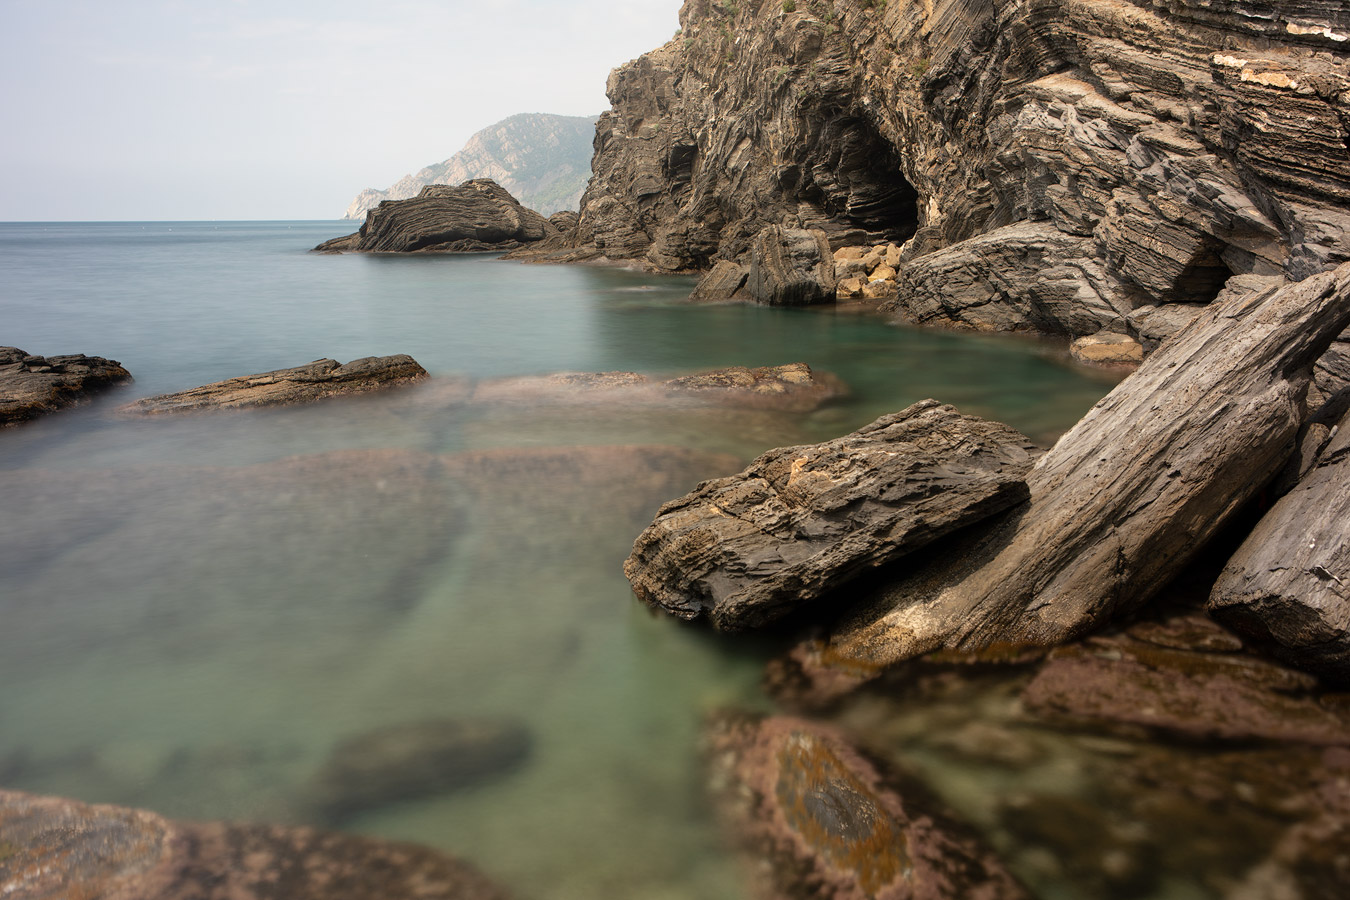
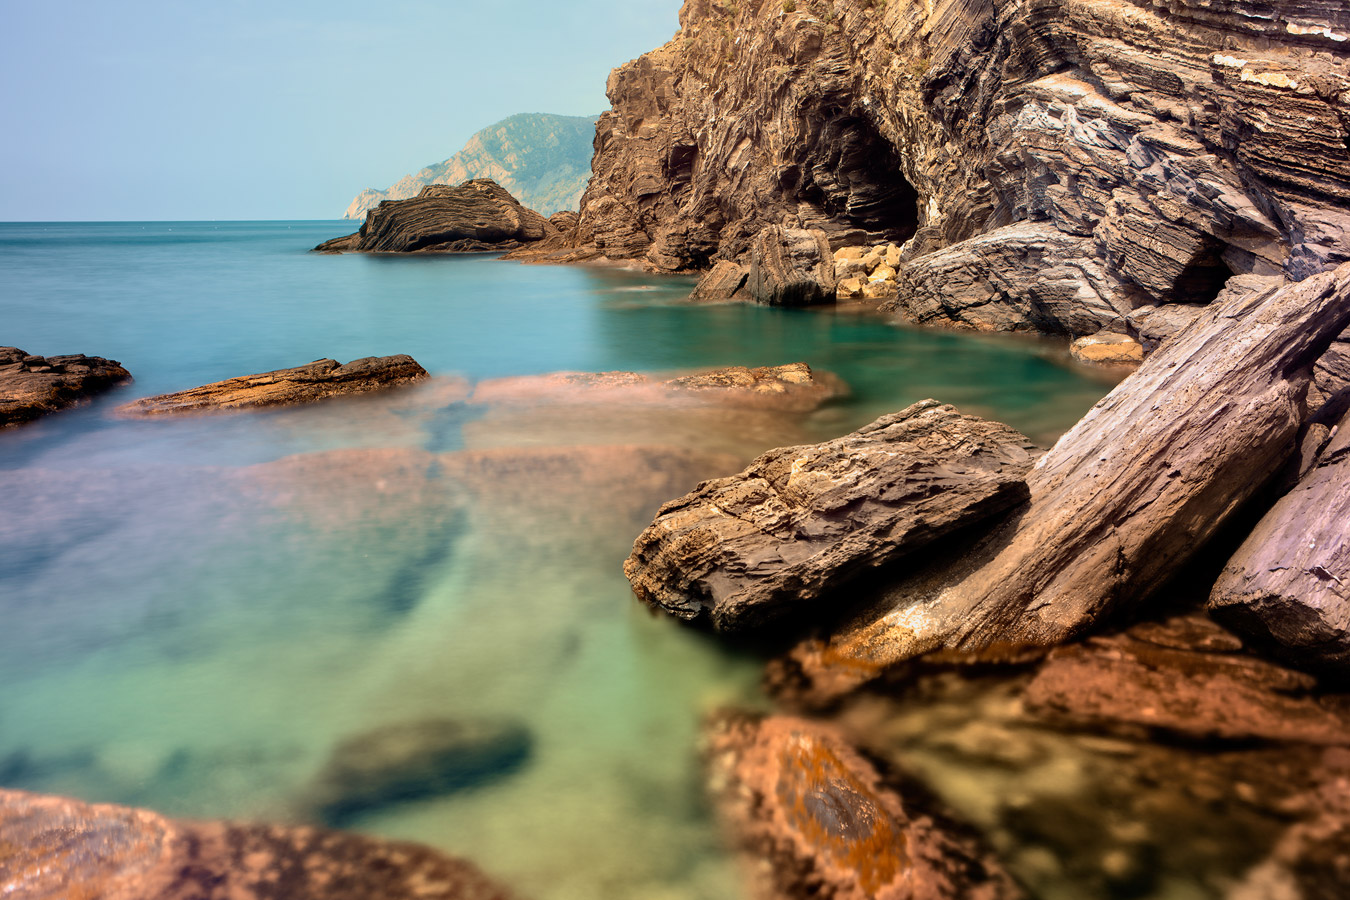
Let’s look at some photos. There are all edited only in Topaz Adjust AI, all from a TIFF file. You can slide the middle point to compare to the original photo. The original is always on the left.

For the first photo, I used the HDR style, changed the temperature to a warmer one and toned down the small detail, as it looked too grainy.

This one is again the HDR style, but I brightened it a bit and added more contrast afterward.

Here I used the HDR style, added a bit of saturation and opened the shadows.

For the last one, I used the standard style, went down with the highlights, added saturation and reduced the small details.

Final thoughts

I like some results, but I don’t think this application is for me. I already have a certain style to my photos, and this will not create the exact look I want. Is this something you will use? If you like the results, you should give it a try. There is a trial version available on the Topaz Labs website here.

What is a Gnarbox

Gnarbox is a rugged backup device. It’s a tiny computer, that you control with your phone and can be used to back up your photos from memory cards, USB card readers or external drives. Like this, you can use it in the field to back up your work, without the need for a PC.

I had a look at the Gnarbox 1.0 recently, and I will share with you my thought on it here. There is also a Gnarbox 2.0, which offers an SSD and ability to backup without a phone, but that one is not released yet.

You can find the official Gnarbox website here.

Gnarbox 1.0

The one I tried is the Gnarbox 1.0 128GB. It has an Intel processor and graphics, Wifi, SD and micro SD slot, one USB 3.0 port, one USB 2.0 port and one micro USB 3.0 port for charging and using it like an HDD. It’s dimensions are 13.5cm x 8.6cm x 2.5cm and has a 4000mah battery.

Gnarbox 1.0

It’s very rugged and all the ports are covered with thick covers. A nice thing is, that the memory card slots are big enough to fit the whole card in, and you can even close the covers with the cards in.

Gnarbox 1.0
Gnarbox 1.0

In the box, you get the Gnarbox, a USB to micro USB cable and a short quick start guide. The build quality looks solid, with the drive and port covers feeling sturdy and well made.

Gnarbox 1.0

Using the Gnarbox

To use the Gnarbox, you need the Gnarbox app. After installing it and turning on the Gnarbox, you have to connect to it using wifi. Once this is done, you control it completely through the app.

Once you put in a memory card, or connect a storage device using USB, you can see it under devices and can access its content. From here you can view the photos or directly copy them to the Gnarbox. You can’t connect your camera directly to the Gnarbox. With the 5D Mark IV connected, the camera switches to storage mode, but the Gnarbox app will not recognize it.

I tried this with a Sandisk Extreme SD XC card, rated at 80MB/s. Photos from my 5D Mark IV were recognized properly and I could copy the files. 10 raw files, 272Mb in size took 15 seconds to copy, with the app showing no loss in battery life. 186 raw files, 6.2Gb in size took a bit longer. They took 5 minutes and 26 seconds to copy, with the Gnarbox battery losing 4% of its power. Gnarbox also works with videos, and you can create a highlight reals using the app. You can then save the results easily to your phone.

One thing to note here is that the Gnarbox heats up a lot while doing this. It’s hot enough that you will not be comfortable holding it in your hands.

Gnarbox appMain screen
Gnarbox appSelect device
Gnarbox appCopy images

The app is overall easy to use except a few strange things here and there. Why would they name the Copy window Move files, and then explained in the dialog that it’s not Move but Copy? Why can’t I just select multiple videos and add them to the real, instead of choosing one by one, hitting edit and then swiping up to do so? I had to look into a guide to find out how this is done, as it’s not so obvious even with the tip the app gives you. Why isn’t the USB mode changed automatically to mass storage when I connect it to a PC? These are all small quirks, but I think they could be easily ironed out.

Gnarbox appFolder view
Gnarbox appDrive files
Gnarbox appVideo Reel

Looking at it as a backup device, it work’s really well. I had no issues connecting it to my phone, previewing the files, copying them and then connecting it to PC afterward. It’s a great way to have more piece of mind if you are doing longer photo trips, and have nothing with you to back up your photos.

Right now I’m really curious about the Gnarbox 2.0 SSD. This one is good, but that one look’s even better.

Innorel

At the end of February, I wrote about getting the Innorel RT85C tripod and the U44 ball head. At that time I mentioned that I will write a followup on how the tripod worked out and how it was to use it. And today is the day for this update.

Innorel RT85C tripod

I have very little to complain about the tripod. It’s stable and tall. The legs were a bit stiff to open in the beginning, but now I don’t notice that anymore. The rotating locks to extend the legs work with ease and are sturdy once locked. The leg locks are a bit harder to operate but still manageable.

Innorel RT85C and U44 after three months

The only issue I had, is when I try to go very low. While you can remove the middle column, I don’t like how it’s done. Firstly, you need tools to do so, as you will need to remove the ball head completely. You will not do this in the field.

Innorel RT85C and U44 after three months

Secondly, the way you attach the head back to the tripod is by using the two ends of the middle column, removing them from it and attaching them back to the tripod (better seen on the images above). This would work fine, but it does not. The bottom part nicely slits into the tripod and locks in place. The top part once screwed onto the bottom part is locked in place by the rotating lock that used to hold the middle column. So the only thing that holds it in place is friction. I don’t think this is a good solution, and I did not use it at all. I put it like this maybe twice, and the lock is already scratched on the top.

But as I mentioned, as long as I used the middle column, there were no issues with this tripod.

Innorel U44 ball head

I had similar experiences with the ball head. Overall it’s quite good. Stable, easy to use, like most other ball heads. I did run into one design issue though and one thing no longer works as it should. So what they were?

The design problem is the friction knob. This should be used to change the friction of the ball head, but it’s so easy to rotate, that you will move it accidentally all the time. And when that happens, you will lock your ball and be surprised why you can’t move it anymore. Though, once you know about it, it’s just one rotation of a knob to fix it.

Innorel RT85C and U44 after three months

The other problem happened to me with the lock mechanism on the top. There is a spring that opens the lock once you start loosening it. That spring no longer works properly on mine and will not open the lock sporadically. In those cases, I have to push on one side of it, and it will spring out. Not sure if the spring broke, or some dirt got inside, but either way it annoying.

Overall I’m mostly happy with this tripod. It works, it was cheap, it’s sturdy, it’s fine. The small issues are annoying but not a dealbreaker. Still, it’s a great value for the price.

Innorel

In my article on the Innorel RT85C tripod, I mentioned that I also got the Innorel PW50 table tripod/monopod base with it. At that time I did not write anything about it, as it was not yet delivered. But it arrived a few days later and today I will share my thought on it with you.

Innorel PW50 table tripod & monopod base

The Innorel PW50 can be used as a small tripod, or as a monopod base. It’s well made, build completely from metal with rubber on the end of the feet. It can be collapsed in both directions, so it can be put into a small compact state. There is a 3/8″ to 1/4″ adapter included, but by using it the tripod gets taller.

Innorel PW50 table tripod

The legs lock into two positions, the lower will make the tripod 9cm in height (when without the adapter) and the taller will be 19cm (also without the adapter). The legs snap into place easily and in both configurations, the tripod feels solid. The manufacturer declares the weight limit at 10kg.

Innorel PW50 table tripod

I tried it with a smaller and also a bigger camera. In both situations the tripod and also the ball head held fine. There is no slit on the side of the ball head, so you can’t put a camera vertically if you don’t have an L-bracket. This is not really a problem with a DSLR, as it’s big to rotate anyway, but if you want to do a vertical shot with a smaller camera, this is not the tripod for you. You also can’t point the camera up by more than about 45%.

Innorel PW50 table tripod

The 3/8″ screw is quite long, probably because it’s also used as a monopod base. It makes attaching a plate clamp a bit problematic. For all I have, the screw goes through and mostly obstructs the quick release plate. Of course, you can use the 1/4″ adapter, and then another 1/4″ to 3/8″ adapter on the plate clamp, but that makes the tripod taller and less stable. Luckily for me, if I use the L bracket, the screw is not in the way.

Innorel PW50 table tripod

When you remove the rubber foot from the monopod part of the Innorel RT85C tripod, you can attach the PW50 as a monopod base. It has a rubber foot on it, so you can keep it on even collapsed. It collapses around the monopod, so it does not add much bulk to it. The tripod feels stable when in the fully opened state, as the base of 34cm diameter is quite big.

Innorel PW50 table tripod

Overall I’m quite pleased. It feels well made, sturdy and stable. I got it mostly to be able to take photos from really low positions and in places where I can’t use the big tripod. And for both this will work for me perfectly. I found only two issues. The long screw can be fixed by using a 3/8″ nut on it, so shortening it. The no side slit can be partially fixed with an L-bracket. But there will be situations where it will be limiting. Still, taking into account the price you can get this for, this is a well-made table tripod for a really good price.

Topaz Labs

We just got a new AI software from Topaz Labs two days ago. We already had the Jpeg to RAW AI, AI Gigapixel and Sharpener AI from Topaz Labs. This one the Topaz Denoise AI, as the name suggest removes noise from your photos. It uses AI to remove noise without loosing detail and sharpness. So today I will share with you my impressions of it, and some comparisons to my currently most used noise reduction Photoshop plugins, the Imagenomic Noiseware. I don’t have many photos taken at high ISO settings, but there are some interiors and night shots where I had to use high ISO, so I will use those for the examples.

Topaz Denoise AI

Same as with other Topaz AI applications, the interface is very simple. You load your image and process it. You only have three sliders: remove noise, enhance sharpness and restore detail. They do exactly what the name suggests. There is also a brighten preview option, where you can have it brighten your photos, so you can see the noise better. This has no effect on the image processing, it’s just to make you work simpler.
Topaz Denoise AI
One nice feature here is the support for RAW images, so you can directly work on the source file. Better to do this before you did other edits on the image. You can save the export as a DNG file RAW afterwards.

Topaz Denoise AI

But let’s go to the examples. There are three images in every example. The original photo as TIFF (lens correction and chromatic aberrations removed before noise reduction, some brightened a bit to make the noise more visible). Second one is a Noiseware noise reduction with strong noise preset and detail protection set to 6. Last one is the Topaz Denoise AI result, with all the sliders at 0.25.

Please take the comparison between Noiseware and Denoise with reservations. You can set the sliders differently in both, and the results may greatly vary based on photo. There is no way I can show all the possible results here, so this should be taken just as small preview, and one should try both for oneself (there are trials available). I will focus here only on the Denoise results.

Please click on the images to see bigger versions, to see the noise.

Original
Original
Imagenomic Noiseware
Topaz Denoise AI
Topaz Denoise AI

In this interior photo, Topaz Denoise very nicely removed the noise and added quite nice structure to the pillars. Strangely, which I noticed in multiple photos, some lines caught a bit of a green color tint. You can see it in the middle here and also in the top right corner. Hard to say why this happens. Original and Denoise versions in one photo for comparison here. 

Original
Original
Imagenomic Noiseware
Topaz Denoise AI
Topaz Denoise AI

Here is a very noisy photo, taken in the middle of the night. Again, you can see how Denoise tries to add more structure to places that it removed noise from. Original and Denoise versions in one photo for comparison here. 

Original
Original
Imagenomic Noiseware
Topaz Denoise AI
Topaz Denoise AI

This is my favorite result here. The car looks so clean afterwards. All the detail is preserved and overall this is a great result. Original and Denoise versions in one photo for comparison here.

Original
Original
Imagenomic Noiseware
Topaz Denoise AI
Topaz Denoise AI

This is a different example from the same photo as the previous example. Again, very nice result, very clean, very crisp. Original and Denoise versions in one photo for comparison here.

Original
Original
Imagenomic Noiseware
Topaz Denoise AI
Topaz Denoise AI

One last example here (again from a car, really have very few photos taken at a higher ISO :)). Again a very nice clean result here. Original and Denoise versions in one photo for comparison here. 

My Impression

I quite like the Topaz Denoise AI results. It’s obvious it does more than just noise reduction. It looks for the structure, similar to other Topaz AI plugins, and tries to recover it after the noise reduction process. The results are really clean and good quality. And to think this is all with very weak noise reductions set at 0.25. You can go as high as 1.00 which just smooths out everything.

You can give Topaz Denoise a try by going to the Topaz Labs website and getting the trial version.

Page 1 of 13123410... Last »
FREE EBOOK!!!
Subscribe to my newsletter and get a free Capturing fireworks ebook. 
Subscribe