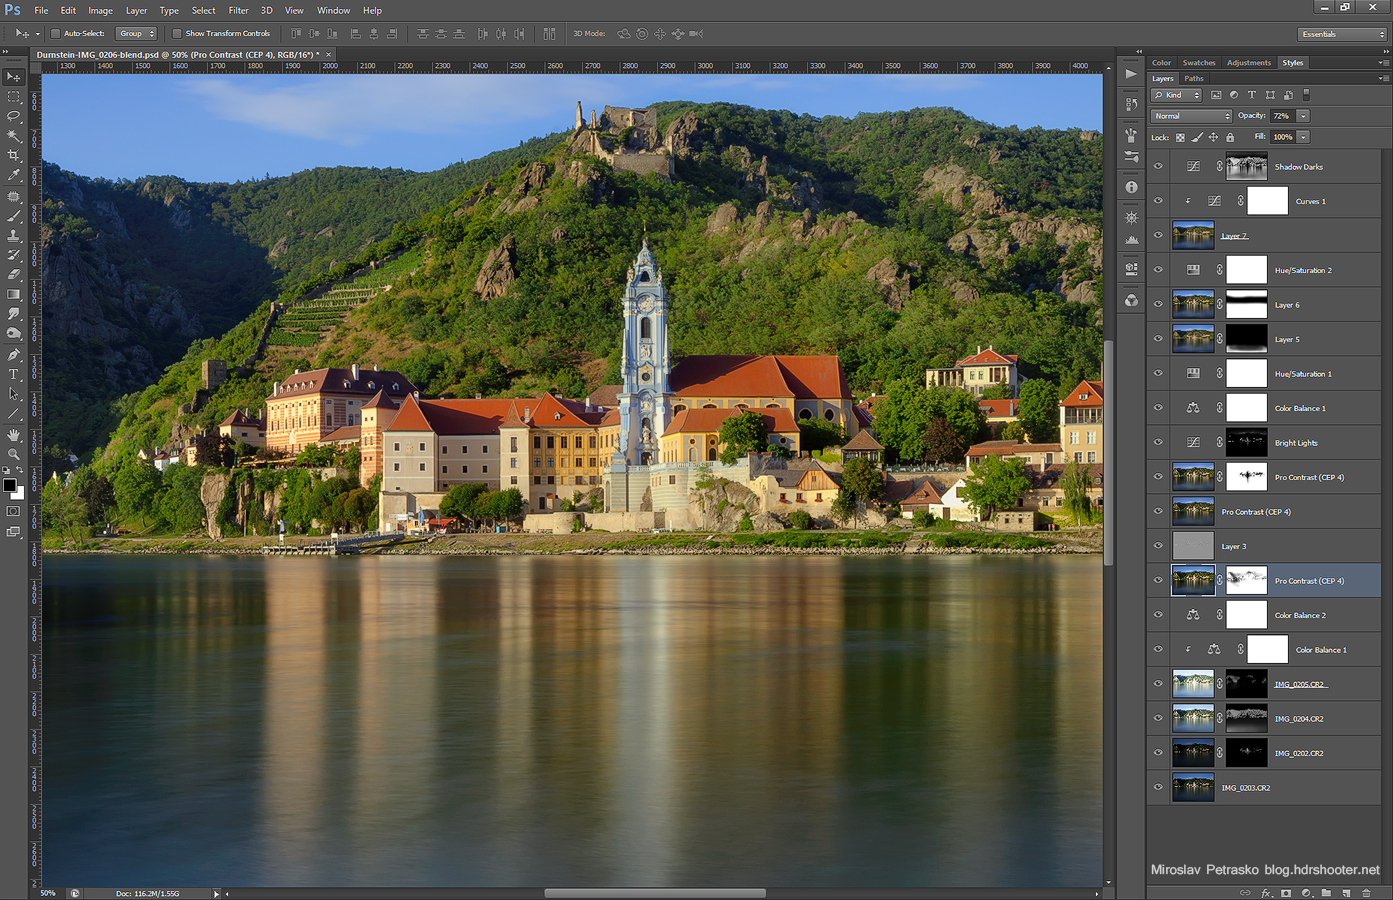
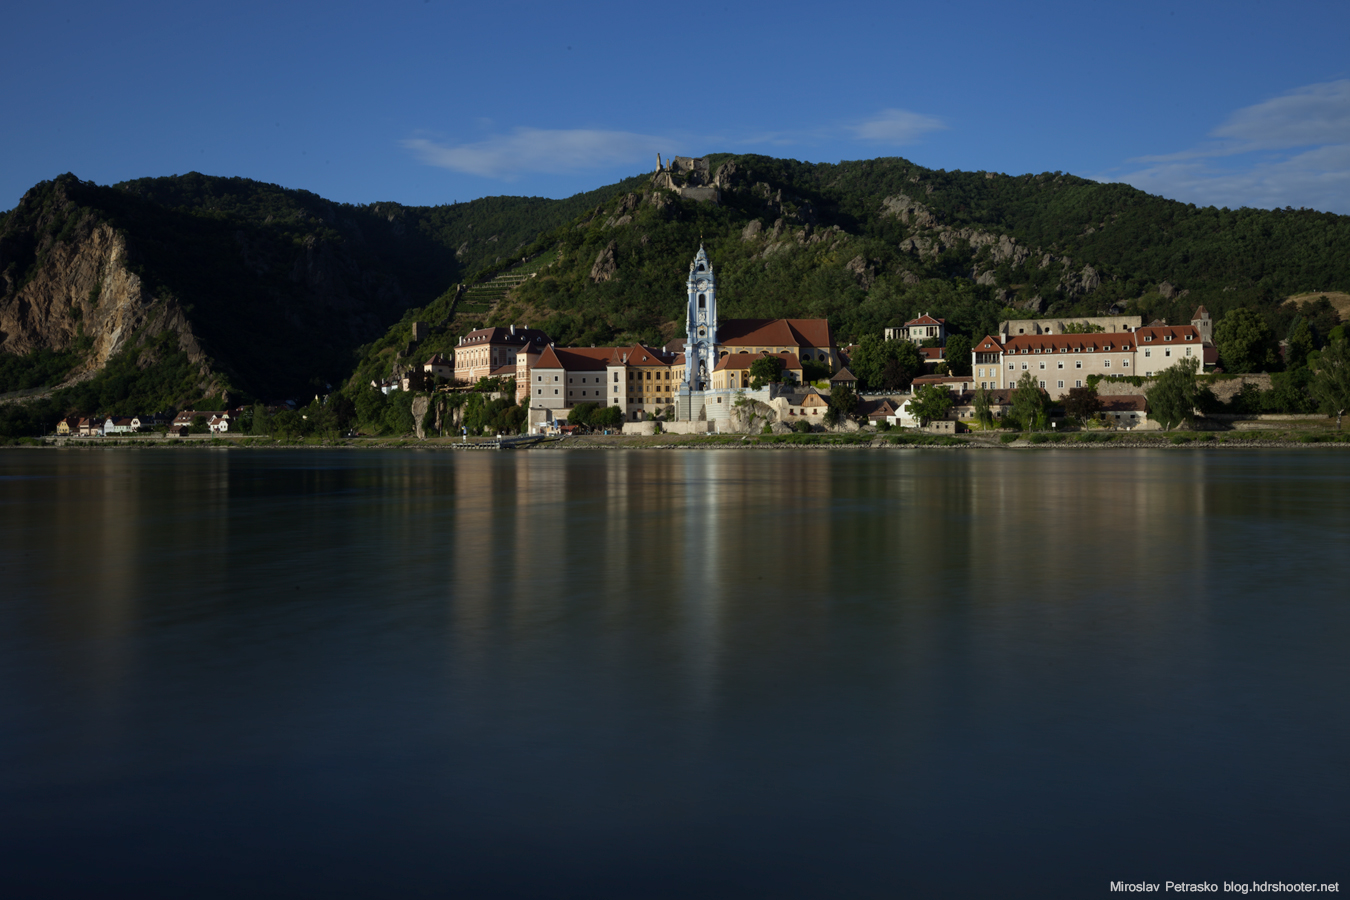
Today there is another process post for you. This time its a long exposure photo from Durnstein in Austria. I used the Hoya ND400 filter here, which made the water nice and smooth, giving so a beautiful reflection.
So to thet to this result

I dit the following (layer numbered from bottom up)
1. -1EV exposure to start with
2. -2EV exposure to darken few parts of the buildings
3. +1EV exposure to brighten most of the photo
4. +2EV exposure to get detail in the darkest areas
5. color balance just on the darkest exposure, as the shadow areas were to blue and I wanted them more yellow
6. color balance on the whole photo, added more yellow to correct for the ND filter color cast
7. first Color efex pro contrast filter to pull out more detail in the photo
8. added sharpness with the high pass filter
9. second Pro contrast filter, as there was still a little color cast
10. third Pro constras filter, as I wanted to pull out the darks even more (I would probably be able to get all this in one use of Pro contrast, but like this I can mas all them differently)
11. darkened the brightest lights
12. the water got too green, so this color balance corected this
13. added more saturation to yellows to get more color in the hills
14. a little bit of motion blur on the foreground water, to give it a more smoother feel
15. noise reduction, but not on the hills
16. more saturation to the blue color to get better looking sky
17+18. added glow, to see what exactly it does, check out this guide
19. a bit of brightenss to the darkest parts of the photo
Continue to the full post to see the -1EV exposure from which I started my edit


Stunning work Miroslav! Great post and images! :)
Great photo and what a difference between final result and 0 EV shot :)
Hey great post bud! getting better all the time! anyway, is there a missing hyperlink on points 17+18?
Thank you Nicholas for letting me know.. already corrected :)