On one of my recent posts, I got a question from Per Kaer why a lot of my photos use a big aperture (just to clarify, small number means big aperture, big number means small aperture), and since this is something I seen in many photography tutorials and books, I thought I clarify this in detail.

If you read any landscape photography tutorial, you will usually find that you should use an aperture of f11-f13 or even smaller, just to get everything sharp and in focus. But if you think about it, and learn how DOF (depth of field) works, you can get a good sharp photo even on a f2.8. And if you shoot a lot of evening and night shots, as I do, shooting at f11 just takes horrible amounts of time and the good light fades always really quickly.

So here are few points about sharpness and DOF, you have to think about when shooting:

1. Try out manual focusing. You can have the best camera out there, but it will never be able to focus in all situations. For instance in total dark, if there is at least a single light source in the scene, you still will be able to focus manually, by using a live view and zooming in onto the light. Also you know what you are taking photo of, not your camera

Rainy evening in Ljubljana

2. Focus 1/3 into the scene. That means that everything in focus, will be split into 1/3 in front of what you focused on and 2/3 behind. This gets some time to use to, but after some practice it will be natural for you.

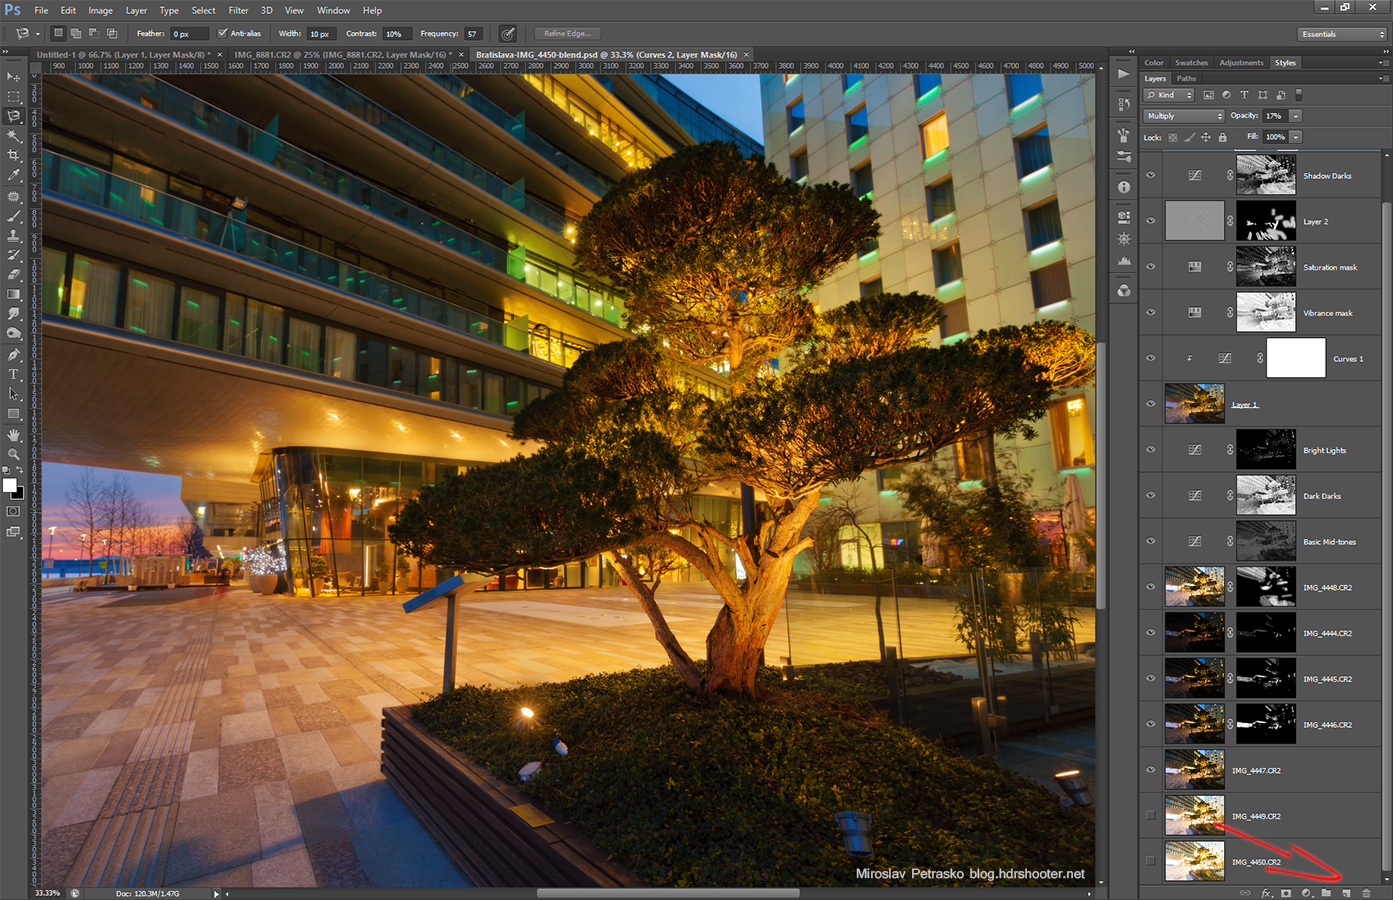
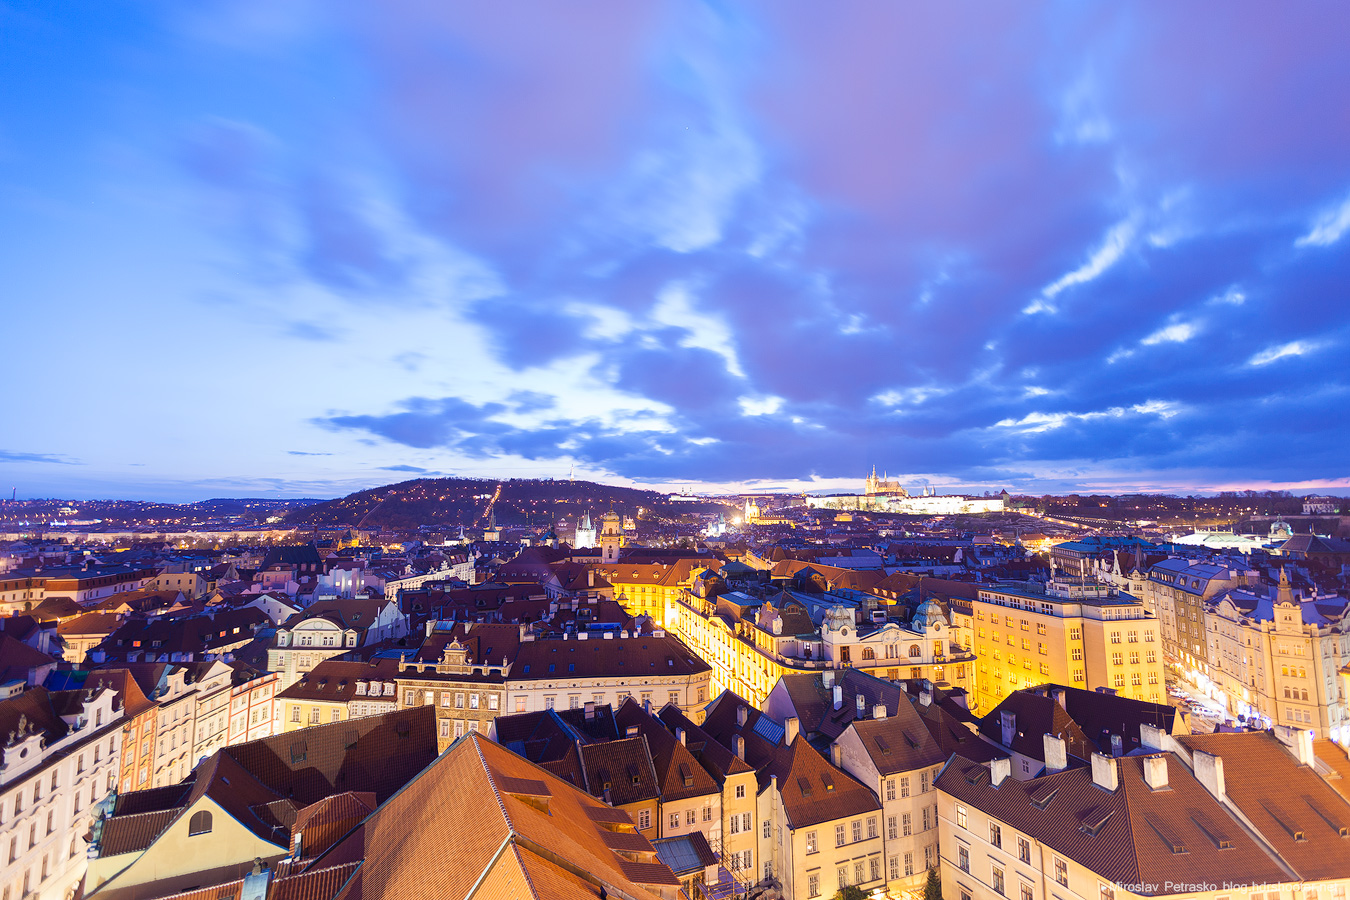
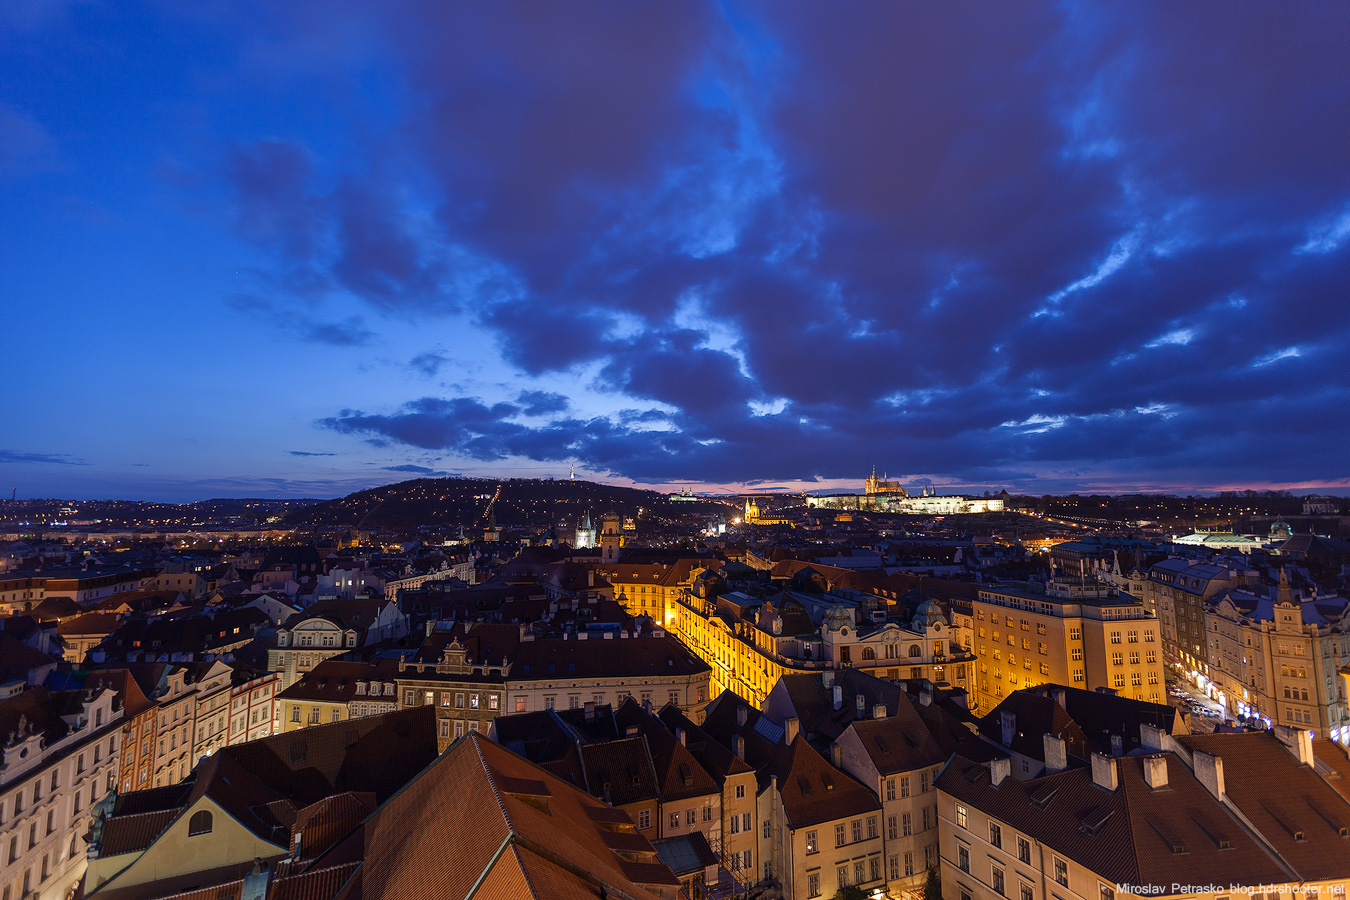
3. The further something is from you, the bigger DOF you will have. So if you shoot a landscape that is far away, you can use f2.8 and it still will be in focus. For instance in the photo on the left, the city is quite far away from me, so apperture f4 was still enough to get everything in focus.

Franciscan Church in Maribor4. The wider the lens you use, the bigger the DOF will be. So if you use anything under 24mm (this is on a full frame camera, if your has a cropped sensor, please multiply yours by the cameras crop factor), you will get a reasonable DOF on f5.6 or bigger. For instance most of my indoor shots (like the one yesterday) are at f5.6 or f6.3 and I still have the whole room in focus. For instance in the photo on the right, apperture f6.3, but a wide angle used, so the whole church is in focus.

5. Most lenses are sharpest around 2-3 stops bellow there maximal aperture. That means a lens that is f2.8 at the maximum, will be sharpest between f5.6 – f8. For instance I know with my Canon 16-35 F2.8 that if I use f5.6, the photo is much sharper, than if I use f11.

6. Go for a small aperture only if you really need it. I can think of two situations here. One is you want to create stars from all the lights in your shots. So the smaller the aperture, the more distinct they will be. The second situation is when you have something close to you and you want it to be as sharp as objects far from you (I personally go with focus blending here, but just using small aperture is easier). But still think about it first, as small apertures introduce defractions and you gain a bigger DOF, but overall you will loose sharpness.

7. Smaller aperture means longer exposure time. And if you don’t use a custom firmware, it can also mean higher iso, as you have to compensate for the very long times. I almost never go higher than ISO 200 and rather go for a bigger aperture. Also I hate waiting for minutes for a single series to finish and if you use 5 or 7 brackets it can get into minutes very quickly.

There is one time when you have no choice but to use a smaller aperture, and that is when there is a lot of light available. In that case, you have no other choice, as the minimum time for a shot is limited by the camera hardware (usually something around 1/4000s).

Feel free to ask if you have any questions to this :)

First part of the Luminance tutorial

I started working on my Luminance masking tutorial and here is already the fist part – Photoshop masks. This one is more for the Photoshop beginners, as I try to explain here what are Photoshop layer masks and how they work. My plan is to extend this with two more parts in the following weeks, one about how to create luminance masks and one about how to use them. Hope some of you will find this useful, and feel free to ask any questions
photoshop-masks-07

Nice sunset spot

I’ve been here at the wrong time of the year. I have to arrange my next stop in Prague, when the sun sets right behind the castle and then this view could be much better :)

This is a manual blend from 6 shots, taken from the Vysehrad area in Prague. I could have made the dark areas brighter, but then I lost the nice contrast between the middle area and the sides.
Nice sunset spot

You can’t start doing anything with Luminance masks without first understanding masks in general. The concept of masks is very simple, but can give you problems, when you are only starting with them. So lets take a look at them.

Photoshop layers

Lets go from the start. Everything you do in Photoshop, you should do in layers. This means that all you modifications are stacked up onto each other and you are looking on them from top, seeing just whats on the top.

In Photoshop you can see your layers on the right side (by default), and there you can also find the new layer button in the bottom right.
photoshop-masks-01
Let’t see how they work. If we create two layers, one filled with green and one with red, we will see that the image wee see is just the top layer, with the bottom one being completely hidden.
photoshop-masks-02
You can also move the layers around, and you will see that you always just see the top one (you can’t move the background layer, but if you double click on it, and confirm the dialog that opens, it will be changed into a normal layer).
photoshop-masks-03

Layer masks

Sometimes you need to see more than just the top layer. And this is where the mask comes in. You can imagine them as templates, showing where the layers should be cut out. Lets add a mask to the top layer using the add mask button in the bottom right.
photoshop-masks-04
And as you can see, nothing changed. This is because the the mask is white. White means that it’s empty. If we stick to the cutting template, white means – nothing cut, black means – hole. If we make the mask completely black, we wont see the layer at all, as we cut out everything. To make your workflow quicker in the future, you can remember that if you hold Alt while clicking the add mask button, the new mask will be filled with black.
photoshop-masks-05

You can work on the masks the same way as on a normal layers. All the tools work there. When we take a brush and just make a big black dot in the middle, we will just see through the area that is black, and for everything else there is just the top layer. So it looks like we cut out a big hole in the top layer.
photoshop-masks-06

A little side tip. If you just want to see the mask, hold the Alt key and click on it. If you want to disable the mask, hold the Shift key and click on it. If you just want to select it, just click on it. A selection rectangle will be shown around it.

Gradual masks

Until now we only used a white and black masks. But what happens if we used a shade of grey? The top layer will be added to the bottom one, based on the brightness of the grey we used. The darker the grey, the less will be added, the brighter the more. You can also think of it like this. The closer the grey is to white, the less its see through, the more it is to black, the more it’s see through.

Here you can see the effect of white, different shades of grey and black. The darker the color, the more of the bottom layer you see.
photoshop-masks-07

This graduation is great, when you need a soft transition between two layers. Using a gradient, or a soft brush here, will make the transition soft, more natural looking.
photoshop-masks-08

Image blending

Even with these basic masks, you still can blend you images. It works great for photos where you only need to replace a specific part, like the sky and don’t have any complicated structures.

So let’t take these two photos as an example. Let’s say I like the sky from the darker shot and the buildings in the lighter shot.

photoshop-masks-09 photoshop-masks-10

What I can do, is to load these two images into Photoshop, and move one into other, so I have them both in two separate layers.
photoshop-masks-11

Now if I add a layer mask to the top one, and start painting in it, revealing the bottom one. And since the horizon is quite straight, I can get a quite even blend here. If I go to much, I just switch the brush to white and remove parts of what I painted. Or I can change the transparency of the brush, to make it softer.
photoshop-masks-12

And here you can see the mask I used
photoshop-masks-13

You can also create a selection using any of the selection tools (lasso, magic want …) to limit where you paint. For instance here I could have selected the sky with the magnetic lasso tool, and paint after that, so I know I won’t paint over the buildings. Lumiance masks are an advanced way of getting these selections, and in the next part I will show you how to create them.
photoshop-masks-14

And that’s all about masks. I hope this made sense and if you have any questions, feel free to ask.

Around the end of last year I switched the main way I combine my photos from HDR to manual blending. And from that time I got a log of questions on how I do it. So here you will find a tutorial on how I do it. I will cover here only how I combine the photos, as all other issues, from shooting to getting your desired look can be find in the HDR tutorial.

This tutorial is split into three parts:

  1. Photoshop masks – I explain and show how the masks work in Photoshop. This is mostly for beginners and if you already know how masks work, you can skip this.
  2. Luminance masks – I show what are and how you get a specific Luminance mask. The knowledge of Photoshop masks is required here.
  3. How to blend images using the Luminance masks – I show how you can use what you learn in the two other parts to blend your images

For now the first part is up, and I’m working on the other two.

And here are few blended images, so this page is a little more interesting :)
Blue hour at the Eiffel Tower
Blue lit stairs
The bonsai tree

FREE EBOOK!!!
Subscribe to my newsletter and get a free Capturing fireworks ebook. 
Subscribe