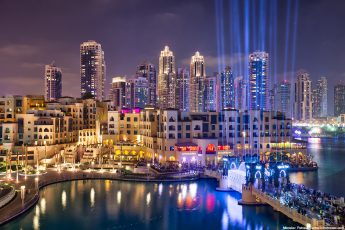
As every Monday, I have for you a new process post today. This time I chosen to show you this photo from Prague. This is taken from one of my favourite spots there (you can see my list of spots here).
So let’s first look at the finished and the original 0EV exposure.
 Finished photo
 Original photo
There was not to much there regarding the dynamic range, but still a lot of things to tweak. For some reason, I don’t remember, I took 7 exposures here. In retrospect, I would probably be OK with three, but since I already had all, I used them.
I started with tweaks in Lightroom, where I corrected the white balance and lens distortions.
 All exposures
 Lightroom edit
From there I loaded all the exposures into Oloneo Photoengine, and just by changing the strength and contrast. From there I continued into Photoshop (layers numbered from bottom up):
1. Oloneo Photoengine result
2. 0EV exposure, set to 20% opacity, to recover a little of the contrast lost in the merge
3. 0EV exposure once more, to remove ghosting
4. -2EV exposure to darken few bright areas
5. desaturated a little the strong yellow lights
6. Color Efex pro contrast to add more local contrast to the photo.
7. Retouched out the light streak I caught in the bottom left
8+9. Added glow to the photo
10. Little more contrast to the whole photo
11. Color efex detail extractor to add more details to the sky and the trees in the foreground
12. Color balance to make the photo a little warmer
13. A little more contrast
14. Brightened the photo a little
15. TK actions Vibrance mask to add more color to less saturated areas of the photo.
 Oloneo merge
 Photoshop editing
And that’s all I did with this image. To find out more on how I edit, check out the guides and before after categories on this blog, or check out my video tutorial series here:


Leave a Comment