Brightening a photo in Photoshop
When I take my photos, I tend to underexpose them. This is because one can usually recover shadows from a RAW file, but not really highlights. Once something is burned out in a photo, it’s gone for good. But then I have to brighten them in the end. So today I will show you a way, that I apply almost to every one of my photos. It does not only brighten it, but also gives a bit of contrast, color and overall pop to the photo. Works well on most of my photos.
This is more for the ones that are less familiar with luminosity masks, as those who use them probably do this all the time :)
Using levels to brighten a photo
So what I do, is to create a selection of only the shadow areas in a photo and then add contrast and brightness to those. I don’t want to change anything with the bright areas of the photo, just the dark ones. One has to:
1. Open a photo one wants to edit
2. Go into the Channels window. If you don’t see it, you can turn it on under Window/Channels
3. In this window, hold down Ctrl and click on the RGB channel. This will select all the bright areas in a photo and you will see the selection marching ants on your image.

4. Now, we need to inverse this selection, so instead of the bright areas it selects the dark ones. Hit Ctrl+Shift+I (or Select/Inverse from the menu). The selection will change to the inverse one.
5. Go back to the layers window. Choose Create new Adjustment layer in the bottom right (circle icon that is half white, half black) and from the menu choose levels.

6. A new levels layer will be added with a mask already applied to it. In the levels window, you will see, that the histogram is towards the left and not the right. That means no highlights are select and will not be modified.
7. To add brightness, start dragging the white triangle on the right side of the histogram to the left. Until it touches the histogram, you are no overexposing any parts of the photo, so you can safely move it as much as you need.
8. To add contrast, move the middle triangle to right. I would not overdo this, usually staying between 1.0 and 0.9 works best.

You can repeat this process multiple times, as after each edit, the selection changes. If you are getting very saturated colors afterwards, you can just change the blending mode of the layer to Luminosity and then it will have no effect on the color saturation at all. Yo can also use this only on part of your image, depending on what you need.
One can get a similar result by using Curves or the Brightness/Contrast adjustments. Mostly depends on which one are you most comfortable to use.
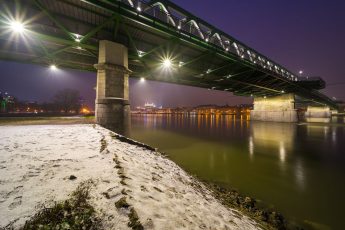
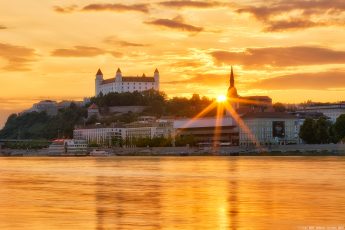
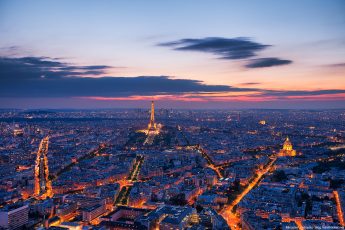
And here are few before/after comparisons. The changes are subtle, but noticeable. Maybe a bit harder with the photos next to each other, but much more when you can flip between the two versions in Photoshop. Most editing is just these subtle changes used multiple times.


This is a very simple edit, but once one gets used to it and luminosity masks, one can get really great results with it. I have some photos, where all of my edits were just levels with different masks applied :)


Leave a Comment