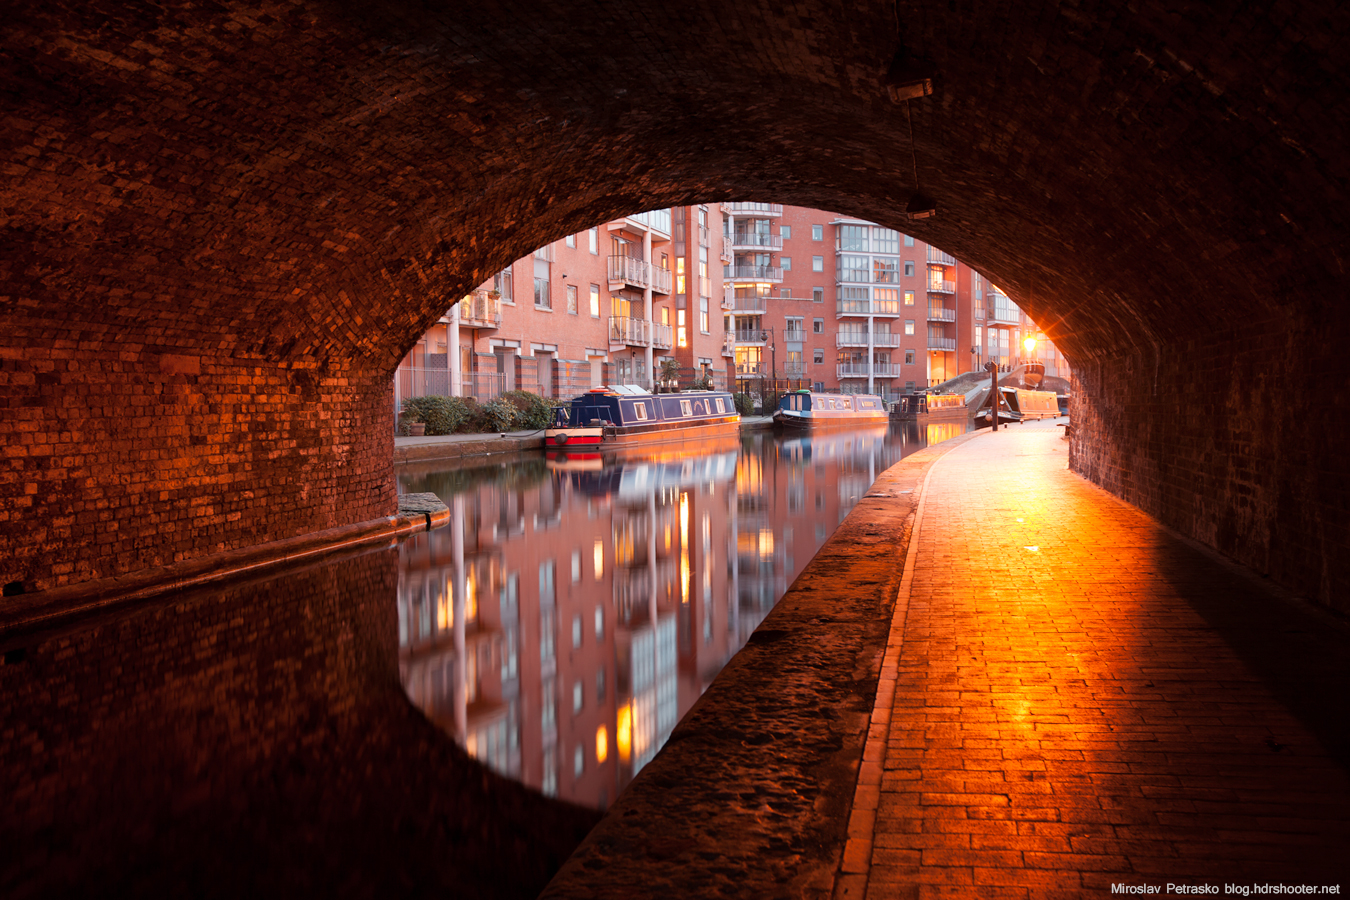
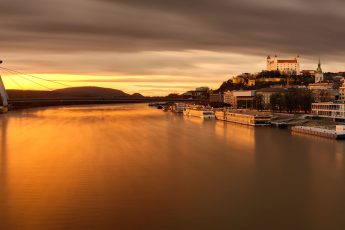
Another Tuesday, another process post. Today I chosen one where I did only a little edit, as I liked the photo quite a lot.
So to get this final photo:

I fist imported the photos into Lightroom, cropped the image and corrected the white balance. Then I exported all the files into layers in Photoshop. There I did the following edits (numbered from bottom up)
1. 0EV exposure
2+3. -1EV and -2EV exposure to darken the middle part of the photo
4+5. +1EV and +2EV exposure to brighten the bricks of the tunel
6. added detail using the high pass filter
7. added contrast to the basic mid-tones (mask created using TK actions)
8. color balance for the center part, as it was too blue
9. curves adjustment for the center part, as it needed more contrast
10. added glow (check out my glow tutorial)
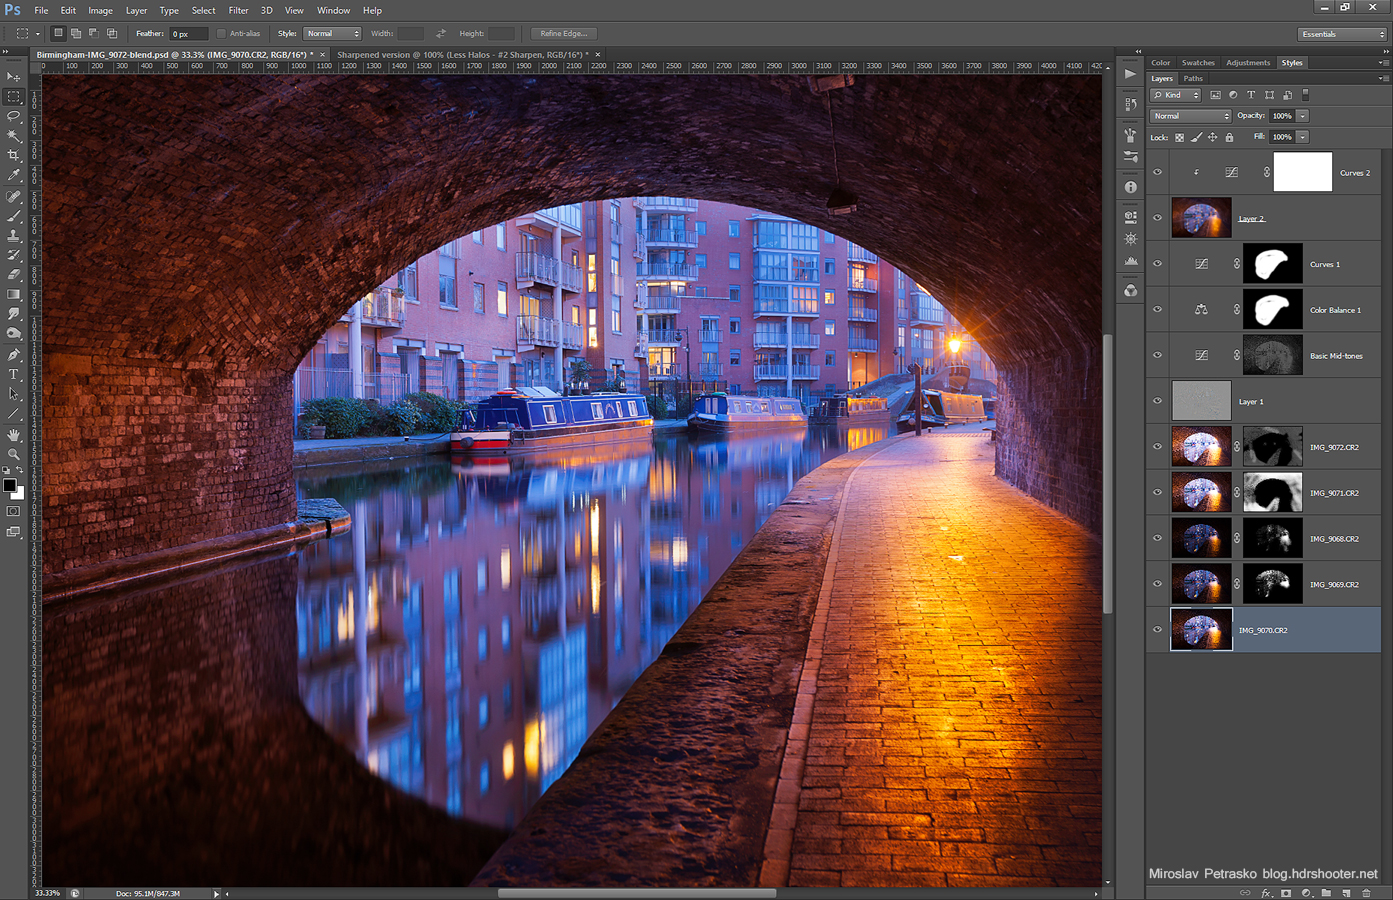
and that’s all. As you see, not every image needs a ton of layers :)
Continue to the full post to see the original 0EV exposure.


Leave a Comment