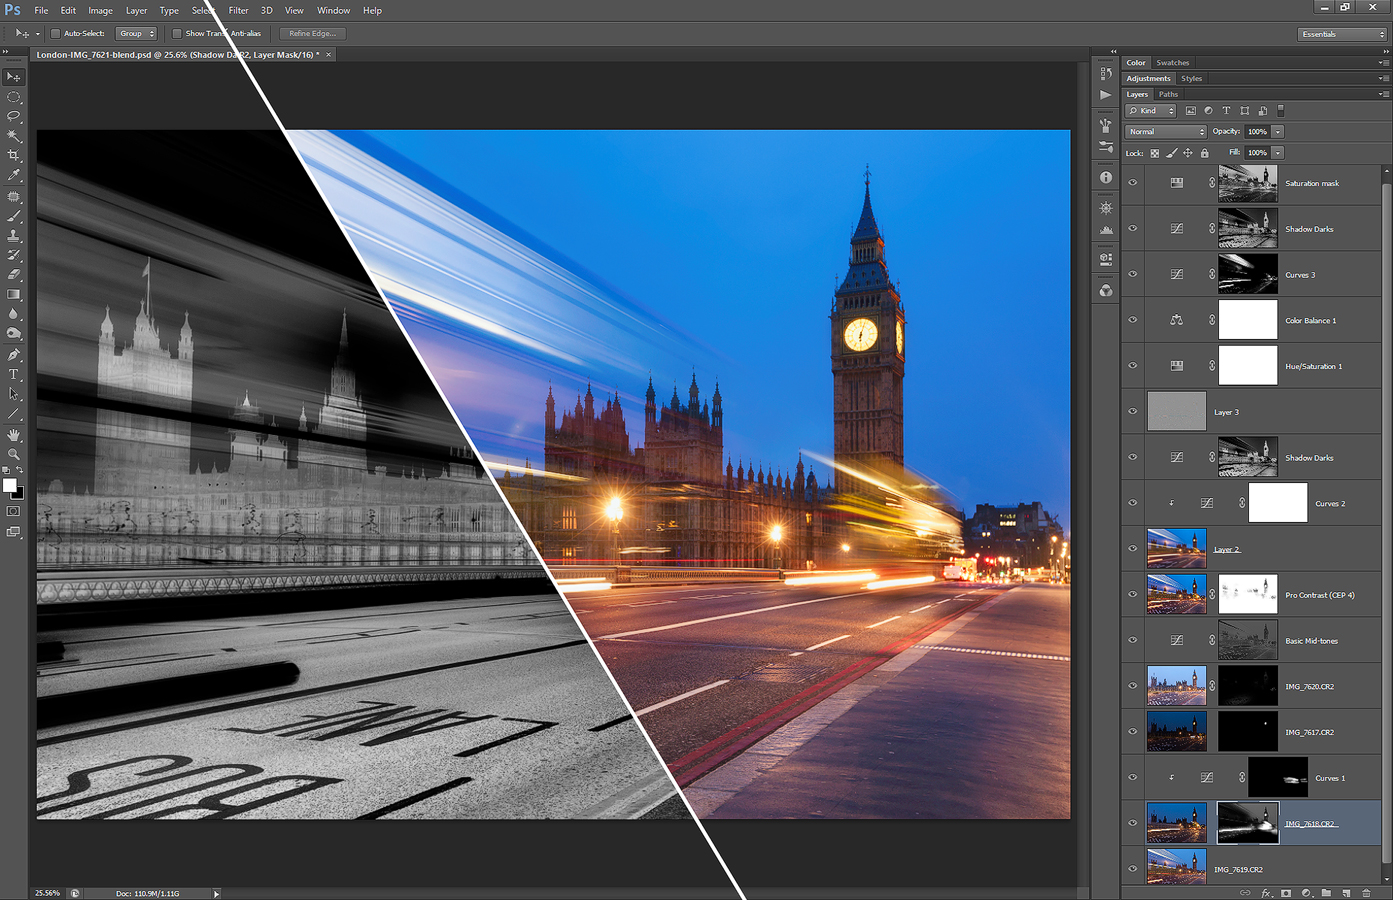
Another one of the before/process/after posts. This time it’s one from the London photos. And to give you more info about what you see, here is a complete description of the layers I used to create this photo.
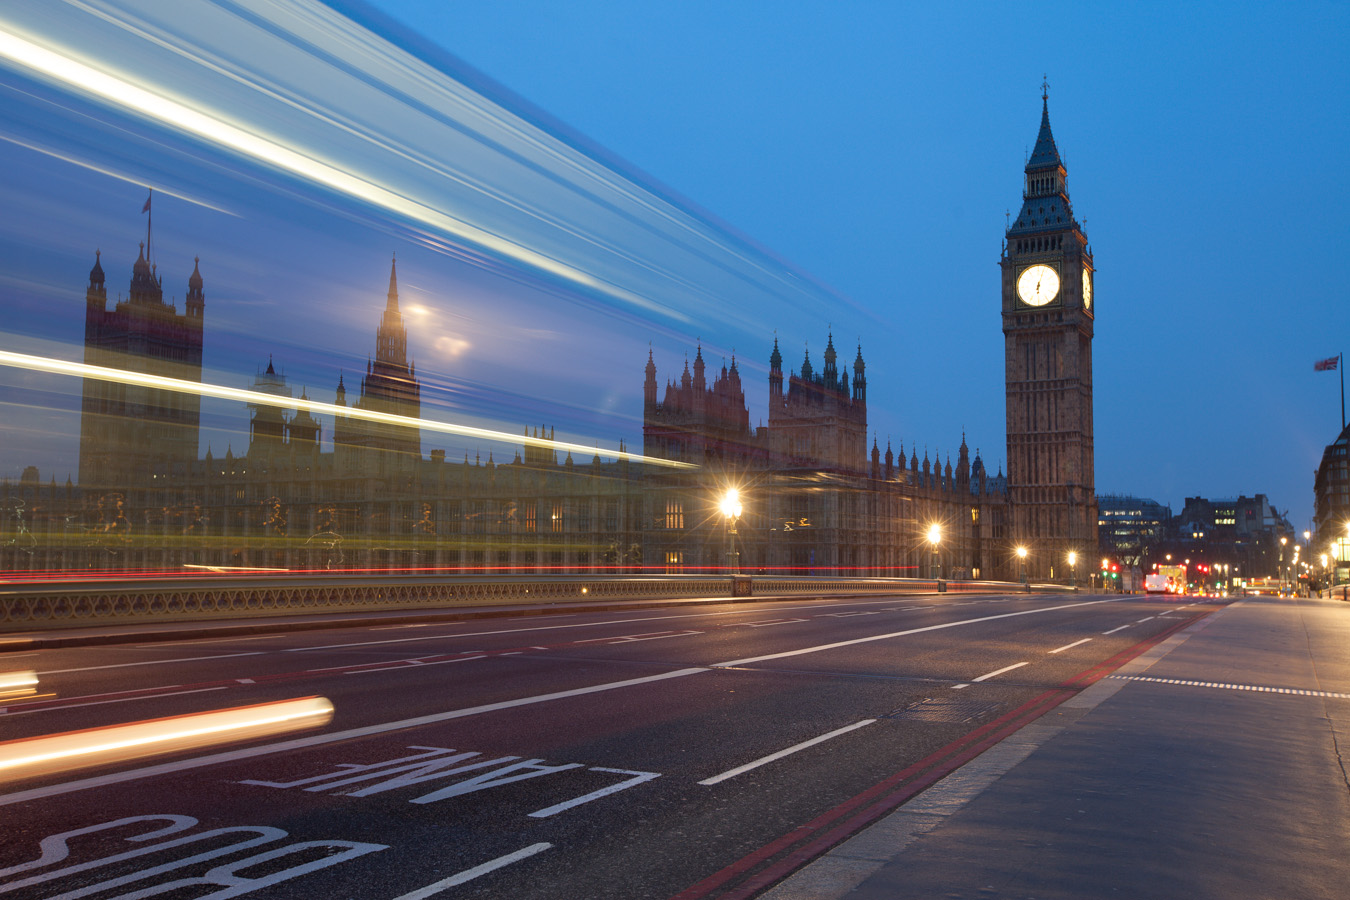
So first the finished photo:

Before I imported the files into Photoshop, I did few tweaks in Lightroom. I corrected the white balance, added a little noise reduction, turned on lens correction and removed chromatic aberrations.
The processing in Photoshop, the layers from bottom to top were:
1. +1ev exposure used as base for the photo
2. 0ev exposure used to darken the sky and to blend in the second copy of the bus
3. curves affecting only the layer underneath, to brighten the bus a little so it fits into the photo
4. -2ev exposure to darken the clock on the tower
5. +2ev exposure to brighten few parts of the photo
6. contrast added to basic mid-tones mask
7. color effex pro contrast to recover a little of the local contrast
8+9. blurred layer to add glow and a layer to lighten the effect
10. brightened the overly dark areas
11. added more detail using high pass sharpening
12. hue/saturation to correct the sky color
13. color balance to correct and overly purple tint
14. curves to brighten the lights of the buses
15. once more brightened the dark areas
16. toned down the saturation on the mostly saturated parts
You can also see a part of one of the luminosity masks here (I combined two screenshots for this).
And here is the original before photo.