Creating a B&W photo is simple. Creating a good B&W photo is hard. And to make your life easier, there are many plugins that can help you. Nik Silver Efex is one of those. As you can see on this blog, I prefer color photos to B&W. Not that I never try B&W photos, I just don’t usually post them.

In its core the plugin is very simple. You have three basic sliders, Brightenss, Contrast and Structure. They all do exactly what they say. Changing these values will change the way the B&W photo looks. Additional you can use control points to affect a certain part of the photo, color filters which simulate that you were holding a color filter in front of you camera, add a look of different film types, vignette, toning and few more. You get everything you need to make your work easier.

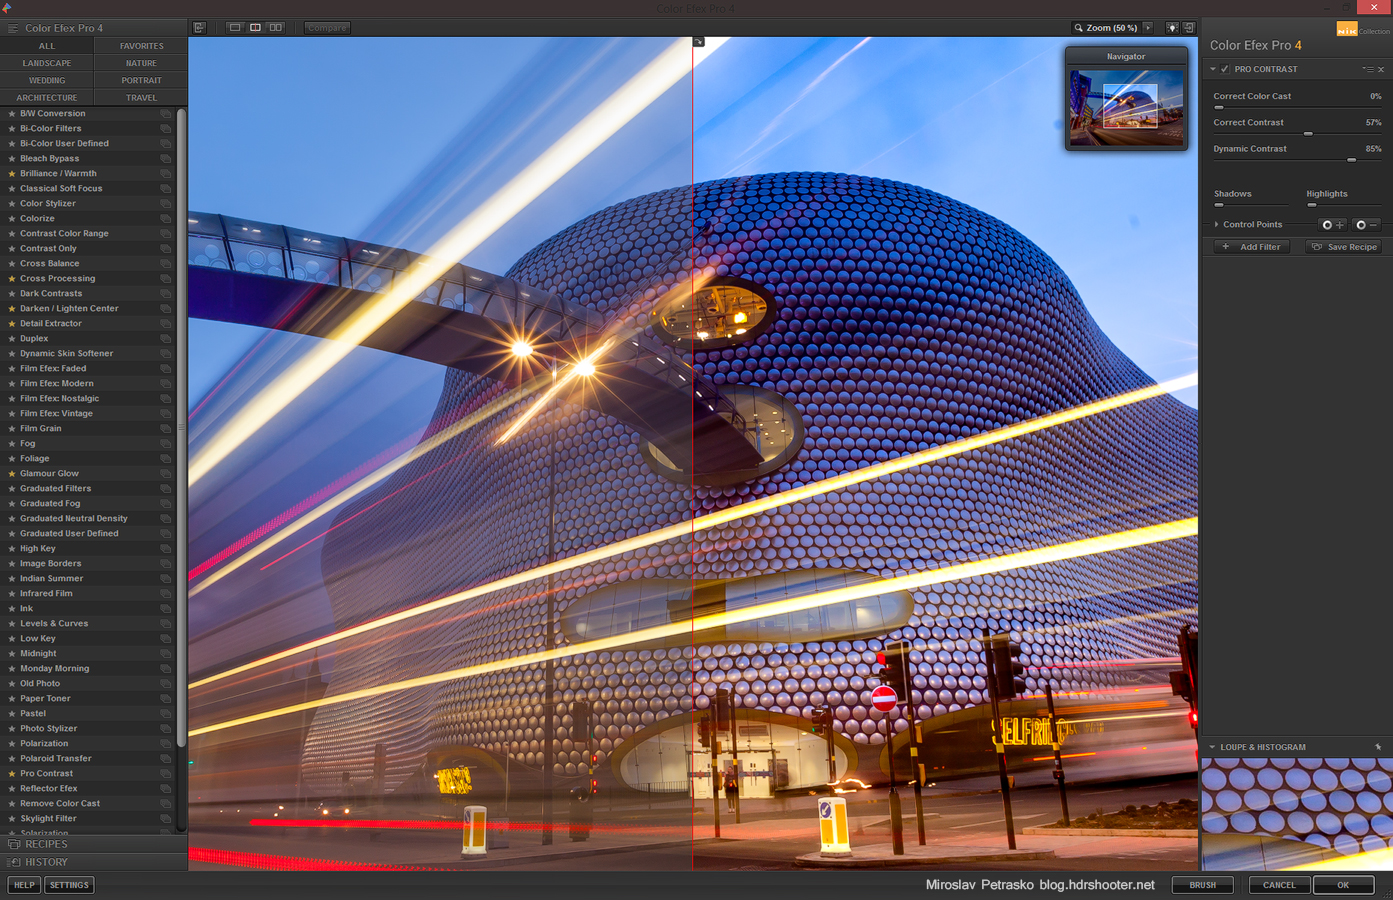
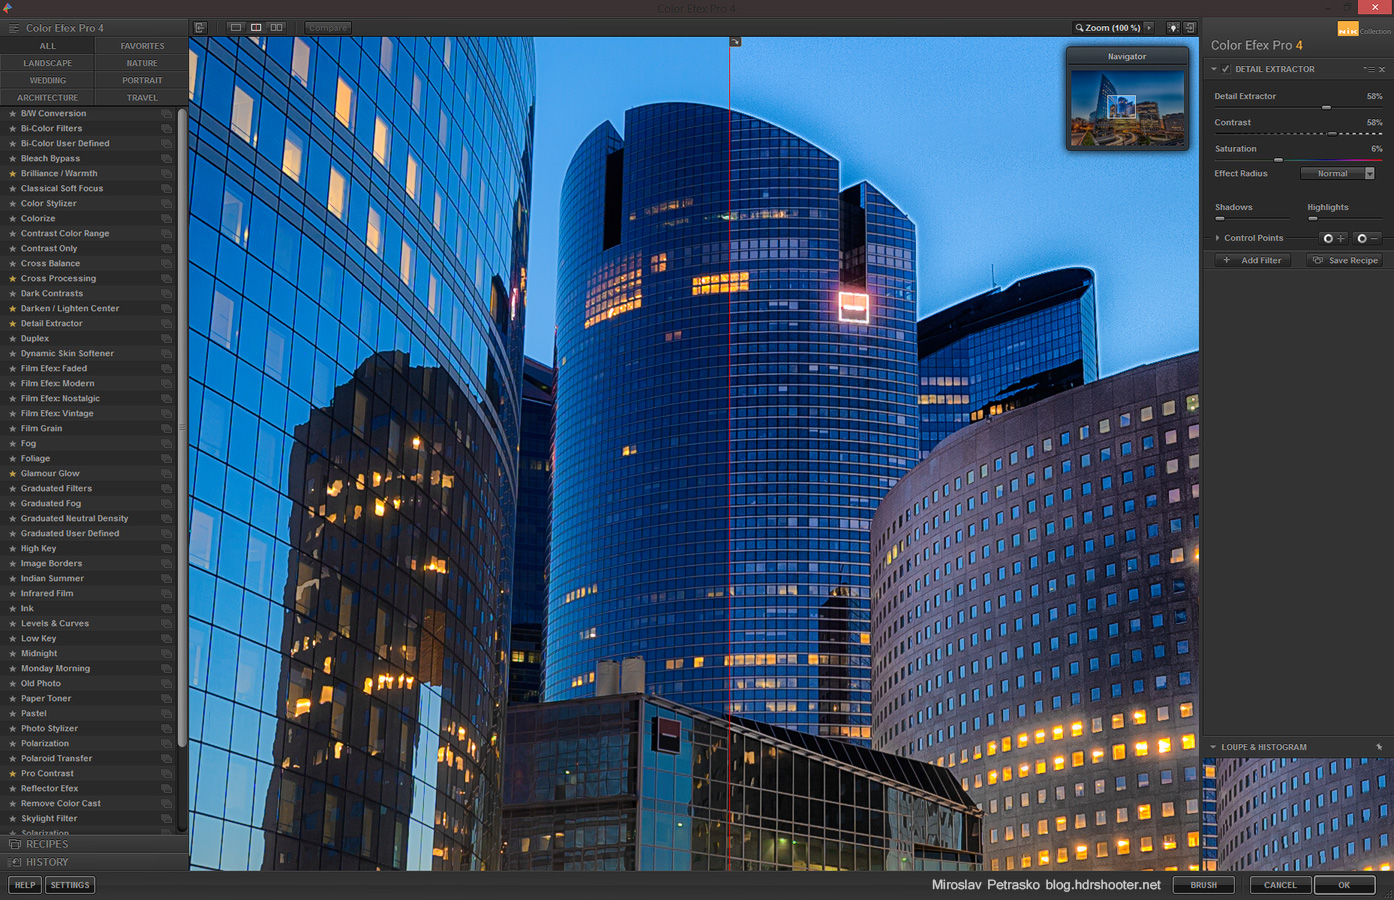
Also if you are used to Nik Plugins, like Color efex, working with Silver efex it very easy. They both share the same approach and interface.

As I mentioned I don’t do many B&W shots, but sometime I use a B&W version in my post-processing. I use it to add more detail and structure to my photos. I create it on a new layer and then change it into overlay, soft-light or luminosity blending mode.

Nik Silver Efex comes with a lot of different presets, so I’m including here a few of my favorite ones
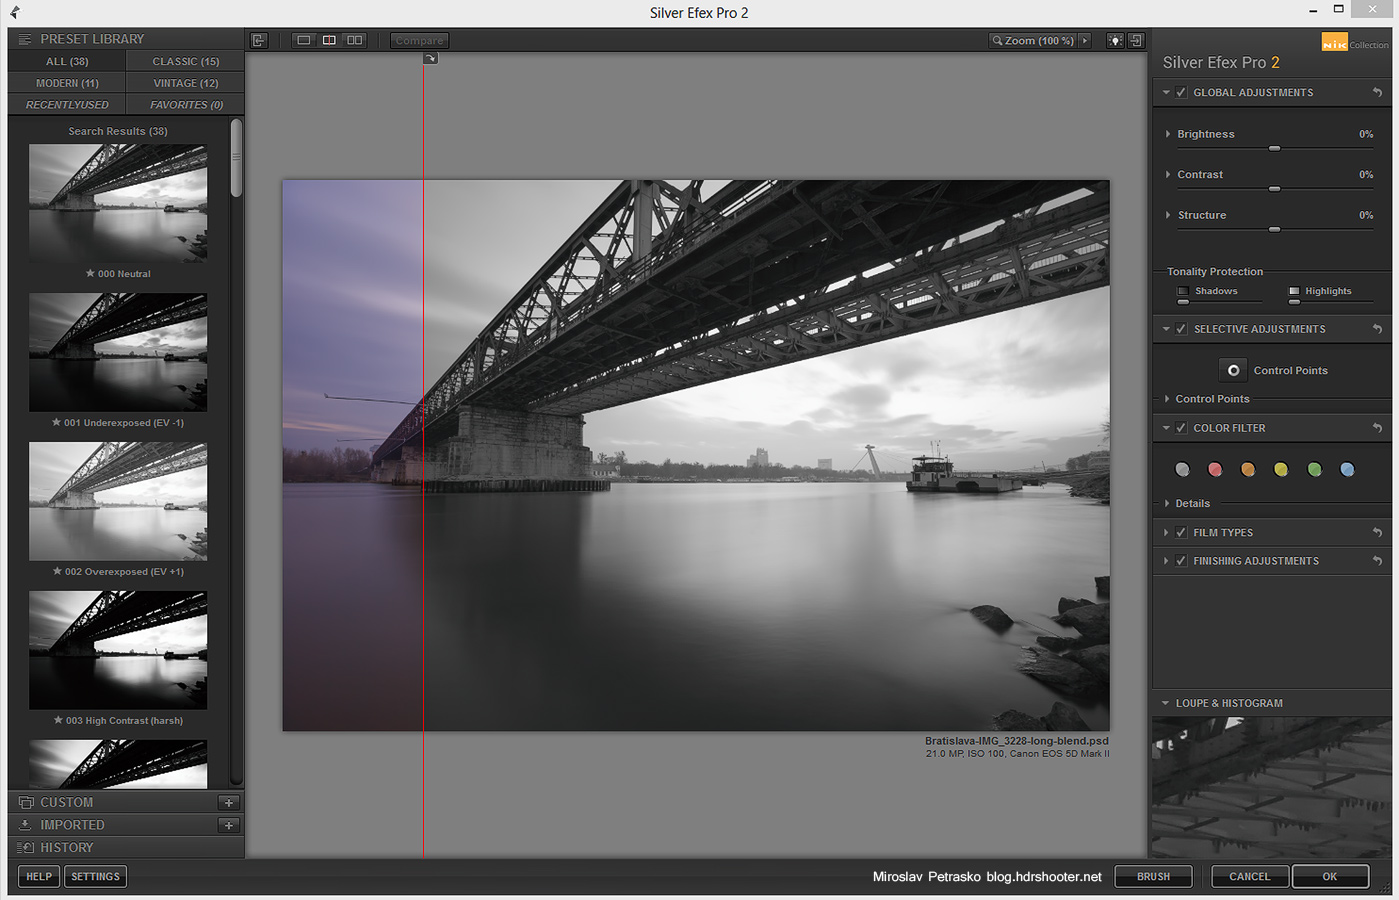
Neutral

This is a very good place to start. It gives you a nice even photo.
nik-silver-neutral

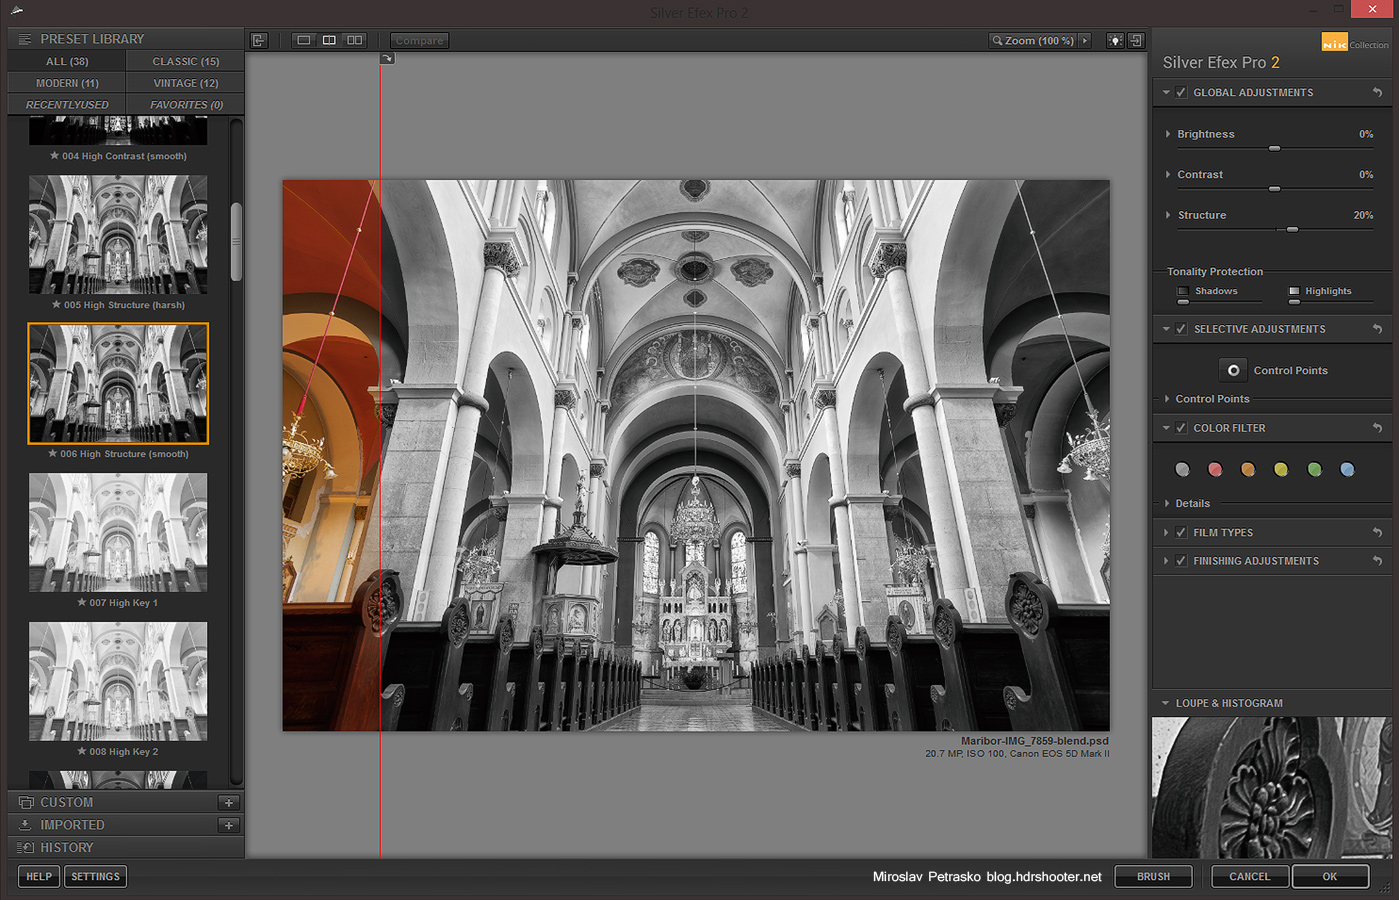
High Structure (smooth)

My go to preset in Silver Efex. Especially when I want the B&W version to be used to add more detail to a photo. Just never ad noise in that case.
nik-silver-structure

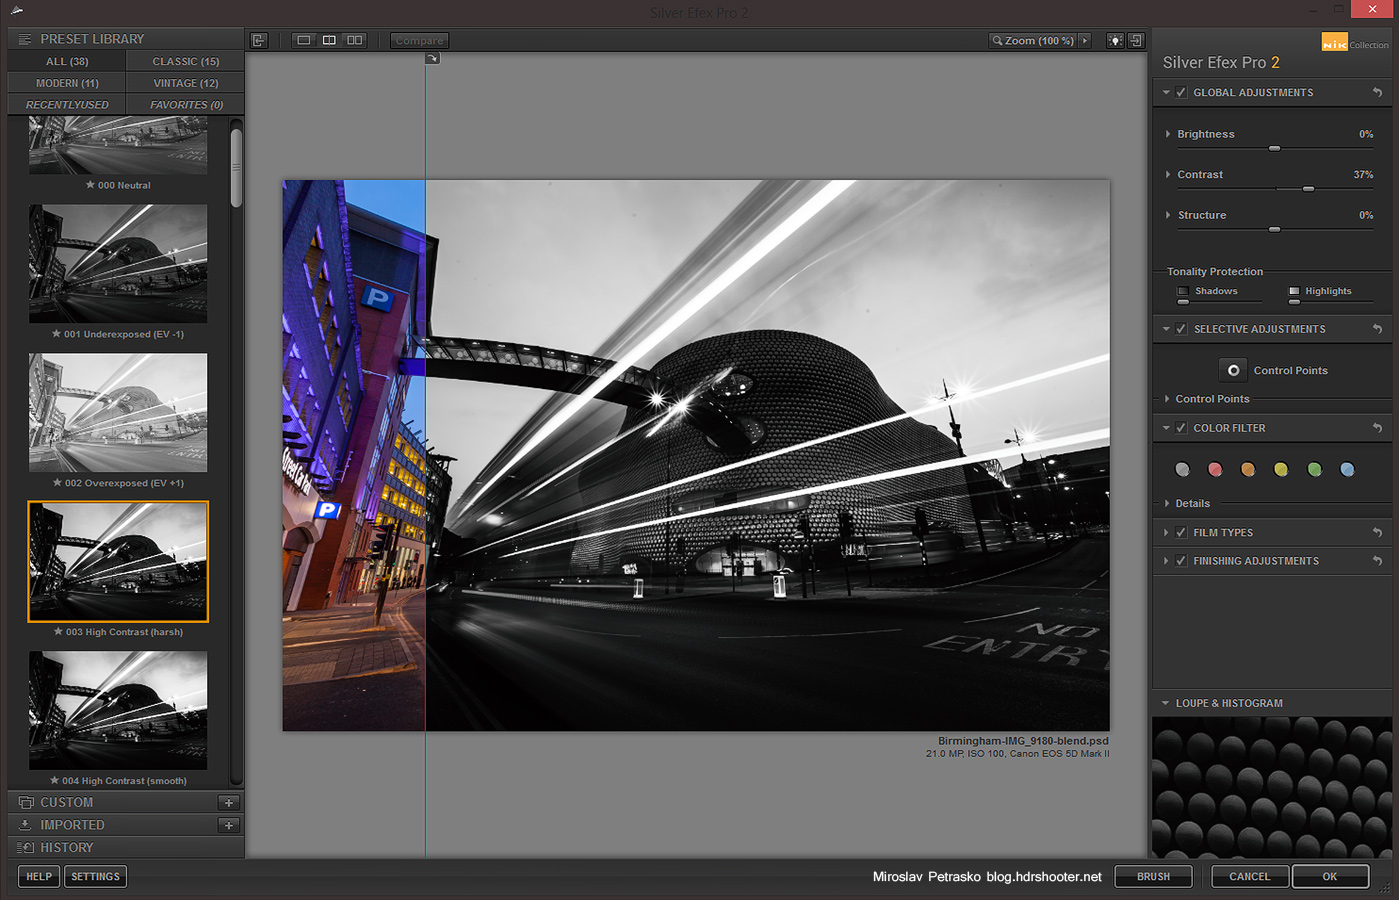
Hight contrast (harsh)

This wan gives a darker, stronger feeling to your photo. Great for street photography.
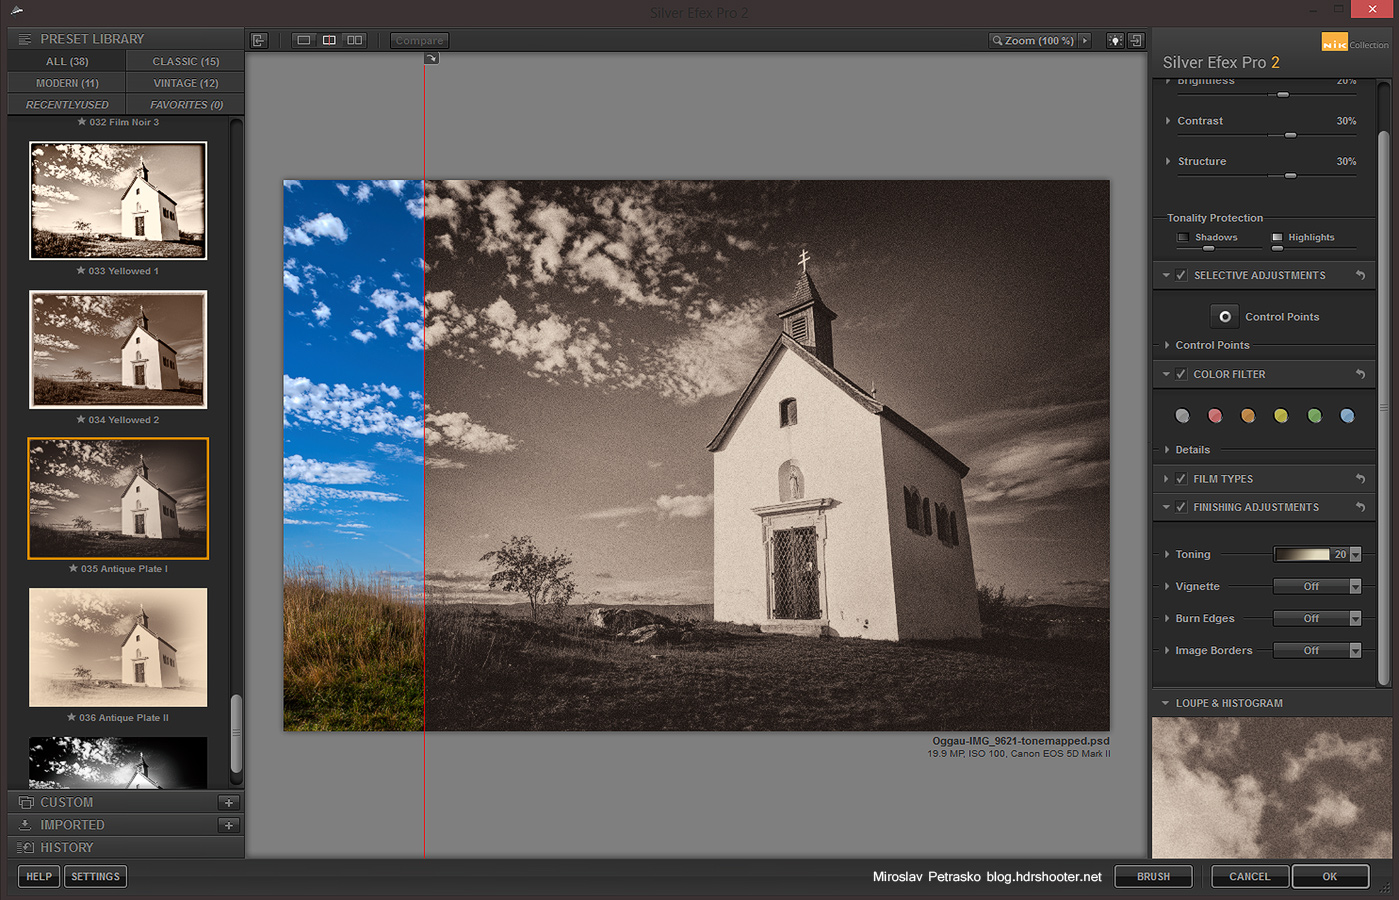
nik-silver-contrast

Antique Plate I

A little more vintage feel here. It also adds a lovely color cast to you photo.
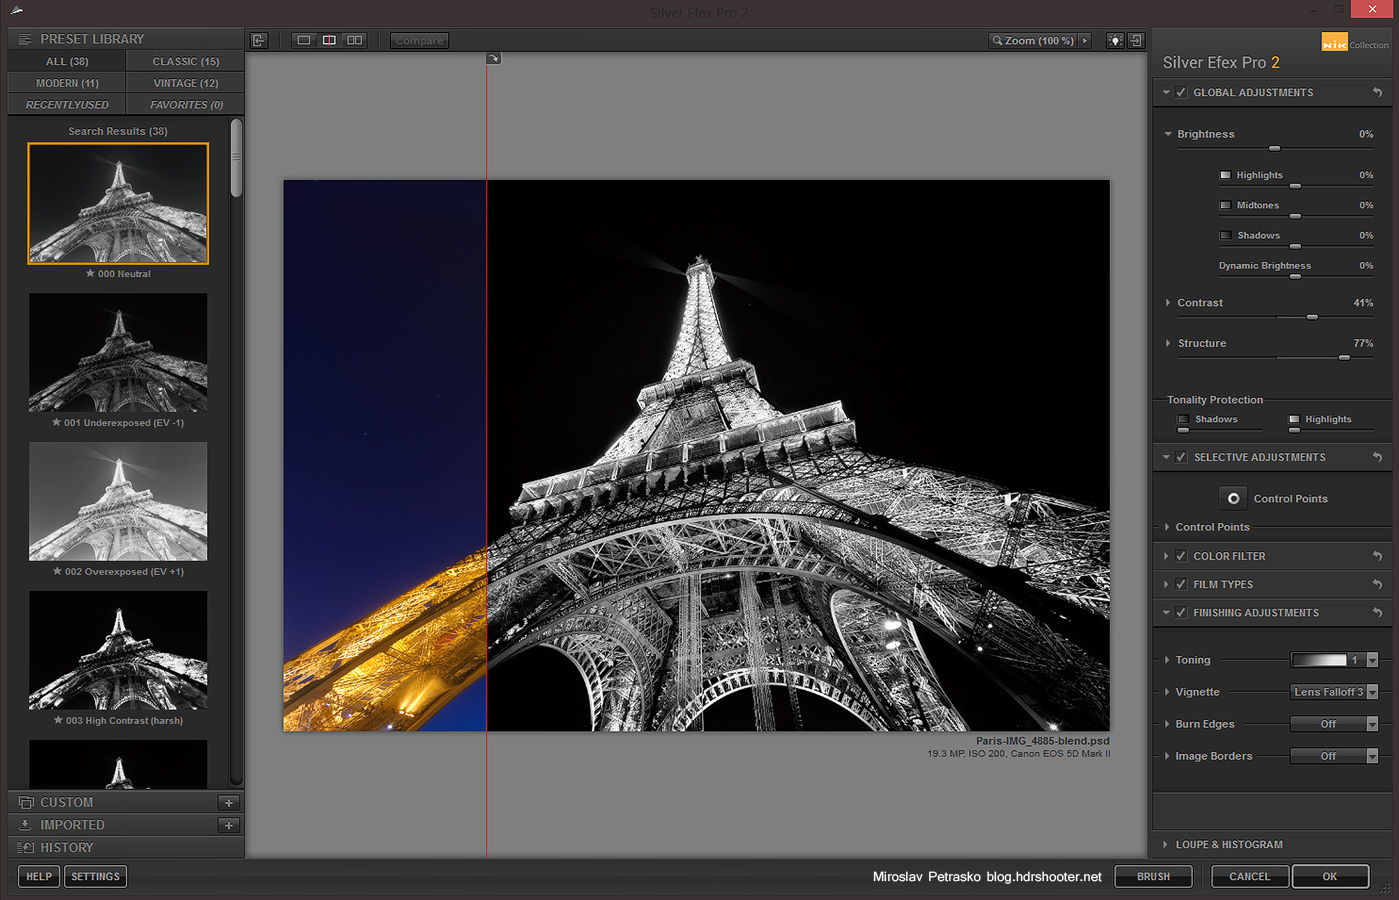
nik-silver-antique

Custom settings

Probably when you start using it, you will end with choosing your own settings. Here is a how this photo of Eiffel tower would look, if I chosen to go with a black and white version.
nik-silver-eiffel
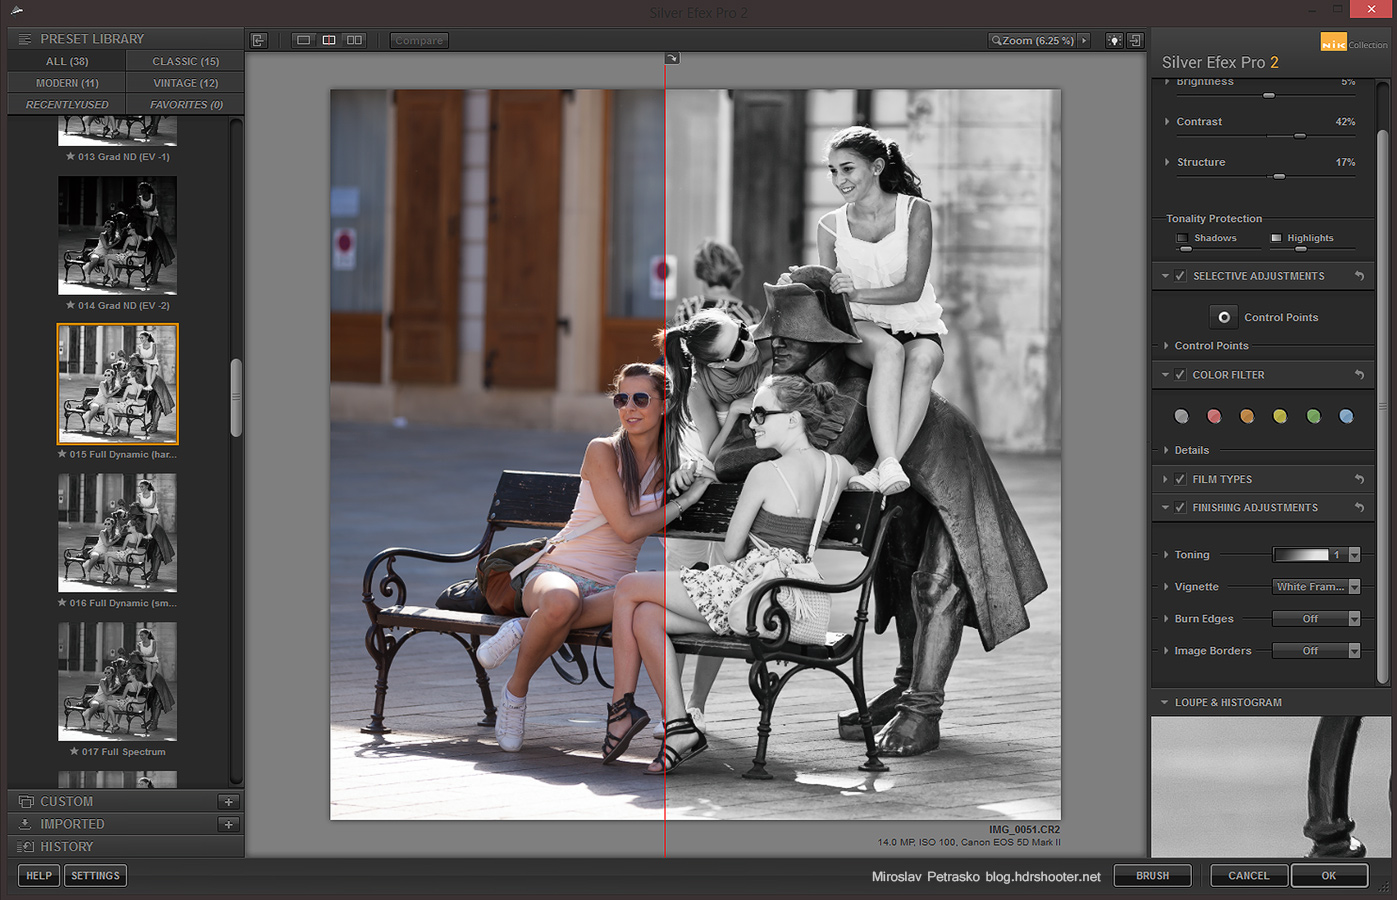
And here is one street shots, only edited through Silver Efex Pro 2
nik-silver-street
Overall this plugin will give you better results in B&W conversion than directly Photoshop, and it also gives you the ability to tweak it, without a huge knowledge of Photoshop.

For additional information on Silver efex, you can visit the Nik collection site here http://www.google.com/nikcollection/. Google does not offer any discount codes there, but if you look around, you maybe find one of the old ones, and can get the collection for a little cheaper :)

View all my other reviews here.

If there is one essential plugin for Photographers, I think this is the one. Color efex from Nik (now a part of Google) is a huge collection of filters, each one with its own set of parameters. Just by using it, you can create a lot of stunning looks, and also correct many photography problems. To go through all the available filters would make this review huge, so I will go through my favorite ones, that help me the most in my photos.

Pro contrast

This is the most useful one. It can correct color cast, contrast and also add more dynamic contrast, which created more detail and local contrast in you photo. It also gives a certain pop your photos, so they just look better and catch the viewers eye much more than before.
nik-color-pro-contrast

Detail extractor

Can add crazy amount of detail to your photo. I’am always very careful with this one, as it can easily be overdone. But when you need to pull out detail from shadows, this filter will help you (just don’t use it on object edges).
nik-color-detail

Glamour glow

This is primary a filter for portrait photos, but it can also be used for landscape shots. Especially fluffy clouds looks better after this is applied. It gives a glow and contrast to everything and you can also choose the temperature of the glow.
nik-color-glow

Darken/Lighten center

Creates a vignette around the photo, but also brightens the center. This is currently my favorite way to add a vignette. Adding a vignette can help guide the eyes into the center of the photo, so making it more interesting.
nik-color-darken

Cross processing

Cross processing simulates an effect from analog photography, where chemical solutions intended for different types of films were used to develop the photo. This creates a color shift in all color channels. There are multiple color shifts available and and you can specify the strength used.
nik-color-cross

Brilliance/Warminth

This one adds color. And it you push it into higher settings, you will see colors you didn’t even know were in your photo. Again, should be used with lower settings, not as in this example screenshot.
nik-color-warmith

Sunlight

Fills you whole image with light. It really feels like if you took your photo during a very sunny day. It can help you  a lot when you have taken your photos during a grey, very cloudy day.
nik-color-sunlight

Polarization

This one simulates the polarization filter that you attach to your lens. You can specify the rotation and strength, and it will saturate and darken all the blue areas in you photo.
nik-color-polarize

Indian summer

Change your summer shots into autumn shots. That’s exactly what this filter does. It takes all you green areas and changes them into yellow, orange or red ones.
nik-color-indian

Tonal contrast

Tonal contrast filter created a lot of local detail. You can specify how much the highlights, mid-tones and shadows are affected. This one can get you that grungy HDR look.
nik-color-tonal

Additional you can use control points, to specify areas where the effect is used/not used. This is very hand if you don’t want to mask the layer with the original picture afterwards. It can help you to be faster in your processing of photos.

Color efex also always creates a new layer on which it applies the filer, which is very hand if you want to use it only on part of your photo. But be careful that you have no selection made, as that will make the effect only on the parts of the selection. Also if you want to have it effecting all layers, create a merged copy first.

Overall Color efex is one of the best plugins for photography editing you can get. It makes the work faster and easier. The only thing I don’t like, is that the Color efex window always wants to be in focus, so it forces you to look at progress bars. If you use it a lot, this can be so irritating. But that’s only a minor issue and it does not effect the performance of the plugin in anyway.

For additional information on Color efex, you can visit the Nik collection site here http://www.google.com/nikcollection/. Google does not offer any discount codes there, but if you look around, you maybe find one of the old ones, and can get the collection for a little cheaper :)

View all my other reviews here.

And here are few photos I used this plugin on. You can actually say, I used it in almost every single of my photos, in one way or another.
Easter Market
Summer colors
Bridges over Vltava

Oloneo Photoengine

I use multiple approaches and programs for my HDR processing and blending. One of my favorites is also the Oloneo Photoengine. As all HDR programs go, the results vary from photo to photo, but there are some points that make this one of the best programs to blend you photos. Except the last part, this review is also about HDRengine, which is a part of Photoengine.

Speed

This is the fastest blending program I ever used. You can see all the changes you do on the photo in real time, and once they are done, you can directly save the photo, without any additional time needed for processing.
Oloneo Photoengine

Sharpness of result

A lot of HDR programs can remove a lot of sharpness from the photo. In my experience Photoengine leaves most of the sharpness in tact. The only way I can get more, is if I blend the photos manually in Photoshop.
Oloneo Photoengine

Easy to use

This is my favorite thing about Photoengine. As I don’t really use presets that much, I really like that I’m able to get my result by using only one slider. Just by using the TM Strength I can get the result I need maybe 90% of the time. The rest of the time I only add more contrast and maybe change the white balance.
Oloneo Photoengine

Single Image processing

Oloneo Photoengine doesn’t care if you put in one photo or multiple, it will treat them all the same, and you can use all the tools in both situations.

Other HDR editing features

Among other notable features, is the Natural HDR mode, which will make your photo more realistic (especially it will remove over-saturated colors), Detail strength, which will add a lot of detail, and I think should be used very lightly and complete set of tools needed to correct the colors or colorize your photo. All this tools are great if you don’t plan to continue your edit in Photoshop, but I don’t use them that often.
Oloneo Photoengine

Photoengine vs. HDRengine

There is a second program from Oloneo, called HDRengine. All I mentioned until now is the same also for HDRengine, as that includes the same HDR editing parts. The difference between these two is, that Photoengine also includes two additions parts. They are HDR Relight, where you can combine photos of the same scene, with different light sources turned on. You can then control each light individually to create a final photo. The second addition is HDR DeNoise where Photoengine uses multiple photos of the same scene, taken with the same settings, to remove noise. This is different than normal noise reduction, and the results loose no detail in the process.
Oloneo Photoengine

There are few things I don’t like about Photoengine. I don’t like the way the file browser works, where you have to browse for the folders, instead just going up and down in the tree structure. Also if they included the double click on the setting name to reset it, would make the work much faster. Additionally in the blending, with some photos the algorithm can create halos or a bright stroke around the dark areas. As I said, it’s not perfect for all the photos, but no program is.

Overall I highly suggest you give this program a try. It’s one of the simplest ways to start with HDR and also creates one of the most natural feeling results from them all.

For more information about Oloneo Photoengine and HDRengine, please visit the Oloneo site.

View all my other reviews here.

And here are few photos where I used Oloneo Photoengine for the initial HDR blending.
Above Paris
Something green
The setting sun in Bratislava

You can find more information about Radian at the Kickastarter page or on the Alpine labs page. Radian can be bought directly from the Alpine labs page from here.

Radian by Alpine Labs – Review

Recently I received my Radian time-lapse panning device form Alpine Labs. This was my first Kickstarter backing, but despite few months delays, it arrived. I’m actually very glad I switched to Radian from the Astro (a similar device, also on Kickstarter) as that haven’t reached even production yet. After unpacking, I was very surprised how small and light the Radian is. You would think that it will not be able to move your camera at all. But it does.

Here is what everything was in my package. I went for the Vertical Radian package, as I also wanted the L-bracket for shooting vertical sequences.

IMG_9384
IMG_9410
IMG_9404
IMG_9403
IMG_9400
IMG_9398
IMG_9395
IMG_9389

I was a little dissapointed, that I could not make a bulb ramping sequence with just the cables in the box. I had to order another cable that was needed. I probably have missed this in the description before. But as it is a very cheap cable, it’s not such a problem.

Also what I noticed right away, is that there is nothing between the Radian and your camera. If you ever looked at any quick release clamp which attaches to your camera, you would notice a small rubber or different area in the middle, so you don’t damage your camera. And here, as the Radian is plastic, it’s now very easy to scratch the top of it when you attach the camera. On my, the first scratches appeared almost immediately.

So I took the Radian to the city to take some photo sequences, I got this:

As you can see, the Radian works exactly as suggested. You get a very nice panning motion and also vertical movement works as it should. I tried it with a Canon 5D mark II and a Canon 16-35mm F2.8 lens and had no problems with the camera weight.

One thing I didn’t liked is, that the Radian is not stable when it’s off. I mean, that when you put your camera on the Radian and touch it, it wobbles. It makes setting up the camera a little cumbersome. You will also notice this very easily when you try to move your setup to a different location. I really suggest removing the camera from top of the Radian, as the movement will probably destroy the internal gears very quickly.

Other than that the hardware looks nicely made, with no visible defects or problems. The on/off switch could be a little bigger, but that’s my personal preference.

On the software side, I tried it both on an iOS and Android device. Both work fine if you don’t forget to set your device to maximum volume (Radian communicates via sound). All of the time I was able to upload the program on my first or second try. The software is easy to use, but few buttons could be bigger. Even on my HTC Sensation, which is not a small phone, I had sometime problems with hitting exactly what I wanted.

Radian App
Radian App
Radian App
Radian App

It’s very nice that the app tries to show you the progress of the Radian. It’s only an estimate, as it is not connected and it’s usually few seconds off from what the Radian does. In my experience this worked nicely until I switched to a different app on my phone. After that the app reset to the default settings and it forgot about the time-lapse I was shooting.

Pros:

– light device, which can move a lot heavier equipment
– horizontal and vertical movement
– long battery life and can use external battery power
– easy to setup with the companion app
– cheap compared to similar devices

Cons:

– easy to scratch
– not stable when turned off
– the app could be better in few cases

Conclusion

Overall until now I’m very pleased with the device. Despite the few small bugs, it does exactly what it should.

As all photographers, I also always search for the best camera bag. I already tried few of them and my latest one is the Sling-o-matic from Think Tank. I heard a lot of good about the Think Tank bags, so I thought I give them a try.

The Sling-o-matic caught my eye, as I’m not really a big fan of backpack. I know that for long trips, the backpack is the best solution, but that’s not what I needed a bag for. I needed something which I can use for shorter, few hour trips, usually when I’m visiting a city. For instance a sunset shooting. So as I said, it caught my eye, as i wanted something what I just can hang on one shoulder and it still is comfortable to carry.

sling-1
sling-2

Before I bought this bag I researched it quite a lot online. The reviews were overall very positive, with very few negatives. I think it is a little strange to see people complaining about stuff, which has nothing to do with the bag, or that have been clearly stated in the specifications (like, complaining that a 17 inch notebook does not fit into a bag designed for a 15 inch notebook, or complaining that the bag fits too much and then its too heavy), so I will try to stay with the bag.

The bag on its own looks very good. The simple square shape without any overly visible branding or other flashy stuff looks very pleasing. It does not scream that its a camera bag. From outside, the bag looks quite small, but quite big when you have it on your back. That is mostly due to the not really traditional shape. You also get a lot of dividers (more than enough) and chest, waist and tripod straps. The inner space is much bigger than one would expect. If I put my 5D with the 24-70mm F2.8 attached, then add the 70-200mm F2.8 IS II and the 16-35mm F2.8, I still have around half of the bag empty. If I compare it for instance to the Lowepro Fastpack 200, which is the same owerall size as the Sling-o-matic, the Fastpack would be already full with such a load.

sling-3

My impressions with the bag in the field are very good. The first try was strange. The bag sits on the back differently than other bags and backpacks I had before. It takes some time to get used to it. But I’ve been using it now for over 6 months and it became very natural. The size of the bag is also perfect for traveling. It adheres to the airline restrictions and it fits nicely under the seat in any airplane.

One of the things I was skeptical, was the way they advertise how you pull out your camera. I mean the way you shift the bag in front of you an pull the camera out. But after about a hour of usage, I started doing this without even thinking about it. It was so natural. It works also great when you are changing lenses and need a place to put down your lens. Only issue is when the bag is not evenly weighted down. Then it can distort a little, which make it harder to zip it up again. This feature helped me many times, when I had no place to put the bag down.

I have the Sling-O-matic 30, which is the biggest version. It also has a place to store a 15 inch notebook. I tend to store my tablet there, and few times I completely forgot that I had it with me, as you don’t feel it at all.

sling-5
sling-4

One issue that a lot of other review mentioned, and I noticed also quite quickly, is the absence of usable small pockets. There is one which can be used for memory cards and identification documents, but you cant fit much more into it. If you have stuff like remote, bubble level, filters and similar, there is no real space for this. You can put it into the main compartment, but then isn’t very hard to find them again. As the whole inner area of the bag is covered by a Velcro surface, I will try to correct this by finding a smaller bag, that can be attached onto the inner side (haven’t found one yet).

Another thing that is not very natural, is having a tripod attached to the bag. As it is to the side, it pulls the whole bag to that side. I usually don’t attach it and just carry it in my hands. There are also straps to go around your chest or waist, to keep the bag in place. This make longer trips easier, but they are in the way if you want to move the bag in front of you to pull out the camera.

Overall I think the bag is great. I been using it for multiple trips and I always get everything into it that I needed. As I stated, it’s not so great for hiking or any longer trips. As it’s not completely balanced, a long trip with it can cause back pain. The feature where you can change the shoulder you carry it on can help here, but only partially.

For more information on the bag, please visit the Think tank website.

View all my other reviews here.

Page 12 of 13« First ...10111213
FREE EBOOK!!!
Subscribe to my newsletter and get a free Capturing fireworks ebook. 
Subscribe