
Free HDR video tutorial

Free HDR video tutorial

MASTER EXPOSURE BLENDING

Find the best ones

Find the best ones

TOP PHOTOGRAPHY SPOTS

Free wallpapers

Free wallpapers

HIGH-RESOLUTION WALLPAPERS

From time to time I like to share with you the RAW images from one of my photos, and today is again that day. I share them mostly for those of you, who don’t have a high end 36Mpix camera, and you would still like to try your editing skill on a photo like that.

You can find this three raw files in this Dropbox forder, and download them right now. They are in ARW file format, which is the RAW format Sony cameras use.

As always, please take note that these are shared under the Creative commons license. You can share them and your editing result as much as you want, just please link back to this blog, and don’t use them commercially.

And here you can see what result I got from this RAW files, feel free to share yours on my Facebook page.

Long exposure Danube

When I shoot fireworks, I really like to plan it beforehand. Know when they are, where and have an exact spot, and composition in mind. This time, in this photo I took earlier this year, I was absolutely not prepared. I was at the Slavin memorial to take a few shots of the city, when fireworks above the castle started. It was quite a surprise. At the last minute I managed to get a usable view, and capture at least few shots. And here is one of them.

This is a single exposure, edited in Lightroom and Photoshop.

Unplanned photo

Technique: Oloneo Photoengine, Number of exposures: 1, Camera Model: Sony a7R + Metabones MkIII Adapter, Lens: Canon 70-200mm F2.8 IS II, Focal length: 85mm, Aperture: 5.6, Middle exposure time: 3.2s, ISO: 200, Tripod used: yes, Location: 48.152944, 17.099966

I added quite a few 21:9 wallpapers recently, but so there are some new also for more standard sizes, here are three new wallpapers in 1920×1200 and 1600×1200 resolutions. You can get them from the wallpapers page as always.

From the Alexander bridge 1920x1200Sunset horizon 1920x1200From a sunny day 1920x1200

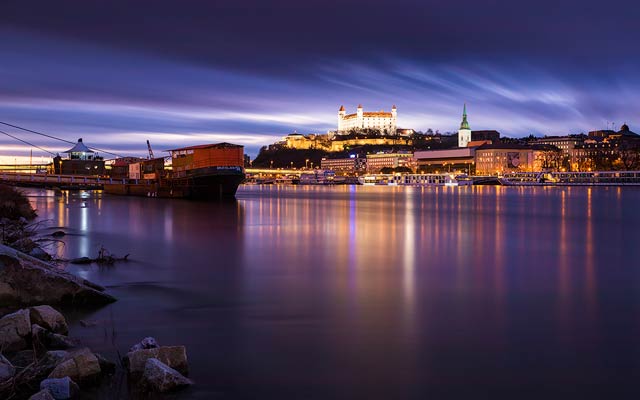
Just a simple photo for today, a classic reflection from the Strkovec lake in Bratislava.

This is a HDR from three exposures, created ion Oloneo Photoengine, finished in Photoshop.

Lake reflection

Technique: Oloneo Photoengine, Number of exposures: 3, Camera Model: Sony a7R + Metabones MkIII Adapter, Lens: Canon 24-70mm F2.8, Focal length: 54mm, Aperture: 5.6, Middle exposure time: 15s, ISO: 200, Tripod used: yes, Location: 48.157639, 17.148792

I did few articles about Color Efex pro plugin before, but today, I will go through my most used filters from Color Efex pro, and will also try to explain why and when I use them. There are of course too many filters available in Color Efex pro, but I will stick to my most used here. There are also all the ones I have set in my favorite selection in Color Efex. So let’s go.

1. Pro Contrast

The most used filter by me, and probably by everyone who uses Color Efex. It can be used either to remove color cast from your photos (the first slider) or add more local contrast and detail into them (the third slider). It also allows for contrast corrections, but the doest not work for me that great most of the time.

I use it on most of my photos, as it gives them more pop, making them stand out more. One just can’t overdo it, especially on Dynamic contrast, as that becomes ugly quite quickly. Values around 30% work the best most of the time.

Color Efex
Color Efex

2. Detail Extractor

If you have a spot where you want to show more detail, or want to exaggerate the texture of an object, Detail Extractor is the filter for you. The best way is to use this effect on a duplicate layer, use more than you need, and then just add a layer mask and just brush in how much of the effect you need, and where you need it. Also don’t forged to add contrast (second slider) and also a bit of saturation (third slider). This is because detail extraction removes a lot of contrast and also partial the colors.

Again, it’s very easy to go overboard here, normally the default of 25% should be enough for most cases.

3. Brilliance/Warmth

This one is again used for multiple effects. One is to add more color to you photo, while doing it more subtly than just adding more saturation. Second is to change the overall warmth of the photo. It’s similar to white balance, but still quite different. It can be great especially for sunrise/sunset photos, where you want to get much more golden light from the sun.

Color Efex
Color Efex

4. Glamor Glow

While this is mostly for portrait photography, in landscape photos, glamor glow can be great when you apply it on clouds, especially white ones. It will make them look brighter and softer, exactly what you want from white fluffy clouds. I would suggest adding more saturation in this filter, as it defaults to -29% there and that can wash out the blue sky a bit.

5. Polarization

Same as a normal polarization filter you use on your lends, the polarization filter in Color Efex serves the same purpose. It darkens the sky and makes it a stronger blue color, and it removes overly bright areas by adding more color into them. Can be really helpful if you get a very dull photo and want to put more life into it.

Color Efex
Color Efex

6. Skylight Filter

This filter adds a lot of yellow light into your photos, so shifting mostly the white balance. It’s a bit like a simpler version of the Sunlight filter. It’s really great if you want to shift the colors more towards warm, and just changing the white balance doest not work for you.

7. Sunlight

Another great filter to use on sunrise/sunset photos. If you want to have your photos look like the scenery is filled with light. Together with Skylight and Briliance/Warmith, you can create a wonderful warm photo that just shines with light. And some of my most popular photos used this filter :)

And that’s all. I use few more, but very very rarely. These are really the ones I use the most.

FREE EBOOK!!!
Subscribe to my newsletter and get a free Capturing fireworks ebook. 
Subscribe