Free HDR video tutorial

Free HDR video tutorial

MASTER EXPOSURE BLENDING

Find the best ones

Find the best ones

TOP PHOTOGRAPHY SPOTS

Free wallpapers

Free wallpapers

HIGH-RESOLUTION WALLPAPERS

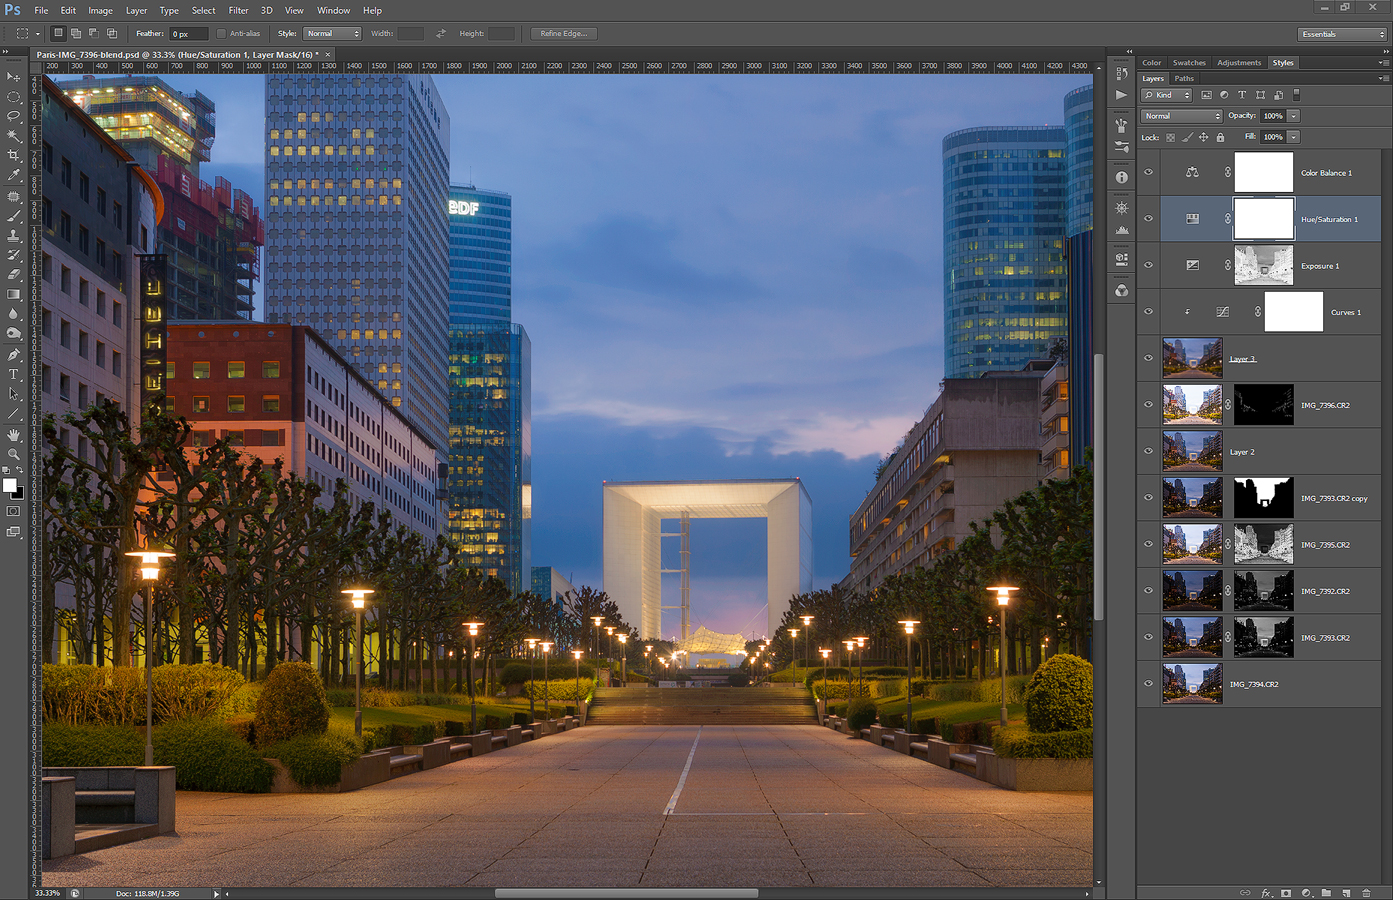
Tomorrow I will be back home from Prague, but until then, I got for you another process post for today. This time it’s a photo from a rainy day in Paris. So to get to this final result:
Returning to La defense

I did the following (layers numbered from bottom up)
1. 0EV exposure used as base
2+3. -1EV and -2EV exposure to darken the middle area
4. +1EV exposure to brighten the buildings
5. -1EV exposure once more, just for the sky (I didn’t like the result of blending)
6. retouched out the crane in the corner
7. used the +2EV to brighten few more dark spots
8+9. blurred layer and curves that brighten it to add glow to the photo
10. exposure to brighten the dark areas further
12. added a little saturation
13. pushed the color balance more towards green

LaDefense-process

Continue to the full post to see the original 0EV photo

And another photo from Castle ruins :) As this was what I visited in Austria, this is what I took photos off. This time it’s the Hinterhaus castle.

This is a manual blend from 5 shots. I wanted to have a nice foreground here, so when the wind stopped for a moment composed with the wall completely covered by plants in the foreground. At first I thought I would have to do a focus blend, but in the end using F22 was enough to get the whole scene into focus.
Castle walls

This post is for those who missed my two tutorial videos. They are not about how to edit photos, but about how to take them.

The first one is how you can use Magic lantern firmware on your Canon camera to get the brackets you need.

The second video describes different way you can take multiple exposures.

I hope you will find them booth useful :)

Of course when I already got on top of the Durnstein castle ruins, I had to take as many photos as possible. I just know I wont go back there that soon. So here is another one from there.

This is a manual blend from 6 shots.
Above Durnstein

And another process for a shot for you. This time it’s a blue hour photo from Prague. So to get to this result:
Passing ship

I did the following steps in Photoshop (numbered from bottom up)
1. 0EV exposure used as base
2+3. -1EV and -2EV exposures used to darken the lights and castle
4+5. +1ev and +2EV exposures used to brighten the foreground and to merge the lights from the passing ship
6. added detail using a high-pass layer
7. added contrast to the basic mid-tones
8. used Color Efex Pro contrast to give more local contrast to the image
9. used Color Efex Detail extractor to add more details to the buildings
10+11. blurred layer used to add glow to the image
12. brightened the dark areas of the photo
13. darkened the mid-tones using levels a little, to recover contrast

Prague-process

Continue to the full post to see the original 0EV image.

FREE EBOOK!!!
Subscribe to my newsletter and get a free Capturing fireworks ebook. 
Subscribe