Not the most beautiful photo of the Grande Arche, because as you can see, the weather was horrible. But as I don’t have any photos with good weather from there, this will do.
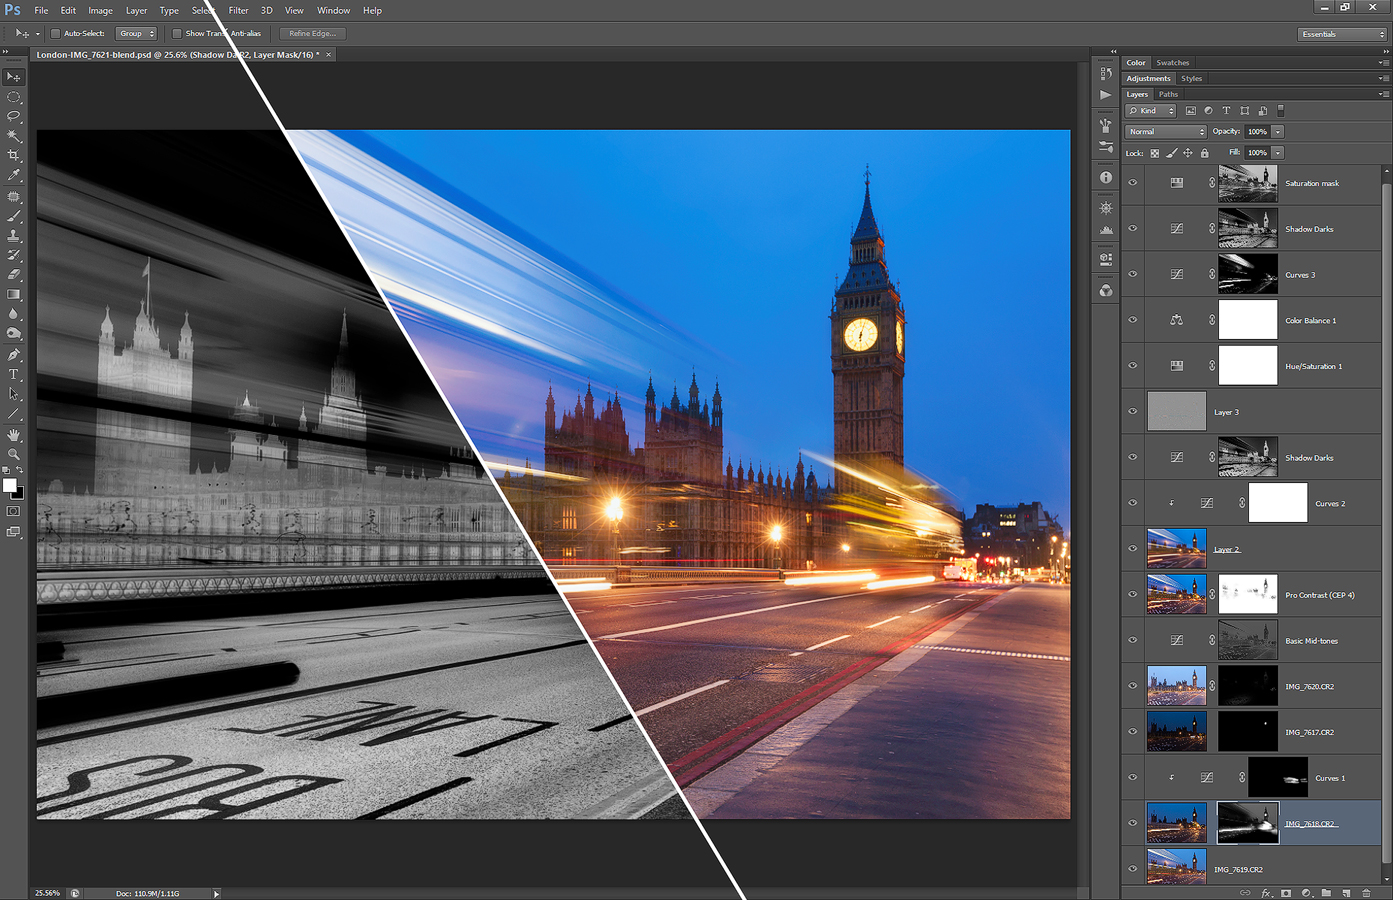
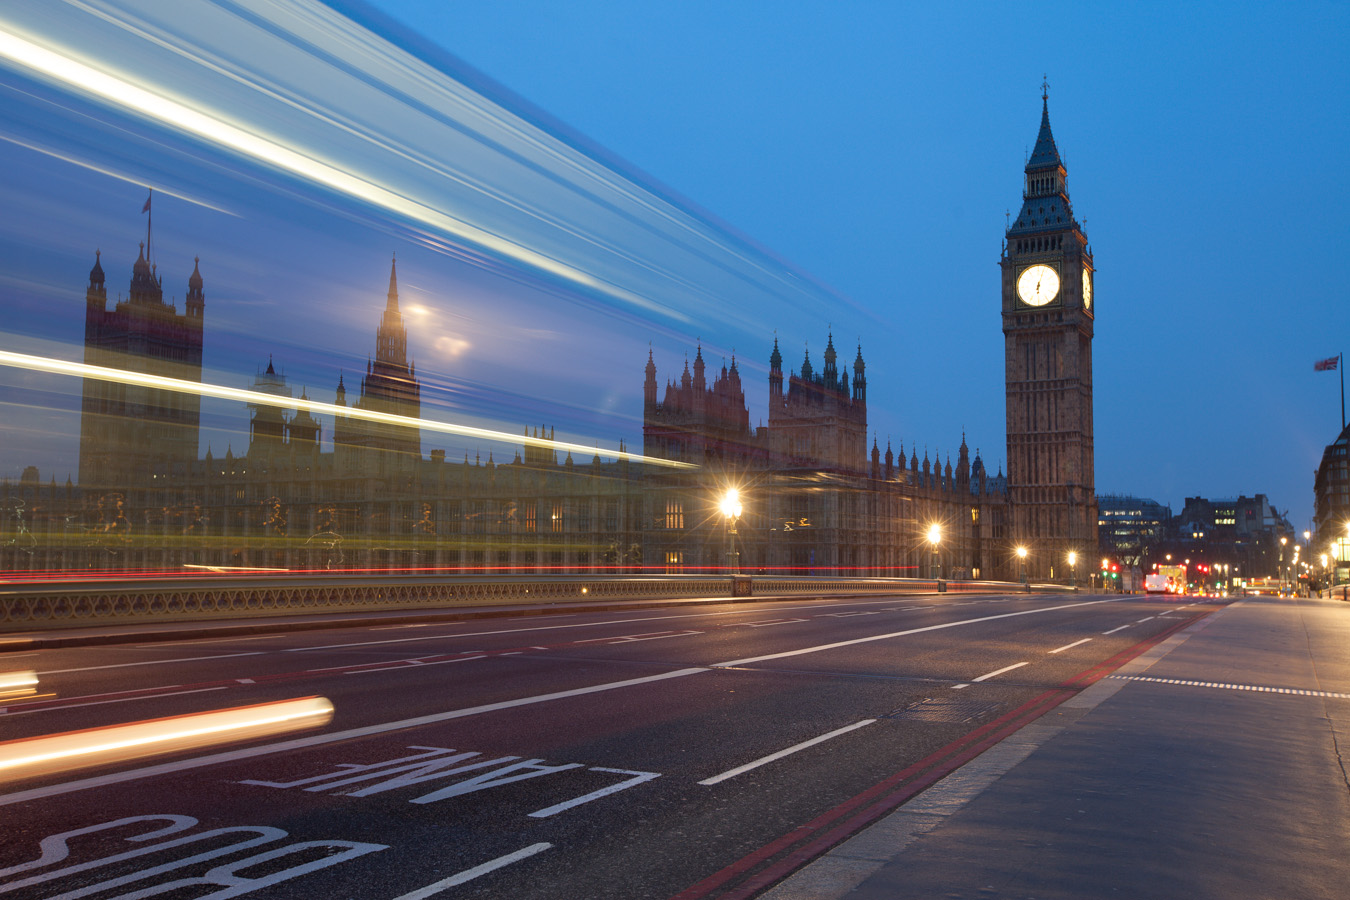
This is a HDR from 5 shots, created in Oloneo Photoengine, then manually blended with two of the original exposures.
I was just watching the anime series Death note (if you don’t know it, I really suggest checking it out :)) while I was going through my photos and trying to decide what to post today. And I came across this one, and it caught my eye. It’s a more random photo, I just took because I found the mask interesting. I took it by the Bojnice castle, as they had the ghost festival there when I was visiting. You could say this mask is not scary, but I would not want to meet someone wearing while taking photo late at night :)
This is a single photo edited in Lightroom and Photoshop.
I haven’t managed to visit the Les Invalides while I was in Paris, but at least I got a photo of it from high up, when I was at the Tour Montparnasse :)
Another one of the before/process/after posts. This time it’s one from the London photos. And to give you more info about what you see, here is a complete description of the layers I used to create this photo.
So first the finished photo:
Before I imported the files into Photoshop, I did few tweaks in Lightroom. I corrected the white balance, added a little noise reduction, turned on lens correction and removed chromatic aberrations.
The processing in Photoshop, the layers from bottom to top were:
1. +1ev exposure used as base for the photo
2. 0ev exposure used to darken the sky and to blend in the second copy of the bus
3. curves affecting only the layer underneath, to brighten the bus a little so it fits into the photo
4. -2ev exposure to darken the clock on the tower
5. +2ev exposure to brighten few parts of the photo
6. contrast added to basic mid-tones mask
7. color effex pro contrast to recover a little of the local contrast
8+9. blurred layer to add glow and a layer to lighten the effect
10. brightened the overly dark areas
11. added more detail using high pass sharpening
12. hue/saturation to correct the sky color
13. color balance to correct and overly purple tint
14. curves to brighten the lights of the buses
15. once more brightened the dark areas
16. toned down the saturation on the mostly saturated parts
You can also see a part of one of the luminosity masks here (I combined two screenshots for this).
And here is the original before photo.
And another early morning shot. This is really one of the best time to take photos. Just look at the walkway on the bridge. You never have it so empty like early in the morning :)
This is a manual blend from 4 photos, taken in London.
Subscribe to my newsletter and get a free Capturing fireworks ebook.
This website uses cookies to improve your experience. By continuing to use it, you agree with their usage. Accept
Privacy & Cookies Policy
Privacy Overview
This website uses cookies to improve your experience while you navigate through the website. Out of these, the cookies that are categorized as necessary are stored on your browser as they are essential for the working of basic functionalities of the website. We also use third-party cookies that help us analyze and understand how you use this website. These cookies will be stored in your browser only with your consent. You also have the option to opt-out of these cookies. But opting out of some of these cookies may affect your browsing experience.
Necessary cookies are absolutely essential for the website to function properly. This category only includes cookies that ensures basic functionalities and security features of the website. These cookies do not store any personal information.
Any cookies that may not be particularly necessary for the website to function and is used specifically to collect user personal data via analytics, ads, other embedded contents are termed as non-necessary cookies. It is mandatory to procure user consent prior to running these cookies on your website.