Free HDR video tutorial

Free HDR video tutorial

MASTER EXPOSURE BLENDING

Find the best ones

Find the best ones

TOP PHOTOGRAPHY SPOTS

Free wallpapers

Free wallpapers

HIGH-RESOLUTION WALLPAPERS

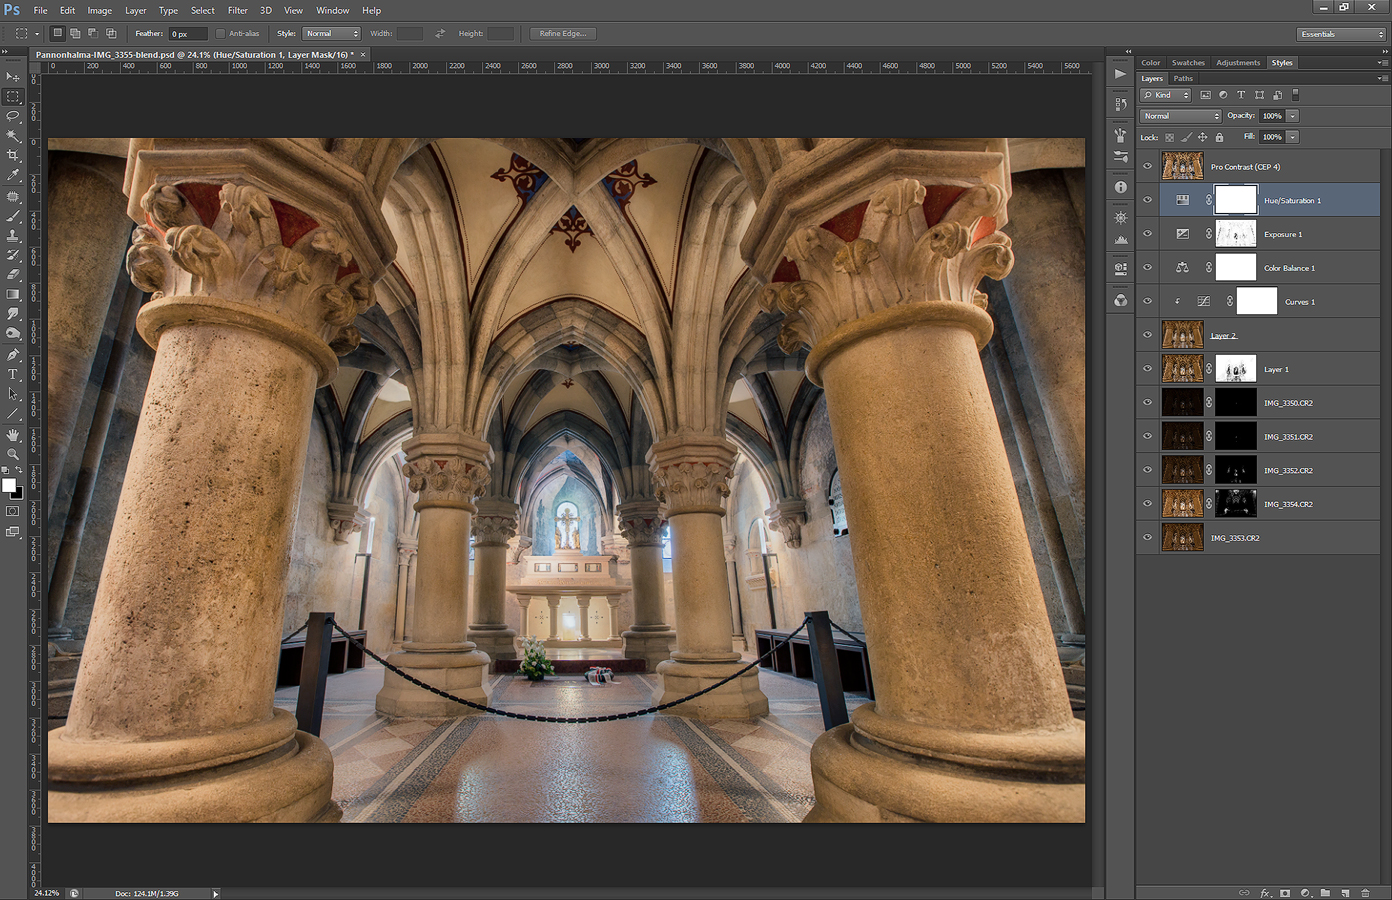
I forgot to post a process post last week, but here is a new one for today. This time it’s the Pannonhalma monastery crypt in Hungaria.

So to get to this result
Pannonhalma Monastery crypt

I took 6 exposures, just to be sure that the light are not overexposed. In the end I used files form -3 EV to +1 EV and had no need form the +2 exposure.

So in photoshop I did the following (layers numbered form bottom going up)

1. -1EV exposure
2. 0EV exposure to brighten few areas
3. -2EV exposure to darkend the ligts
4. -3EV exposure to darken the lights even more
5. -4EV exposure, created in Lightroom from -3EV, to darken few lights even more
6. Color Efex Pro contrast to brighten image and add more contrast
7+8. Blured layer and a curves layer to add more glow
9. Color balance to remove the yellow color cast
10. Added 0.7 exposure to brighten the image more
11. Added a little saturaton (around +15)
12. Pro contrast once more, there was still a little colorcast

You will also notice that I corrected the perspective using the Perspective Crop tool in Photoshop

Pannonhalma-Monastery-crypt-process

Continue to the full post to see the original -1EV photo, as that’s the one I started with.

Ok, I know it’s not called the Inception bridge (it’s called the Pont de Bir-Hakeim), but if you have ever seen the movie Inception, you know why it’s so much easier to remember it by that :)

I took this photo quite in a hurry one early morning in Paris, while I was on my way to a different location, but I just could not pass it without at least few photos. I got it a little of center, and even with a lot of corrections, it’s still a little off. But not so much that it cannot be shared :)

This is a manual blend from 5 shots, all blending just to brighten the area under the bridge.
The Inception bridge

And again something for those who don’t have a good camera, but still want to experiment with HDR. You can download the original raw files for this photo from here https://www.dropbox.com/sh/xeaj3in493k5kmu/FysTgnR8XW and try to edit them. Feel free to share you results on my Facebook page.

No contest this time, this time it’s just for the fun of post-processing.

You can also find brackets I shared last time in the folder “other” under the same link

Feel free to share you results on your facebook/flickr/blog, but please don’t forget to give me credit for the photo and link back here. And of course, please don’t use this photo for any commercial purpose (I’m still the author )

Have fun
Paris-brackets

As Louvre was closed off for a filming, while I was there, I had to be a little more creative with my composition. So I tried going a little more with and angle towards it :)

This is a manual blend from 5 shots.
Paris-IMG_7193-blend-sharpen

So hard to catch the blue hour sometimes. It passes so quickly. This one was actually just luck. I was just on the spot in the right time, with my camera in the bag.

This is a HDR created in Oloneo photoengine from 5 exposures and the result was blended with two of the original exposures in Photoshop.
Blue hour and the Chain Bridge

FREE EBOOK!!!
Subscribe to my newsletter and get a free Capturing fireworks ebook. 
Subscribe