Another week just passed, and again I’m getting to another process post. So as always I will show you how I edited one of my recent photos. For today I chosen this photo from Austria, from this stunning sunset at the Neusidler see. So to get to this final photo, I did the following
Crazy skies

As always I started in Lightroom, where I corrected the lens distortion and removed Chromatic aberrations. After that I exported all the files as 16bit Tiff files.
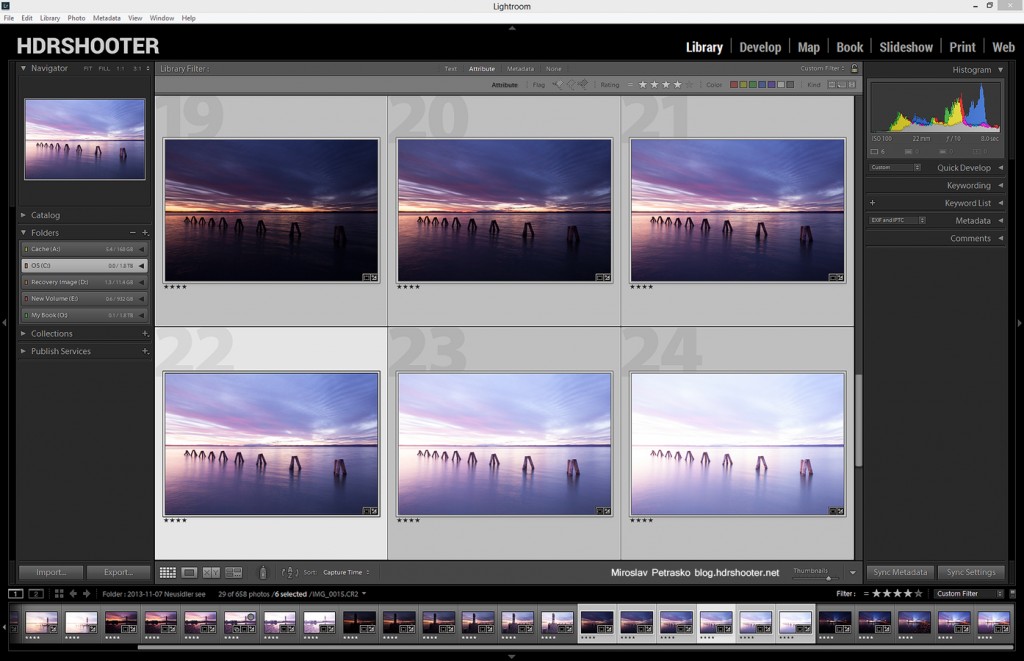
crazy-skies-lightroom
Then I took them and loaded in Photomatix Pro 5. I used the Contrast Optimizer to get a nice even image, a good start for additional blending.
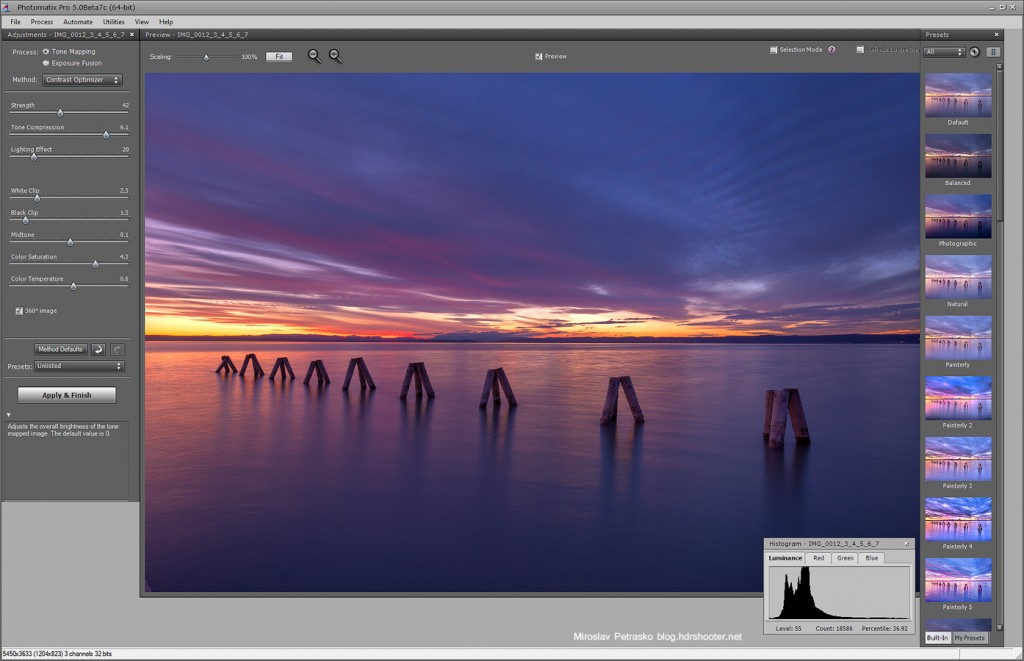
crazy-skies-photomatix
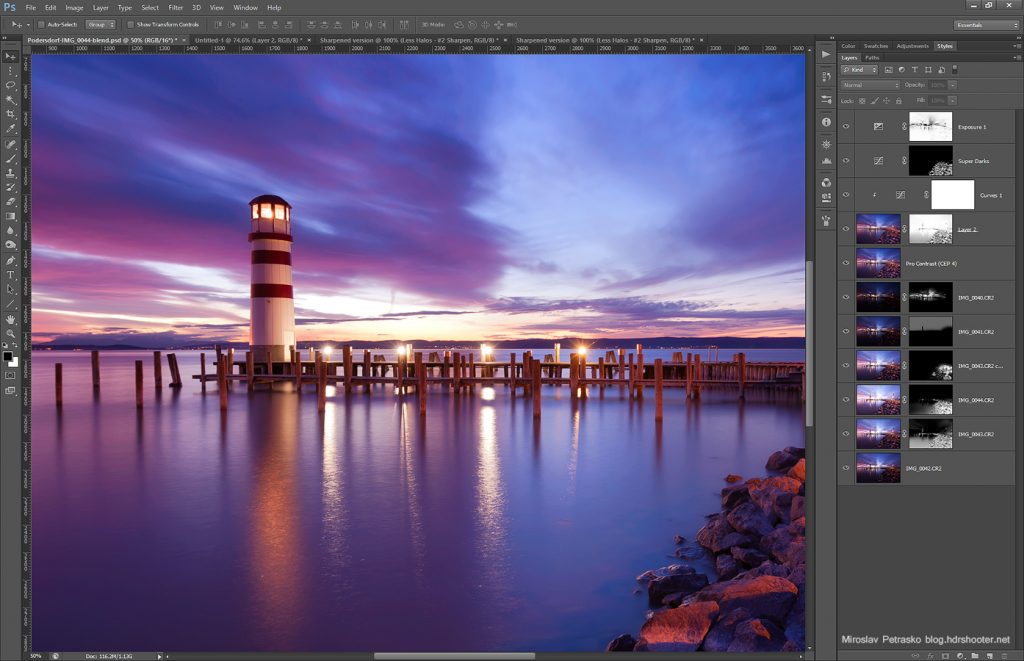
After that I loaded the Photomatix result together with the original exposures into layers in Photoshop, and continues as follows (layers numbered from bottom up):
1. Photomatix result
2. recovered detail in the water from the 0EV exposure
3. recovered detail in the sky from the -1EV exposure
4. brightened the pillars from the +2EV exposure
5. used Color Efex Pro Contrast to add more color and contrast to the photo
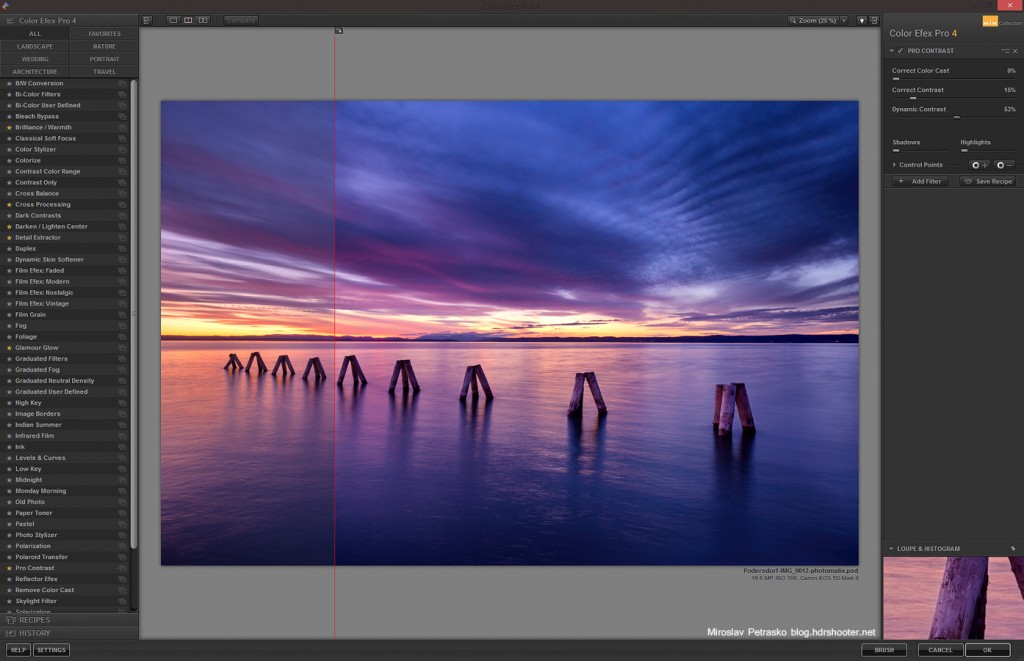
crazy-skies-color-efex
6+7. added glow (view my glow tutorial for details)
8. color balance to make the photo a little warmer
9. used Color Efex Glamour glow to soften the colors a little
10. used Color Efex Detail extractor, to get more detail in the sky and water
11. used Color Efex Darken/Lighten Center to add a vignette. This should have been the last point, but in the end I did few more edits on the photo.
12. curves to add more contrast
13. a little more Color Efex Pro contrast, as I felt the photo needed more local contrast
14. noise reduction using Imagenomic Noiseware
15. added more color to the sunset
16. finished with a little more contrast
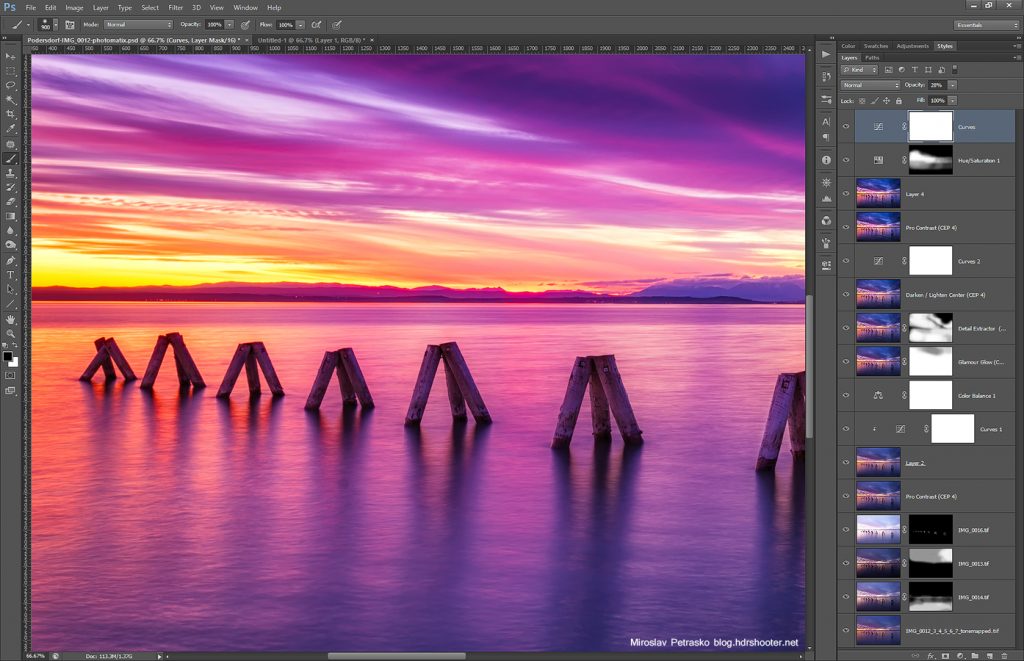
crazy-skies-photoshop
Not maybe the nicest use of layers, but it got me to the finished photo. Please continue to the full post to see the original 0EV shot and the Photomatix result.

A week passed and we are again at the process Tuesday post. And as I’m currently hawing the contest and raffle where you can win Oloneo Photoengine, I thought I show you a photo which I edited mostly in Oloneo Photoengine. And I’m including a special tip today :). So here goes.

Something green

I took this photo two years ago, still with a Canon 7D (my 450D that I had at that time had a broken shutter :)). That’s also why I used only three brackets, as that’s all I could take then. So as usually I started in Lightroom. I corrected the horizon here and also did a little noise reduction.

Something-green-lightroom
From there I exported all three brackets as 16bit Tiff files and loaded them into Oloneo Photoengine. Here I merged them and as you can see, I had to move only one slider to get the look I wanted (the TM Strength). It created a very nice blend, and also opened the shadows more that it was on the original brackets.
Something-green-oloneo-process
My next step was to load this result into photoshop. I haven’t used any original brackets here, as there was no need to blend any parts from them. I then did the following edits on it (layers numbered from bottom up):

  1. the result from Oloneo Photoengine
  2. I removed lens flares from the trees on the right
  3. did more noise reduction
  4. brightened the darkest parts of the image
  5. added glow (view my glow tutorial)
  6. brightened the glow
  7. changed the color of the sunlight (I will explain this in a moment)
  8. brigtened the overall photo with an exposure adjustment, but not in the brightest areas
  9. added more contrast to the basic midtones
  10. added a little contrast to the whole image

Something-green-process

And now for the point 7, where I mentioned I changed the color of the light. A lot of times when I have a photo with the sun in it, I want to have the surrounding area to have a nice yellow/orange glow to it. Same here. The green color was nice, but I wanted more. And to get this I did the following:

  • created a new layer
  • filled it with 50% grey (shift+backspace and select 50% grey and confirm :))
  • set the blending mode to soft ligt, this will make this layer invisible for now
  • picked a color from the sun, something nice and warm
  • chosen a big soft brush, with around 20% opacity and started painting around the sun, the more away from it, the less brush strokes
  • just change the opacity of the layer if the effect is too strong

And that’s it. Looks really great if you need more sun glow, or if you trying to change a color of a certain part of the photo. Here is this layer from this photo, shown without the blending mode selected and at full opacity. I used it in the end at 33% opacity, and as you can see, I also deleted parts of it.
Something-green-grey

And that was all. To see the original 0EV exposure and the Oloneo Photoengine result, please continue to the full post.

Another week has passed, another process post is here. For today I chosen a little older photo, one from start of this year (as you can easily see by the snow in it :)). As I no longer have the PSD file of it (I started keeping them only few weeks after I edited this one) I will go more into the overall steps I took to get it. So here goes.

First of all the finished photo itself. You can see, it’s quite a huge panorama, with dimensions of 19649 x 5237 which makes this photo around 120Mpix.
Big one
You can view a zoomable version of this panorama in the Panorama section on this blog, or directly here.

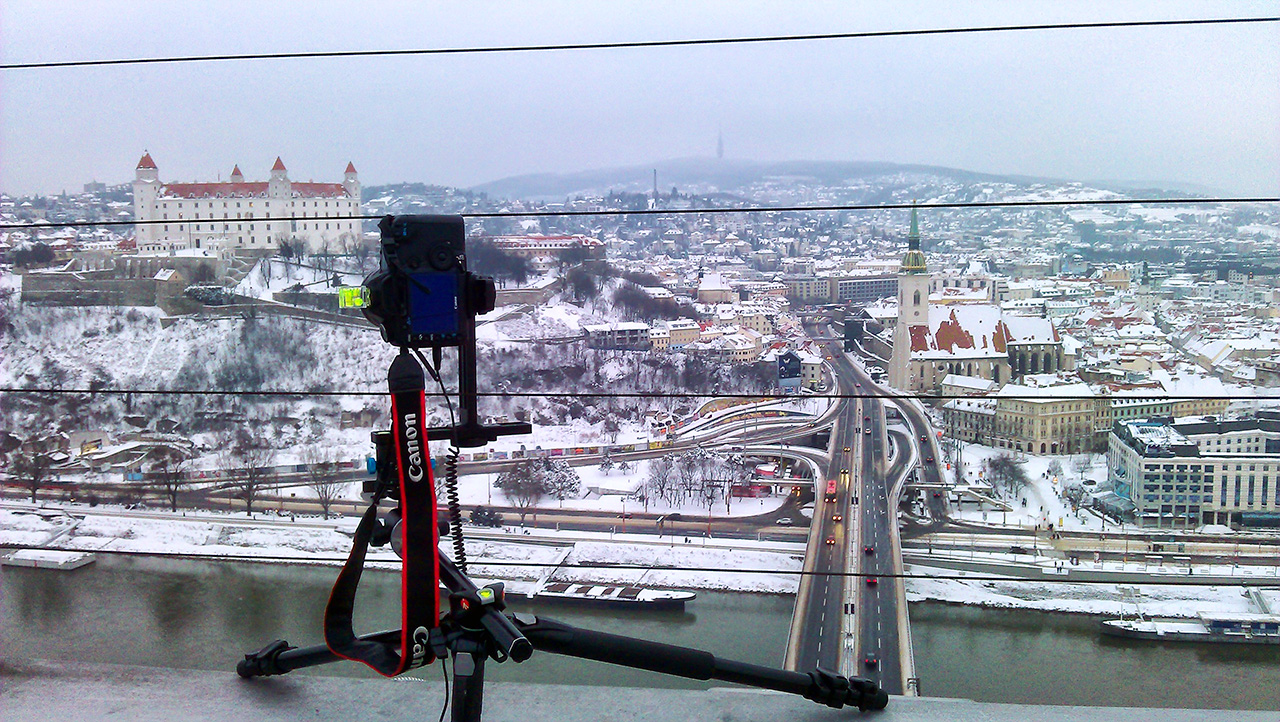
I knew I wanted this photo fro a long time before I took it, as this is the best view of Bratislava. I was just missing the needed equipment. But sometime before I took it, I bought the Nodal Ninja 4 panoramic head. And with the help of it, I could make this pano without any problem. Here is the setup I was using:
winterpano
So it was my Canon 5D mark II, with the Canon 16-35mm lens, wired remote, the bubble level all on the Nodal ninja 4 head.

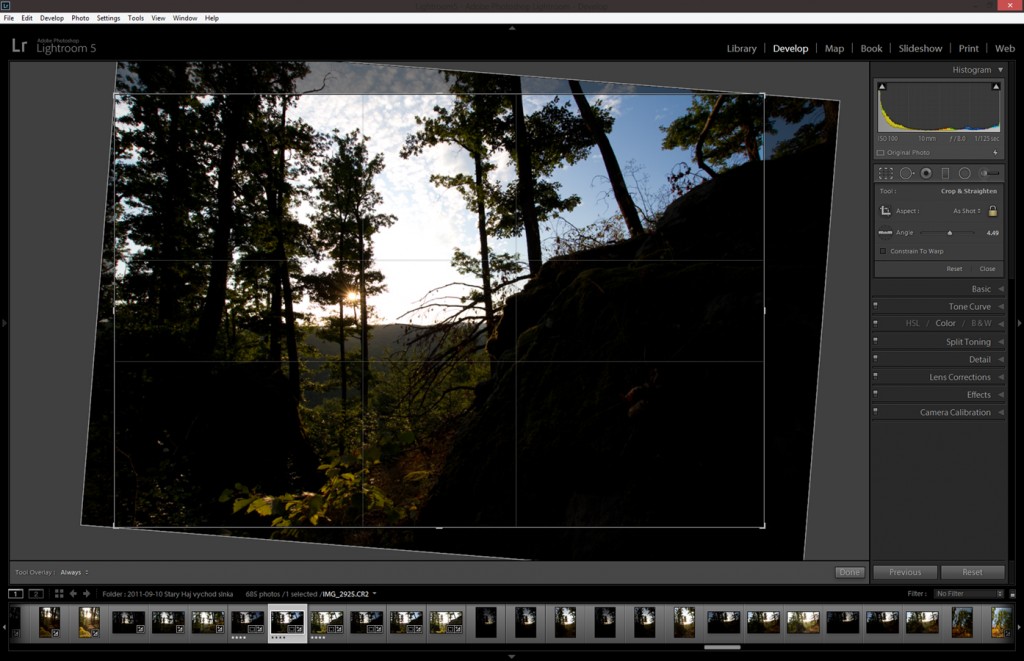
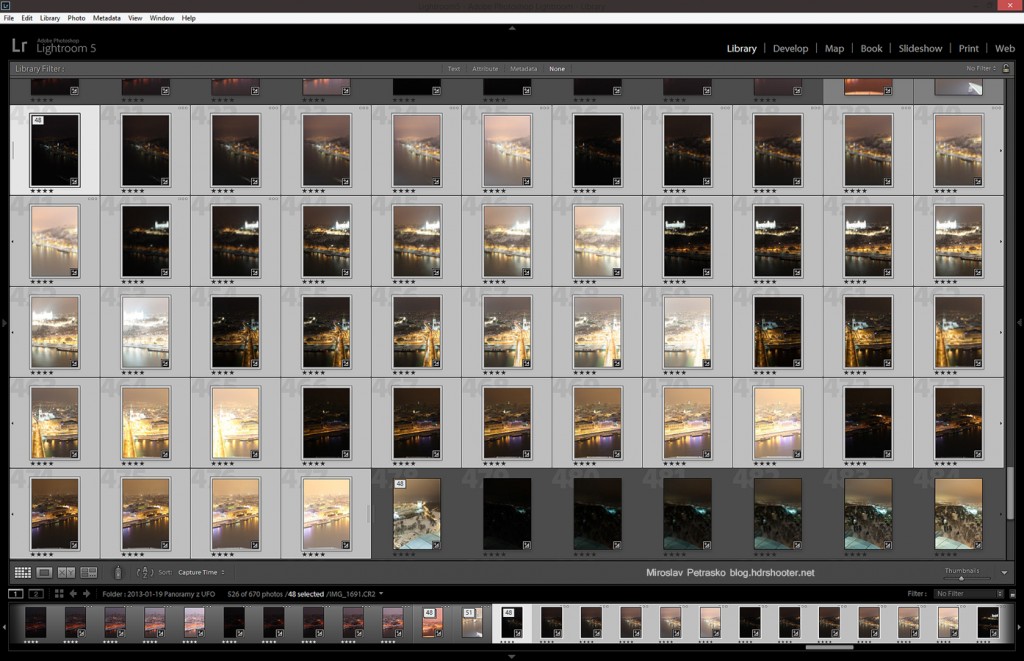
Overall I took 8 shots, all 6 bracket series. I imported them all into Lightroom, where I did few minor corrections. First of all I enabled lens correction. This is very important when doing a panorama, as it removes the vignetting from the photo and so helps it to be blended more seamlessly. I also removed the chromatic aberrations and corrected white balance in Lightroom.
big-one-lightroom

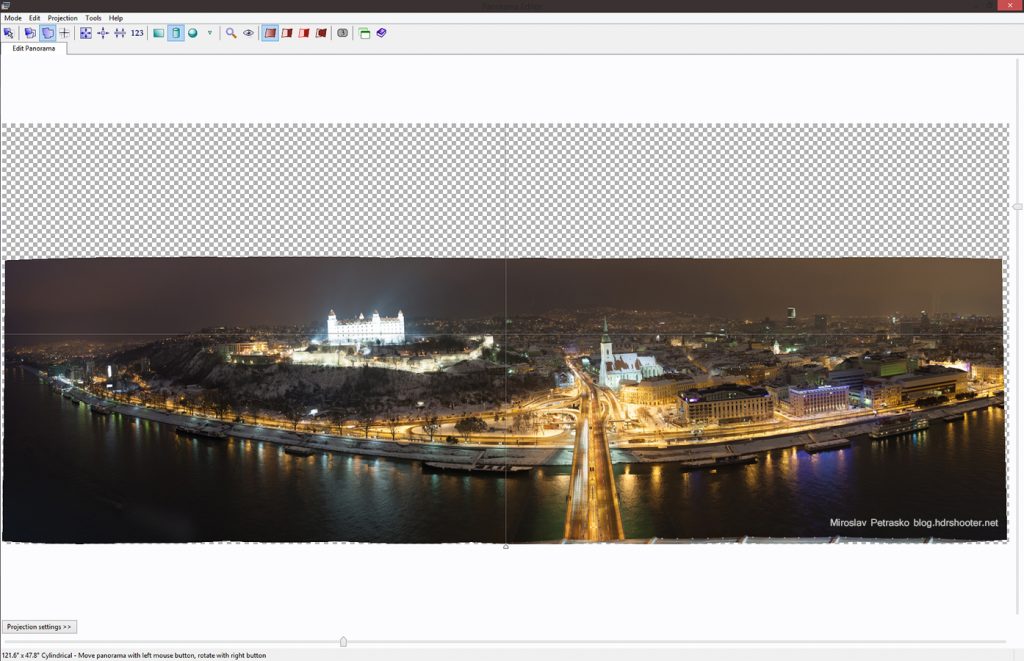
After that I exported all the 48 images as 16bit Tiff files and loaded them into PTgui. I merged them into a panorama and saved as their separate blended planes (check out my HDR panoramas tutorial for a more detailed explanation)
big-one-ptgui

After that I used Bridge to load all the files into one Photoshop file as separate layers. You can do this also manually, file by file, but using Bridge is much faster.
In Photoshop I blended the images, and corrected the angle. As I said, I haven’t saved the file, so no screenshot here, but instead here is a piece of the panorama taken from the 50% zoom
big-one-50
and from a 100% zoom.
big-one-100

Continue to the full post to see two of the original 0EV exposures.

How the week passed quickly. And again we have here another Tuesday and another process post. Today I chosen a very recent photos, as a lot of people liked it. So here goes.

To get this photo
The perfect sunset

I started as always in Lightroom, where I applied lens correction, removed chromatic abberations and applied a little noise reduction.
The-perfect-sunset-lightroom

After that I loaded all the brackets into layers in Photoshop. I used the following layers (numbered from bottom up):
1. 0EV exposure
2. +1EV exposure to brighten the foreground
3. +2EV exposure to brighten the foreground even more
4. +1EV exposure once more, to recover few areas. I’m including here a screenshot of what I had to correct. Blending can make colors look grey, and this has to be corrected.
The-perfect-sunset-process-2

5. -1EV to darken the sky
6. -2EV to darken the brigtest parts of the sunset
7. Color Efex Pro contrast to add more structure and local contrast to the photo
8+9. aded glow (check out my tutorial on this) but I removed it from the darkest parts of the image, as they got too dark
10. brightened the darkest spots on the rocks
11. brightened the whole photo by adding a little bit of exposure

The-perfect-sunset-process

And that was all.
Please continue to the full post to see the original 0EV shot.

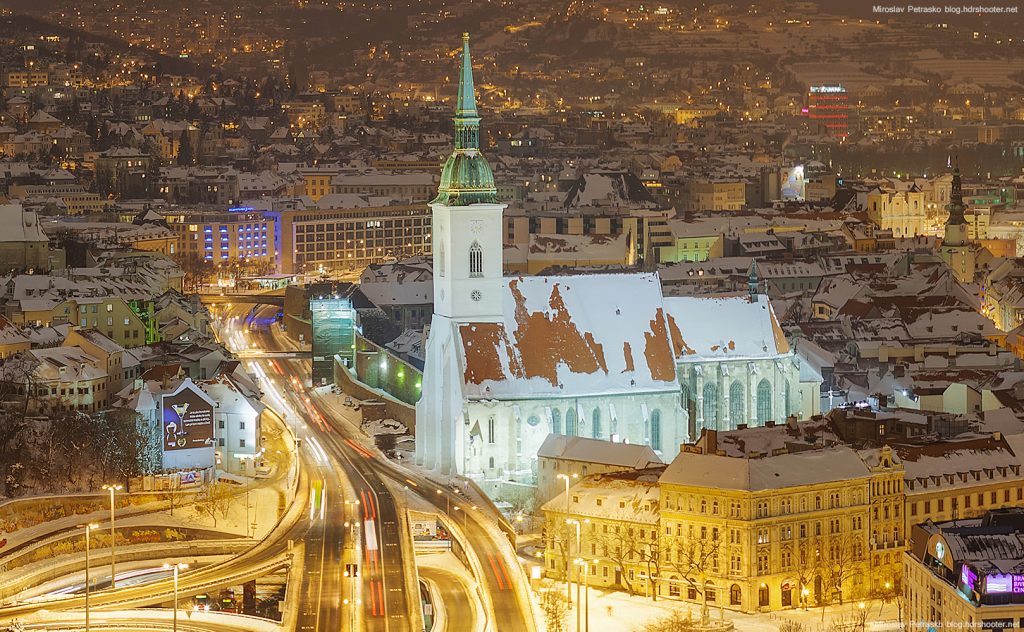
And another week passed and again I’m have for you another process post. For today I chosen this view of the St. Martins cathedral in Bratislava. So lets get started.

My goal in this photo was to open up the surrounding of the cathedral, so it’s not just black and you see some detail there. So to get this final result:
Bratislava-IMG_5932-blend-sharpen
I first corrected the lens distortion and chromatic abberations in ligtrom. Then I exported all the 5 exposures as layers into Photoshop and continued from there. The layers I used vere (numbered from bottom up):

1. 0EV exposure used as base
2. -1EV exposure used to bring down the overexposed areas of the cathedral (I’m inluding here how the mask looks, so you can see what effect it has, if you don’t understand layer masks, check out this guide I written about them)
Bratislava-light-mask1
3. -2EV exposure, to correct few more overexposed areas
4. +1EV exposure, to brighten the overall image
5. +2EV exposure, to brigten few more parts and to add light trails to the road (again I’m including an image here, so you see how it looks)
Bratislava-light-mask2
6. added more detail using a high pass layer
7. I reouched out the small piece of the sky visible in the right corner, it just bothered me there
8. added 0.5 exposure to the whole image, except the brightest parts
9. Color efex pro contrast to add more local contrast to the image
10. color balance for the trees in the foreground as they were too red
11. Color efex Darkne/Lighten center to add a vignete to the photo
12. levels to add a little contrast
13. desaturated the oversaturated yellows
14. added glow (check out my tutorial on this)
15. brightened the shadow darks
16. made the image a little colder
17. darkened the extreme highlights

Bratislava-light-process
And that was all. I actually stopped after step 11 at first, but that added the few more tweaks, as I was not completly sattisfied with the result.

Please continue to the full post to see the original 0EV exposure.

Page 15 of 24« First ...101415161720... Last »
FREE EBOOK!!!
Subscribe to my newsletter and get a free Capturing fireworks ebook. 
Subscribe