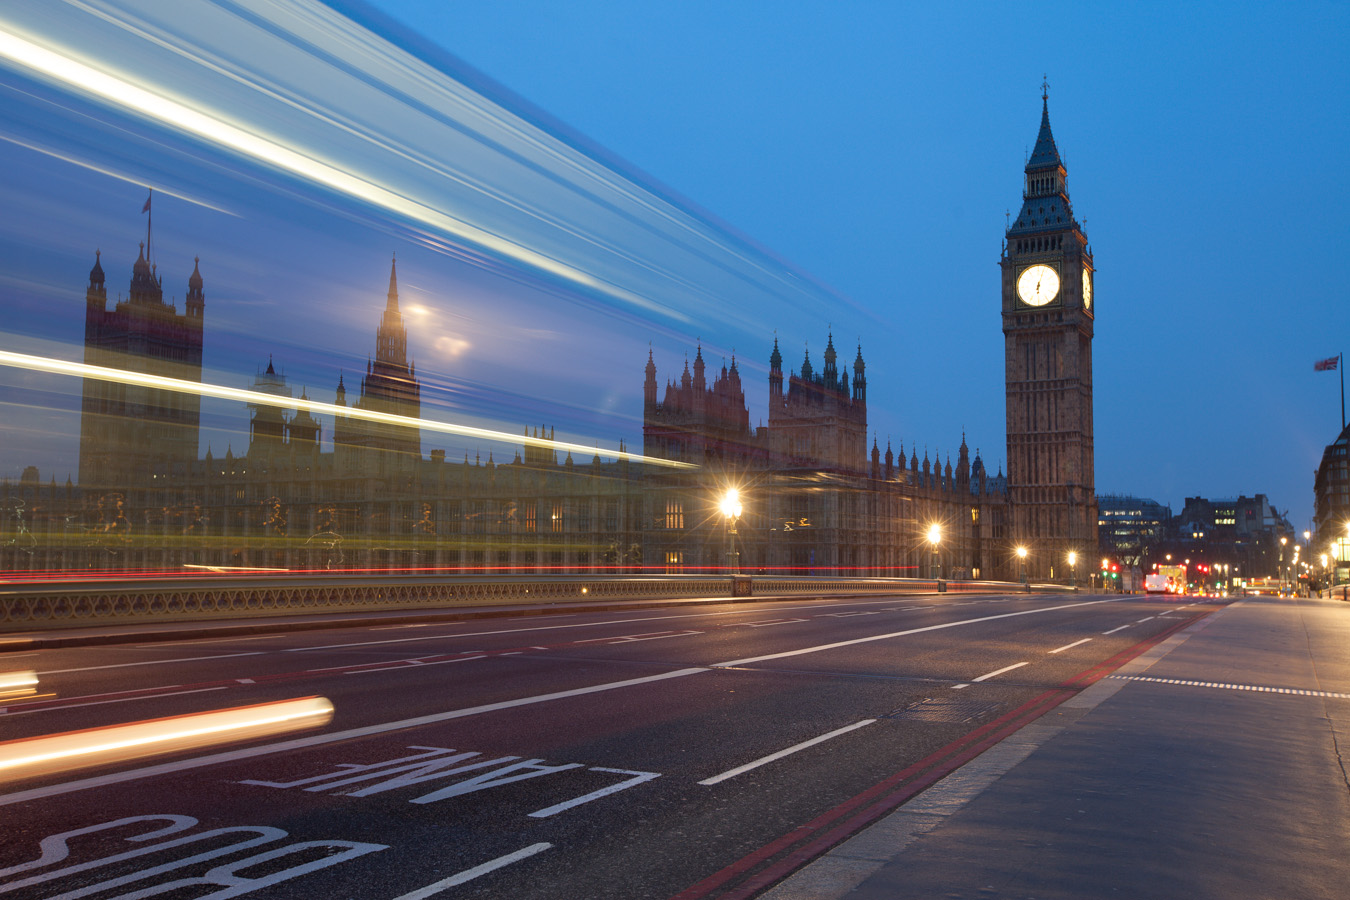
Another one of the before/process/after posts. This time it’s one from the London photos. And to give you more info about what you see, here is a complete description of the layers I used to create this photo.

So first the finished photo:
Morning bus

Before I imported the files into Photoshop, I did few tweaks in Lightroom. I corrected the white balance, added a little noise reduction, turned on lens correction and removed chromatic aberrations.

The processing in Photoshop, the layers from bottom to top were:

1. +1ev exposure used as base for the photo
2. 0ev exposure used to darken the sky and to blend in the second copy of the bus
3. curves affecting only the layer underneath, to brighten the bus a little so it fits into the photo
4. -2ev exposure to darken the clock on the tower
5. +2ev exposure to brighten few parts of the photo
6. contrast added to basic mid-tones mask
7. color effex pro contrast to recover a little of the local contrast
8+9. blurred layer to add glow and a layer to lighten the effect
10. brightened the overly dark areas
11. added more detail using high pass sharpening
12. hue/saturation to correct the sky color
13. color balance to correct and overly purple tint
14. curves to brighten the lights of the buses
15. once more brightened the dark areas
16. toned down the saturation on the mostly saturated parts

You can also see a part of one of the luminosity masks here (I combined two screenshots for this).
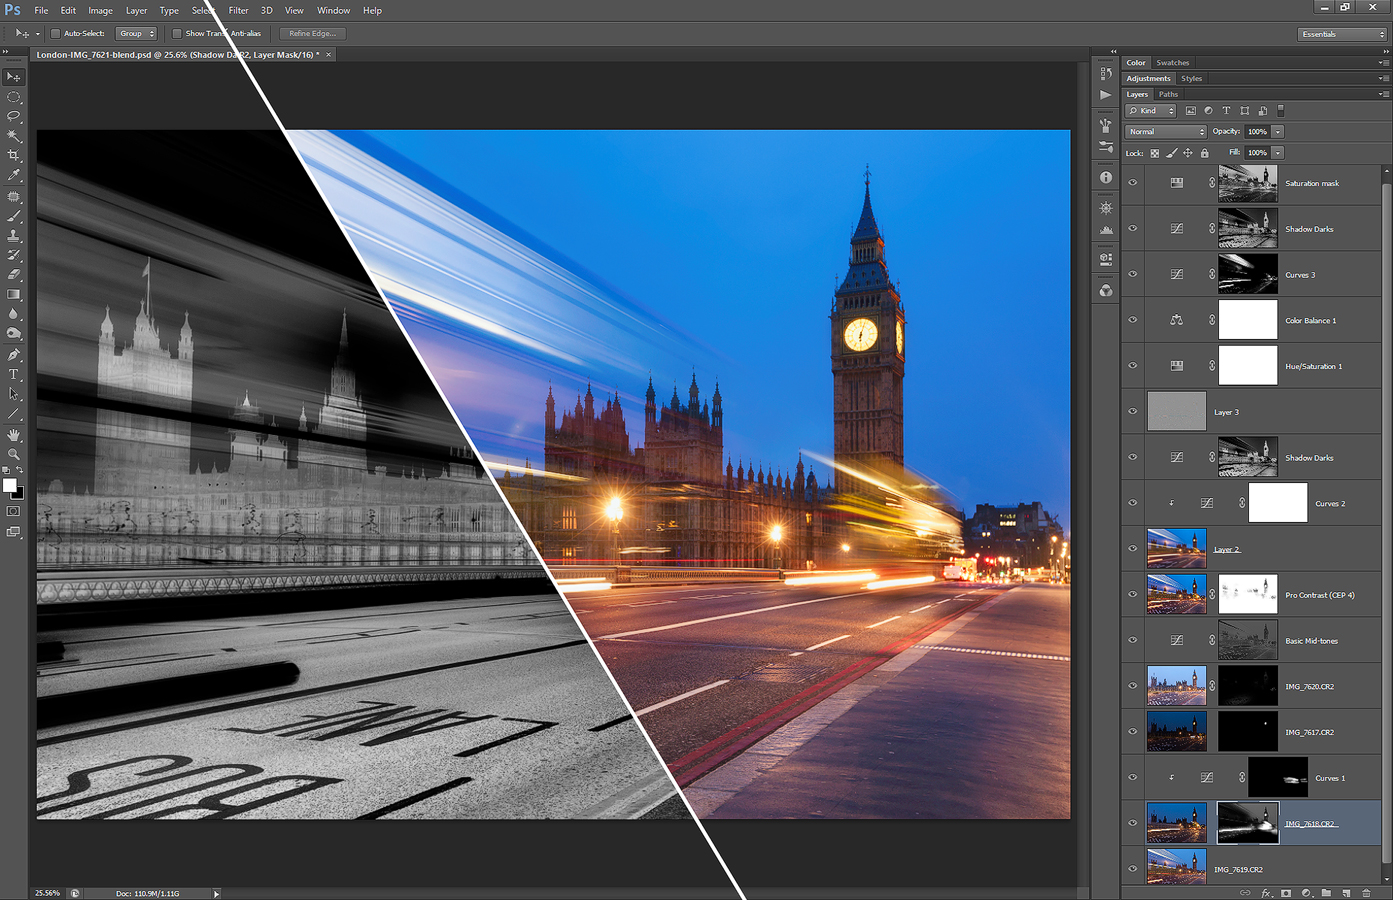
morningbus-process
And here is the original before photo.
IMG_7619

I was really busy today, and away from home for the whole day. So not really any time to edit and prepare a new photo for the blog. So instead another one of the process series today. You will notice that I did not do many changes on this photo, but is not about how many changes you made, but if they make the photo look better :)

This is the final photo, open the full post to see the original shot and how it looked in photoshop:
Traffic at the Arc De Triomphe - Process

HDR panoramas

As I started shooting panoramas and HDR panoramas, I was trying to find the best workflow how to combine the photos into a panorama. I seen two main approaches to do this. First one is to first merge/blend the HDR image for each part of the panorama, the second is to first combine the panorama and do the HDR processing later. After a lot of experiments, this workflow worked the best for me.

I will be using Lightroom and PTgui in this guide. If you want to know how to do the same thing using Autopano, please view this HDR panoramas with Autopano guide.

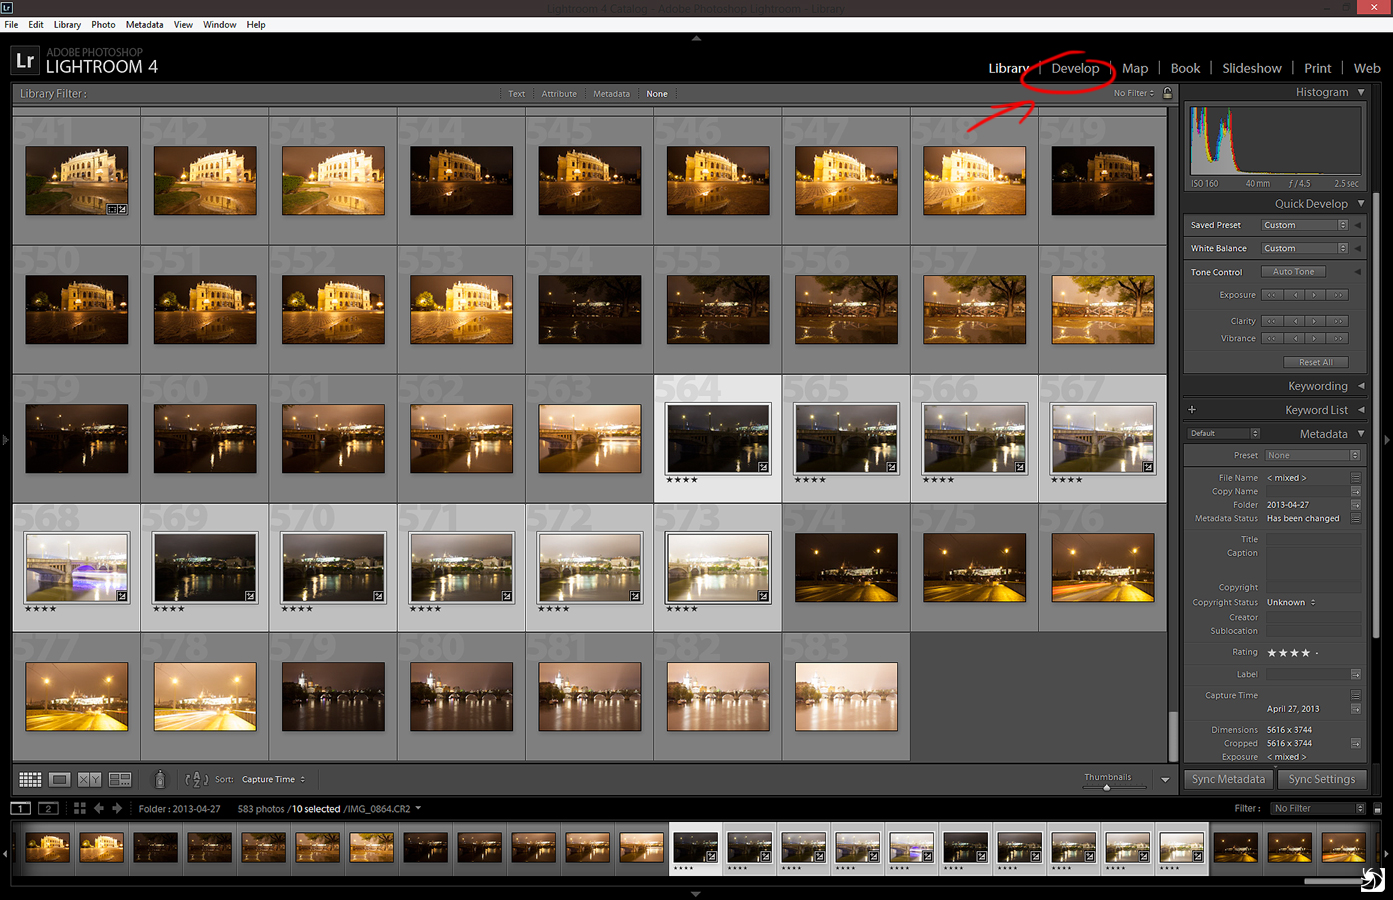
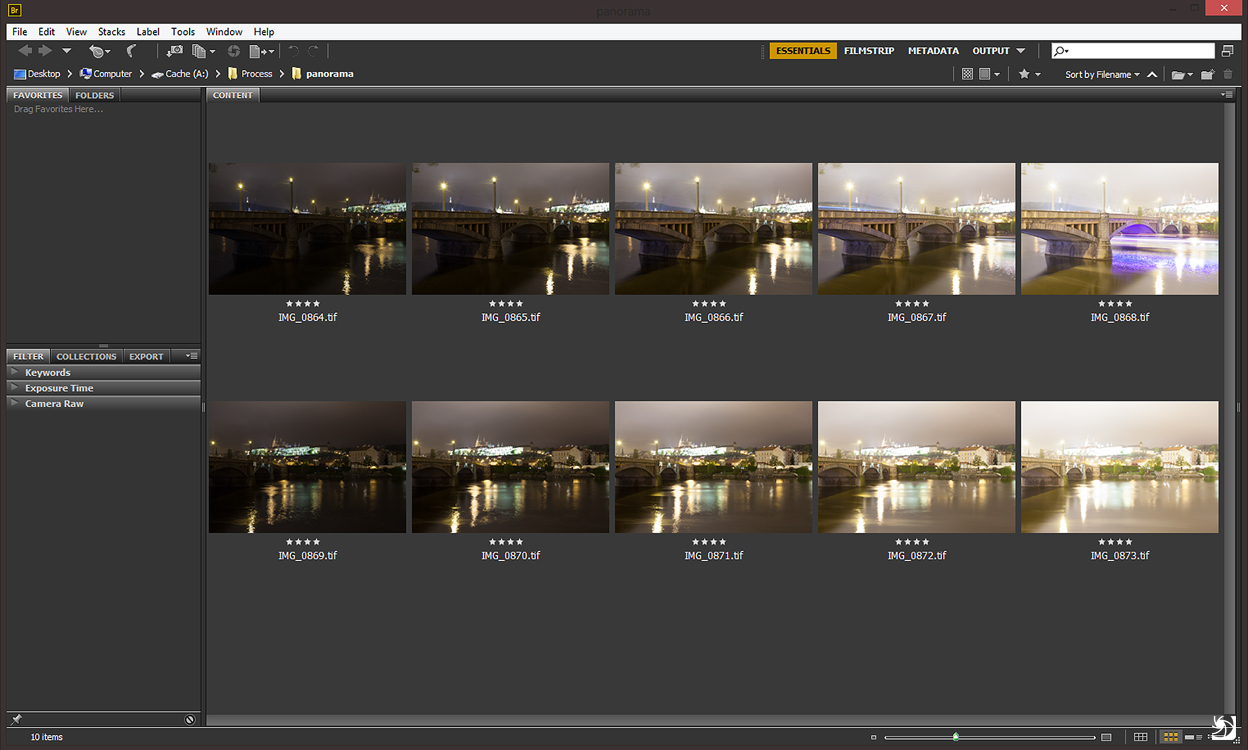
Select the photos you need

First find all the photos from the panorama, you want to use. Select them all in Lightroom and choose develop.
pano01

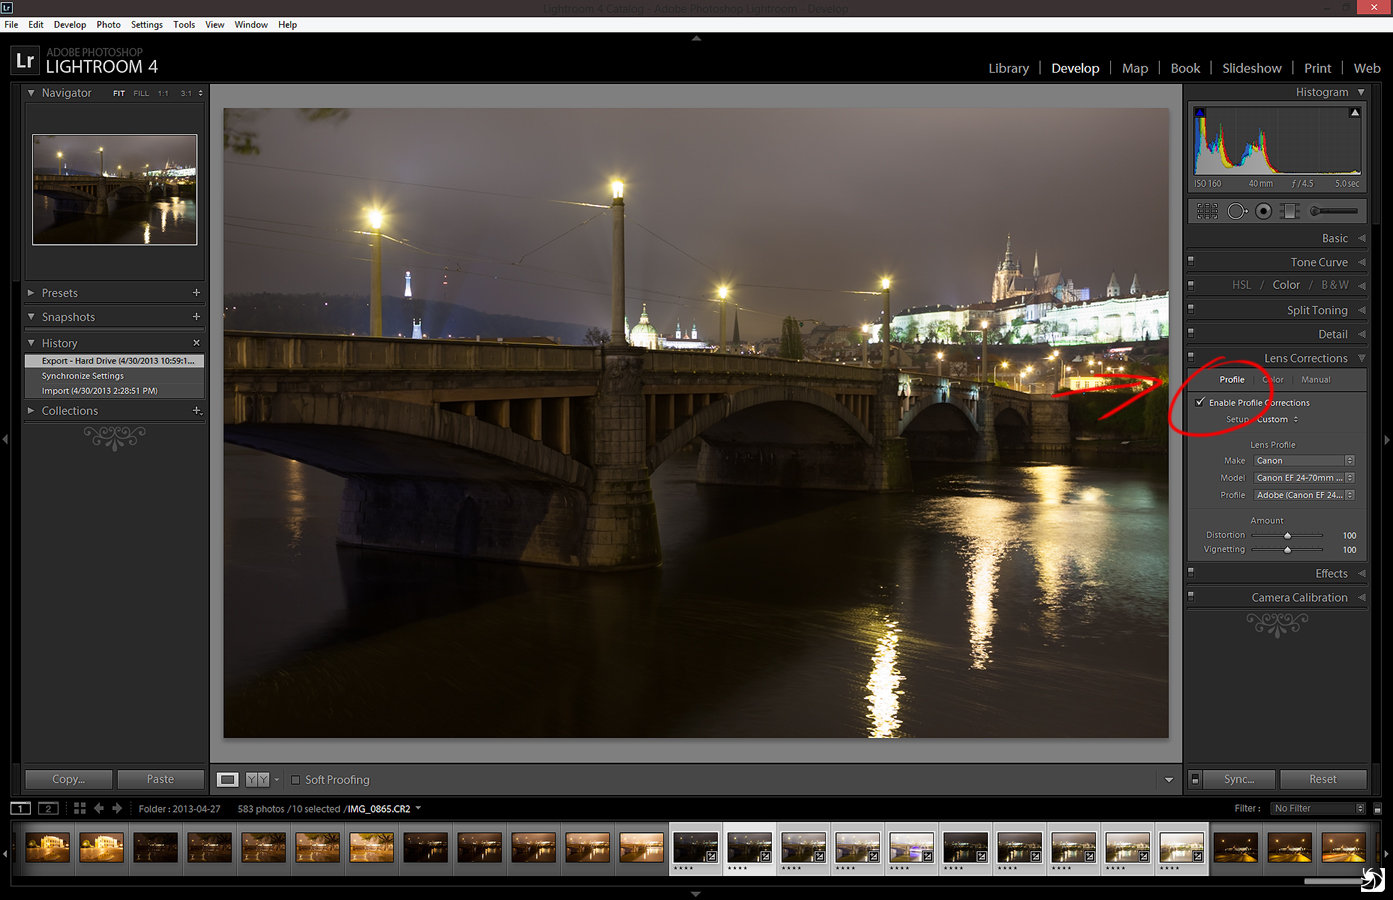
Enable profile correction

In the develop module modify any settings you need (noise reduction, white balance and similar) and then under Lens correction/Profile select Enable profile correction. This will remove lens distortion and lend vignetting, which will make the the blending of the panorama shots together easier and you will avoid having shadows where the blends are.
pano02

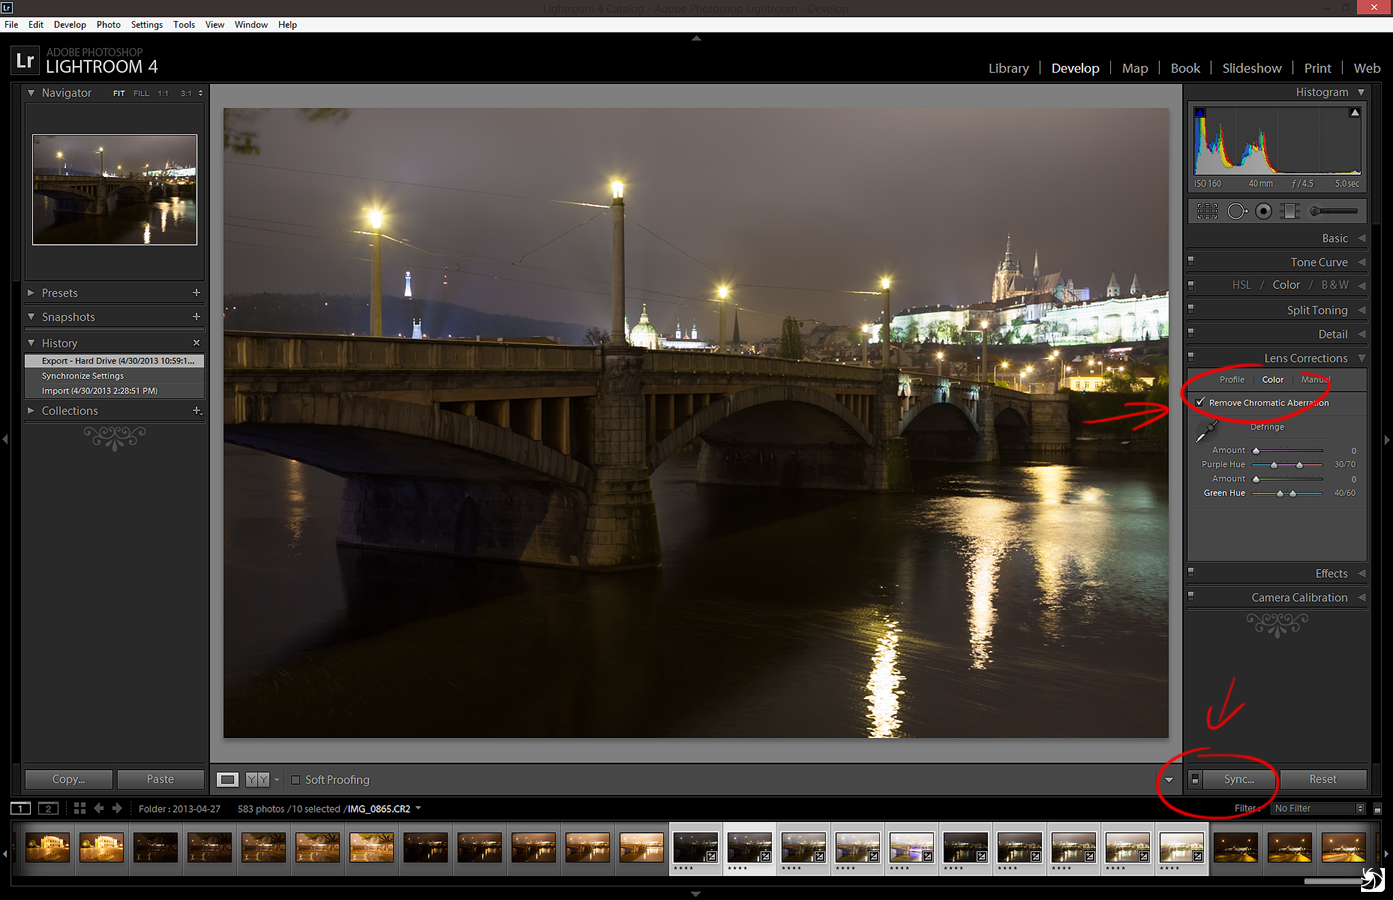
Remove chromatic abberations

Under Lens correction/Color select Remove chromatic abberations. This is not required, but it’s much easier to remove them now, than to try to do it later. After that, choose the Sync button and sync all the settings to every selected photo.
pano03

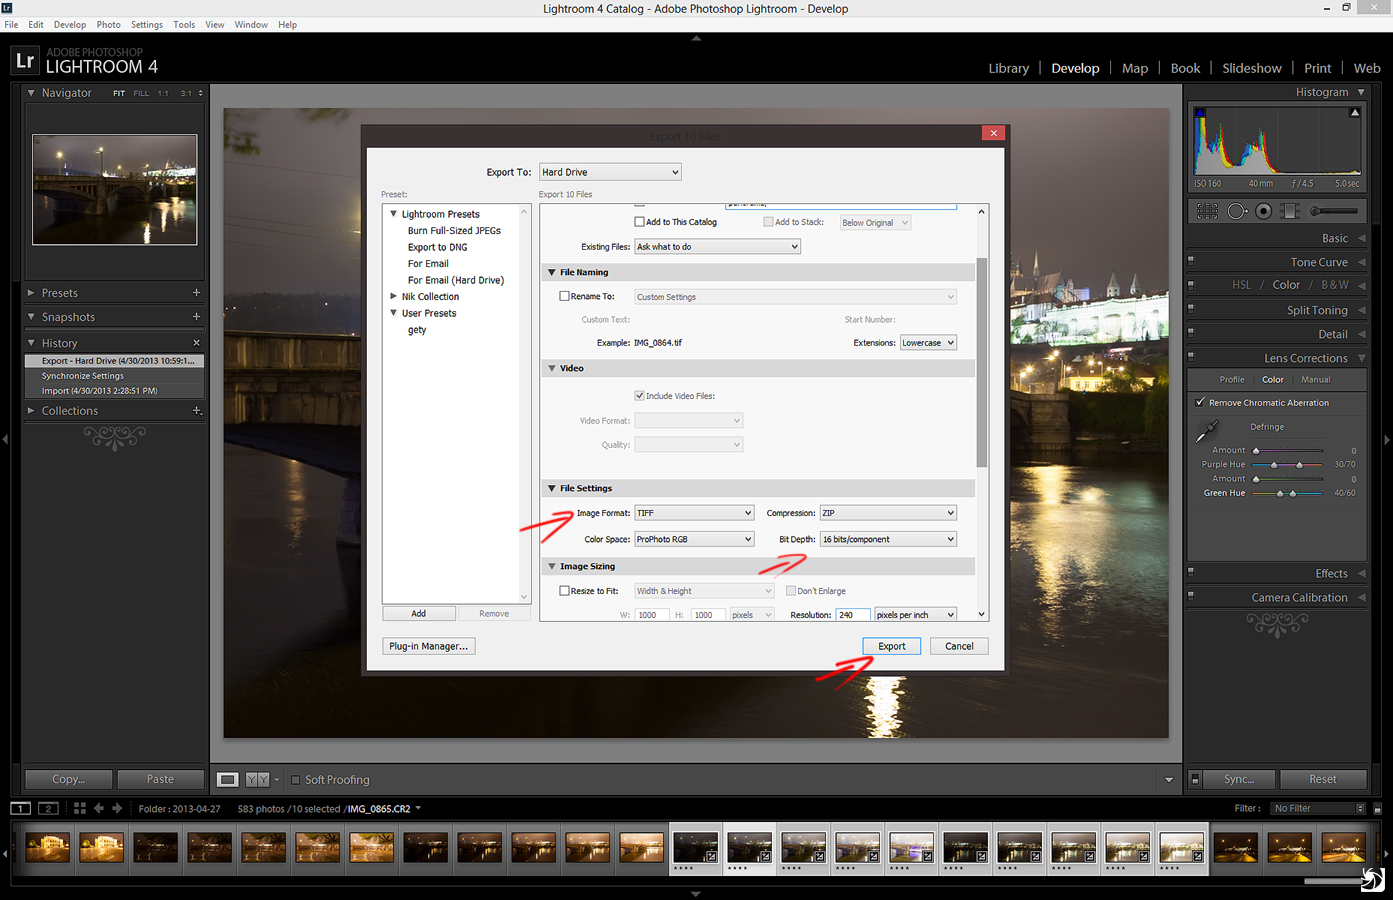
Export the images

Now you can export the images. Choose File/Export. I suggest choosing a new folder, where all your images will be stored. Then so you have the best quality export, choose Image format as TIFF, ProPhoto RGB and 16bit colors. Hit export.
pano04

you will end up with all your images exported as 16bit TIFF files in the folder you selected
pano05

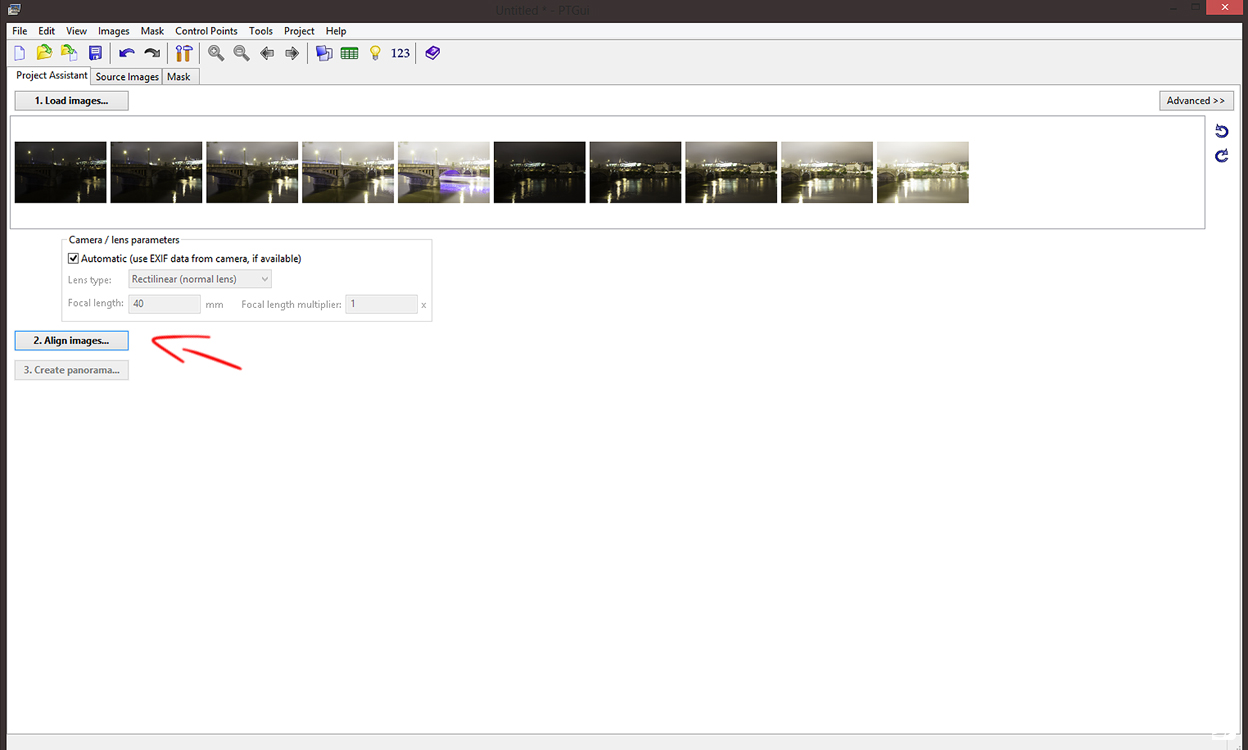
Load the files into PTgui

Now open PTgui and load all the exported images into it
pano06

Choose Align images

You don’t have to wait until all the image previews are loaded, just hit Align images
pano07
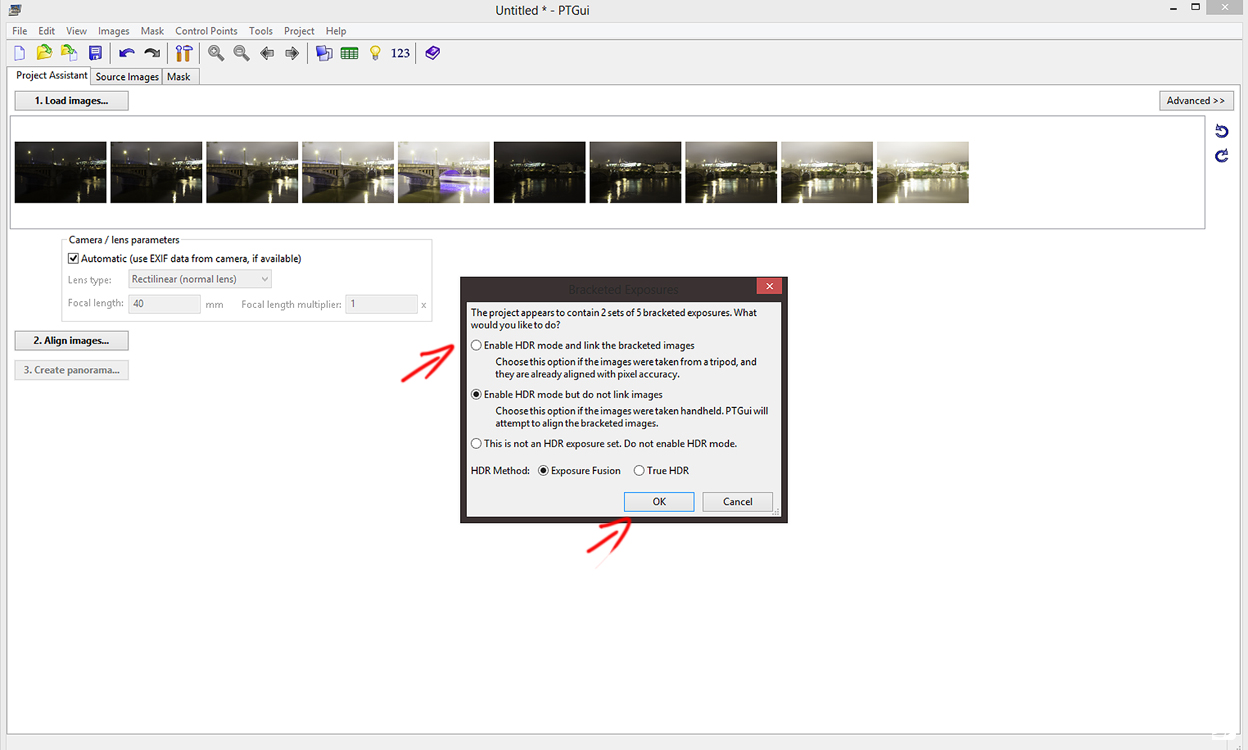
Now you will be given an option if these are HDR brackets or not. If you don’t get this options, there could be multiple reasons for it. Either you don’t have all your brackets loaded (e.g. you have one 5 bracket series and one 4 bracket series loaded) or the exif data does not match (e.g. one series +2ev is 20s, the second is 25s). In this case PTgui will not be able to combine them. Just try to add the missing brackets, or remove the ones where the exif does not match and you are good to go.

If you shoot your brackets from a tripod, choose the first option, if handheld, choose the second. You can have any HDR method selected, as we will not use PTgui to merge the HDR.
pano08

Correct your panorama if needed

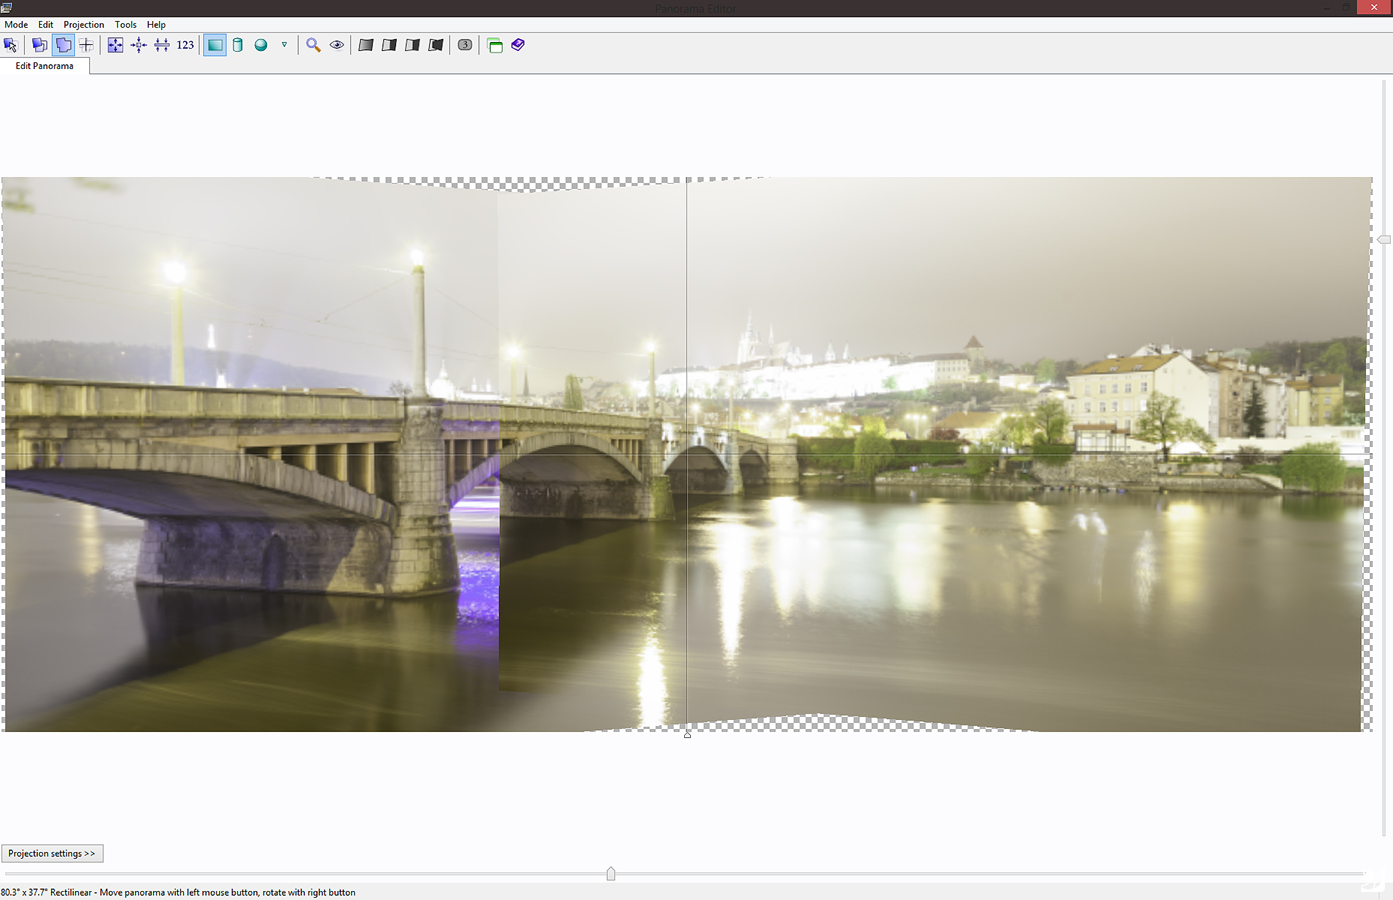
Once the alignment is complete, you will see a preview of the panorama. Here you can correct the alignment of it. I suggest looking through the PTgui tutorials on their page to learn more about it. But usually you don’t need to do anything. Once you done here, close this preview window and choose Create panorama.

Btw. don’t worry if the photo here looks strange. PTgui can’t display 16bit files, so the colors and contrast will be quite bad. But our goal here is just to get good panorama alignment, nothing else.
pano09

Save blended planes

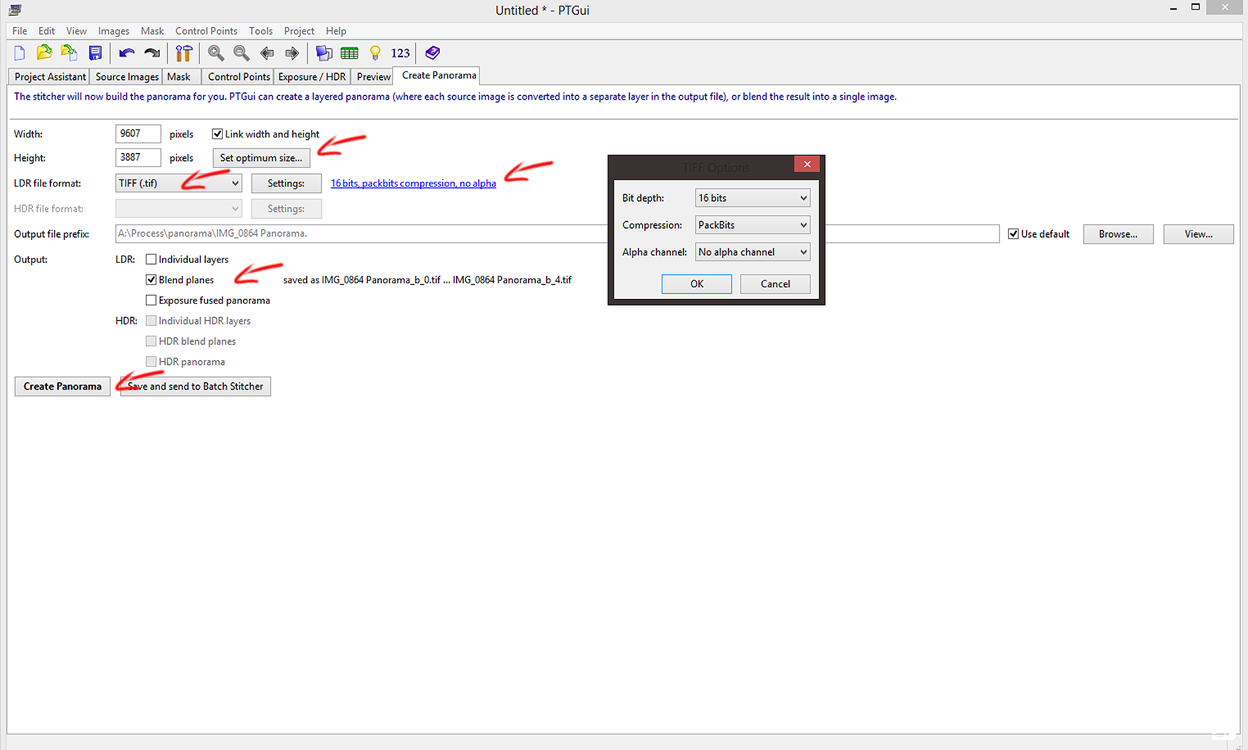
Once you hit Create panorama, you will be presented with this dialog. Here you have to choose how you want to save your panorama. You should select:

  • click Set optimum size and choose Maximum size
  • select TIFF as file format
  • click the format settings and choose 16bit, Packbits compression and no alpha channel
  • choose blend planes
  • click on Create Panorama

pano10
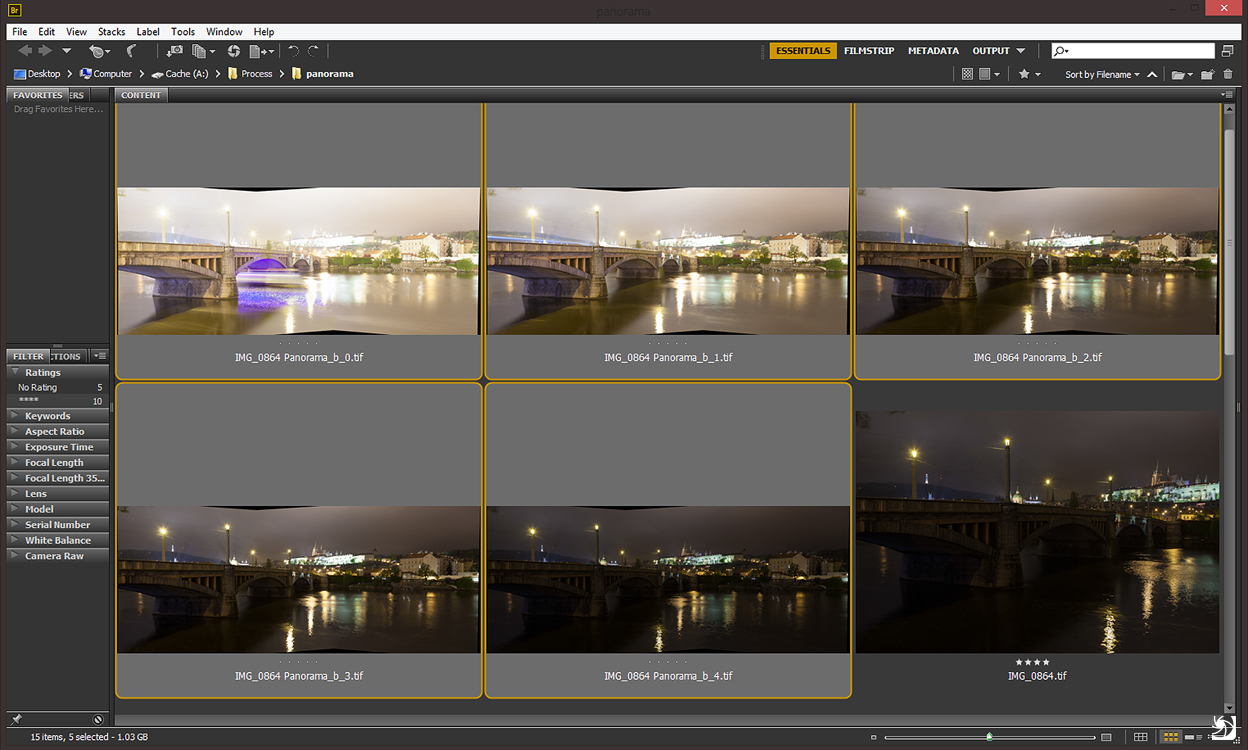
Now PTgui will save your panorama. We have chosen blend planes, so each brightness level is saved into separate file. This takes usually a lot of time, but after it’s done, you will end up with the same number of panoramas as you had the number of brackets for your HDR.
pano11

Continue with your HDR

Now you can continue as if you combined a normal photo. You can use any technique to combine this shots. Tonemapping in Photomatix, manual blending in Photoshop or any other. Just be prepared that if you have a slower PC, this will take a long time, as these panorama photos are very big.

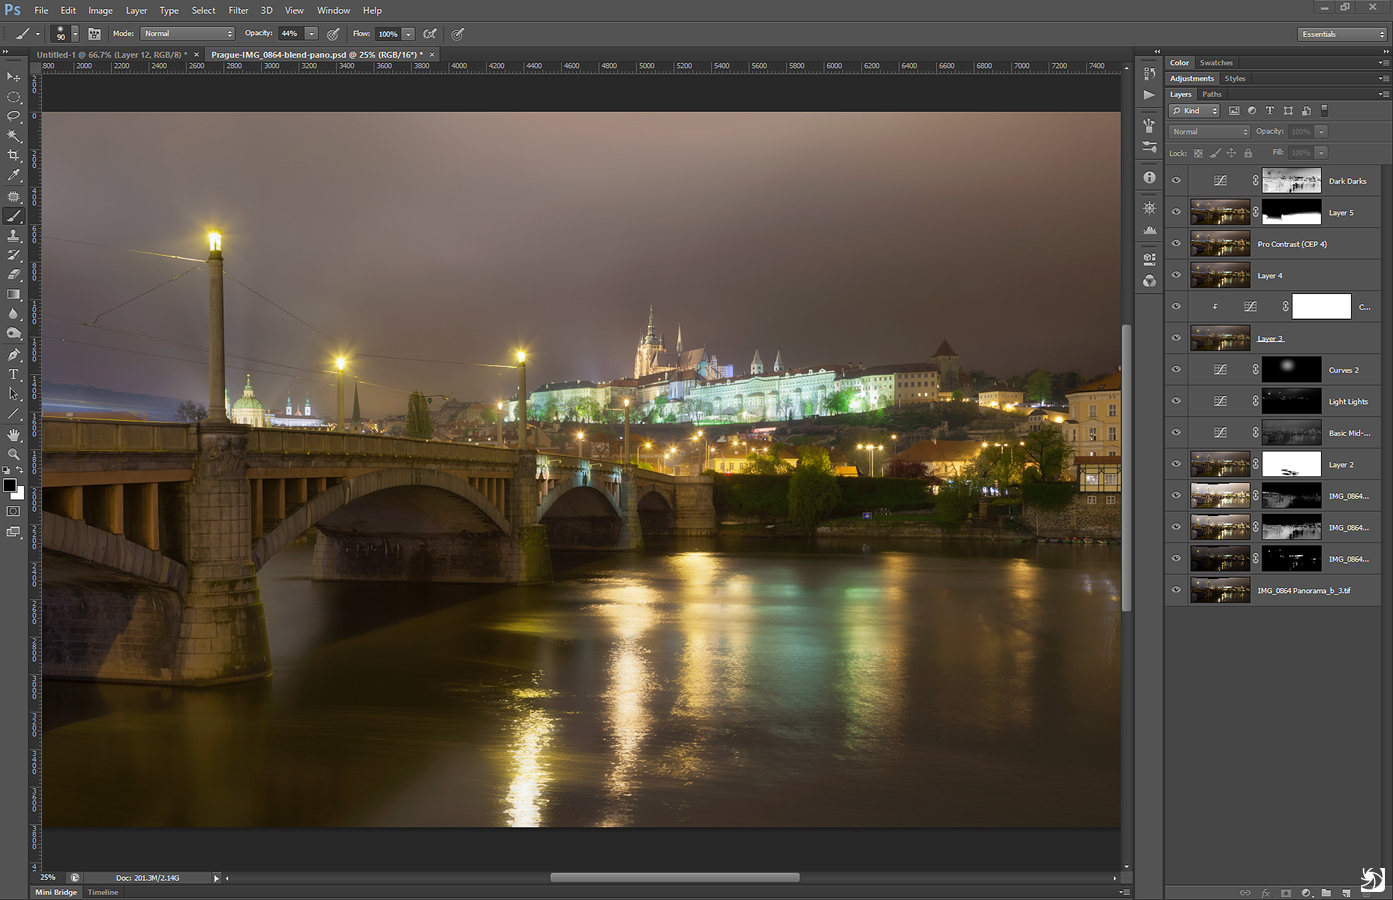
I personally finished this photo with manual blending in Photoshop
pano12
and got this final image
After the rain in Prague

Hope you find this guide helpful and feel free to ask any questions

You can find more information about Radian at the Kickastarter page or on the Alpine labs page. Radian can be bought directly from the Alpine labs page from here.

Radian by Alpine Labs – Review

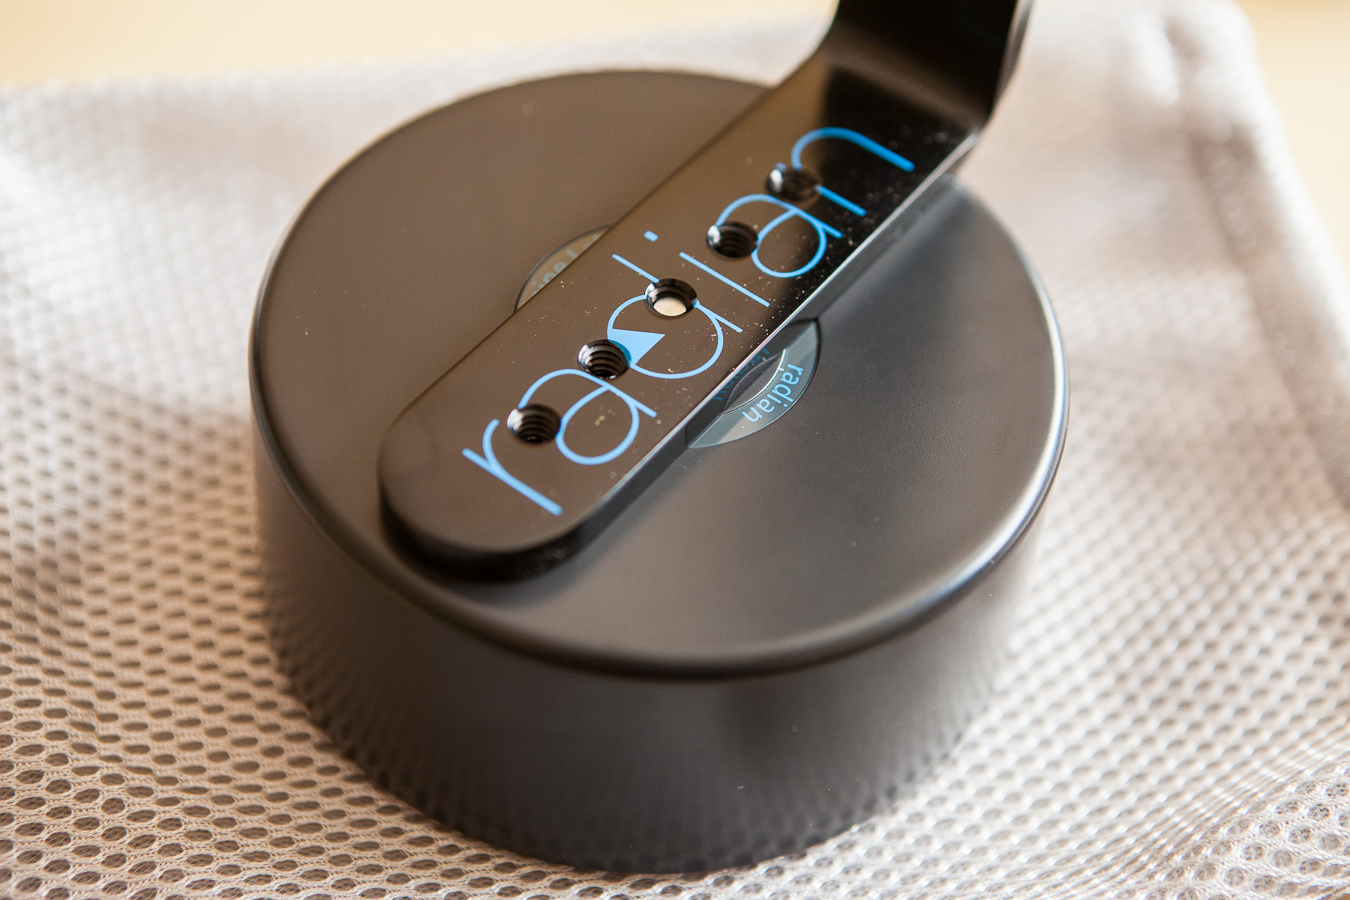
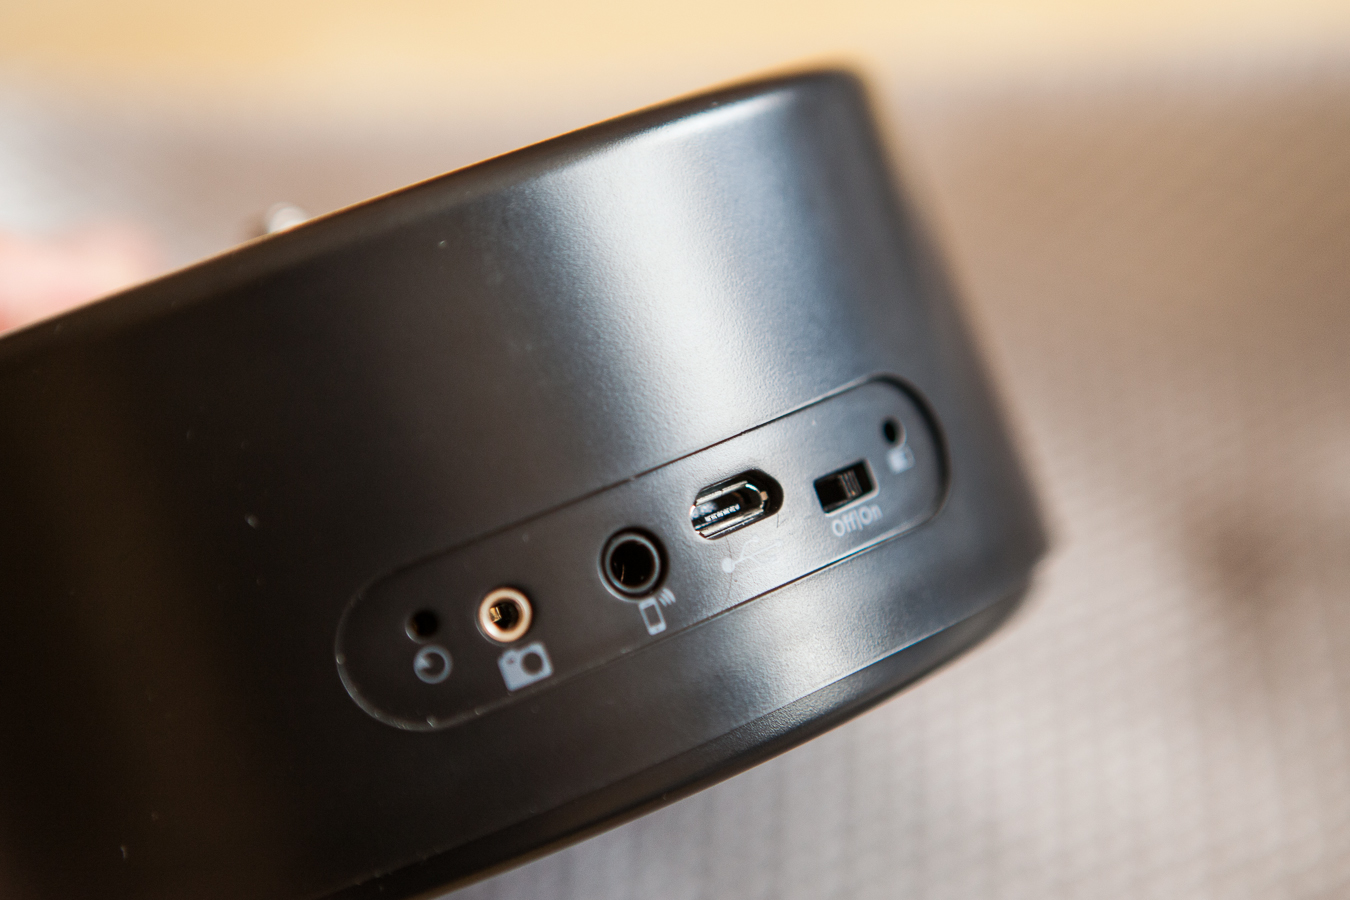
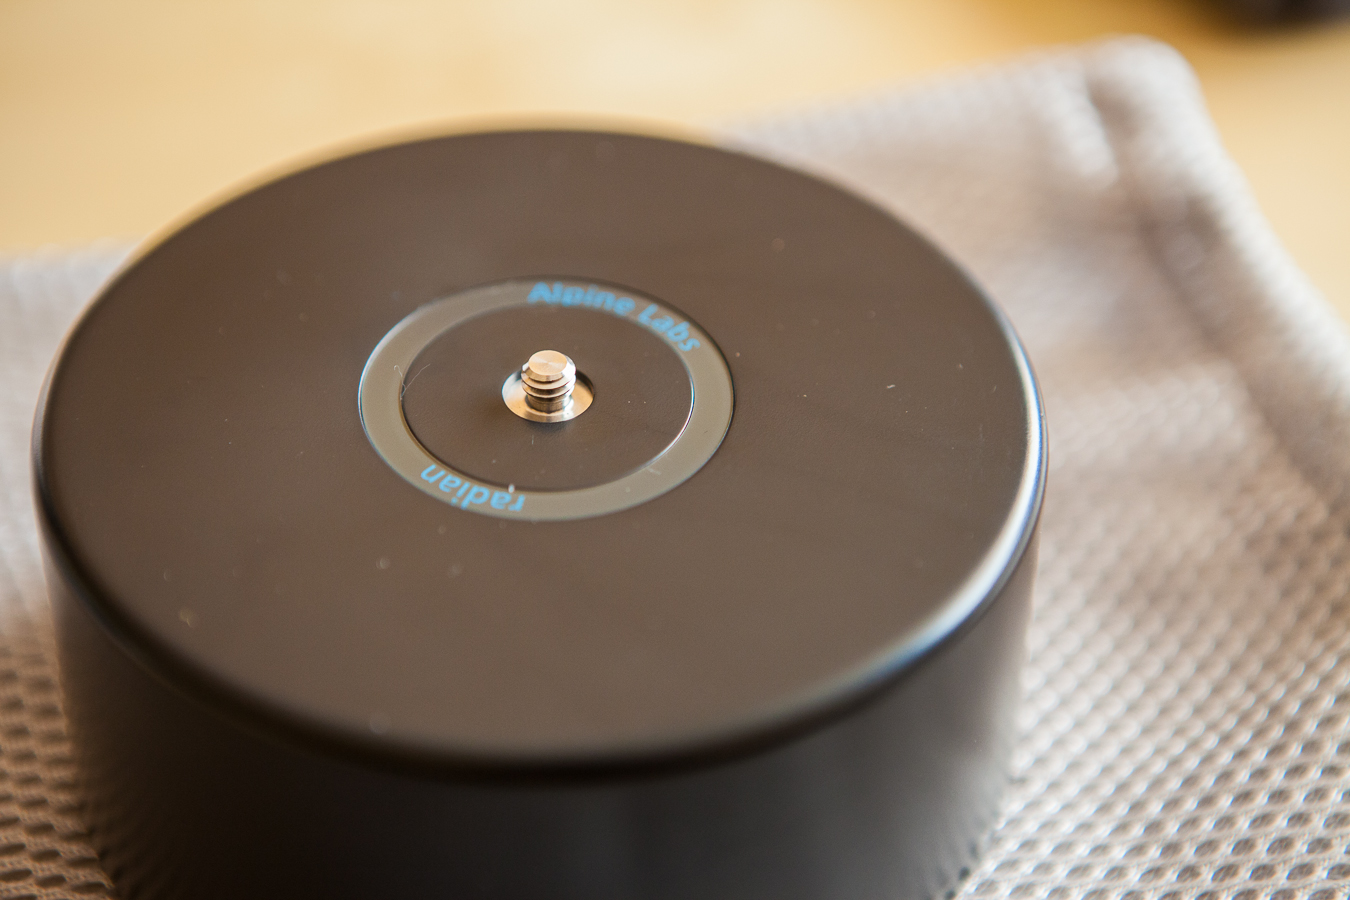
Recently I received my Radian time-lapse panning device form Alpine Labs. This was my first Kickstarter backing, but despite few months delays, it arrived. I’m actually very glad I switched to Radian from the Astro (a similar device, also on Kickstarter) as that haven’t reached even production yet. After unpacking, I was very surprised how small and light the Radian is. You would think that it will not be able to move your camera at all. But it does.

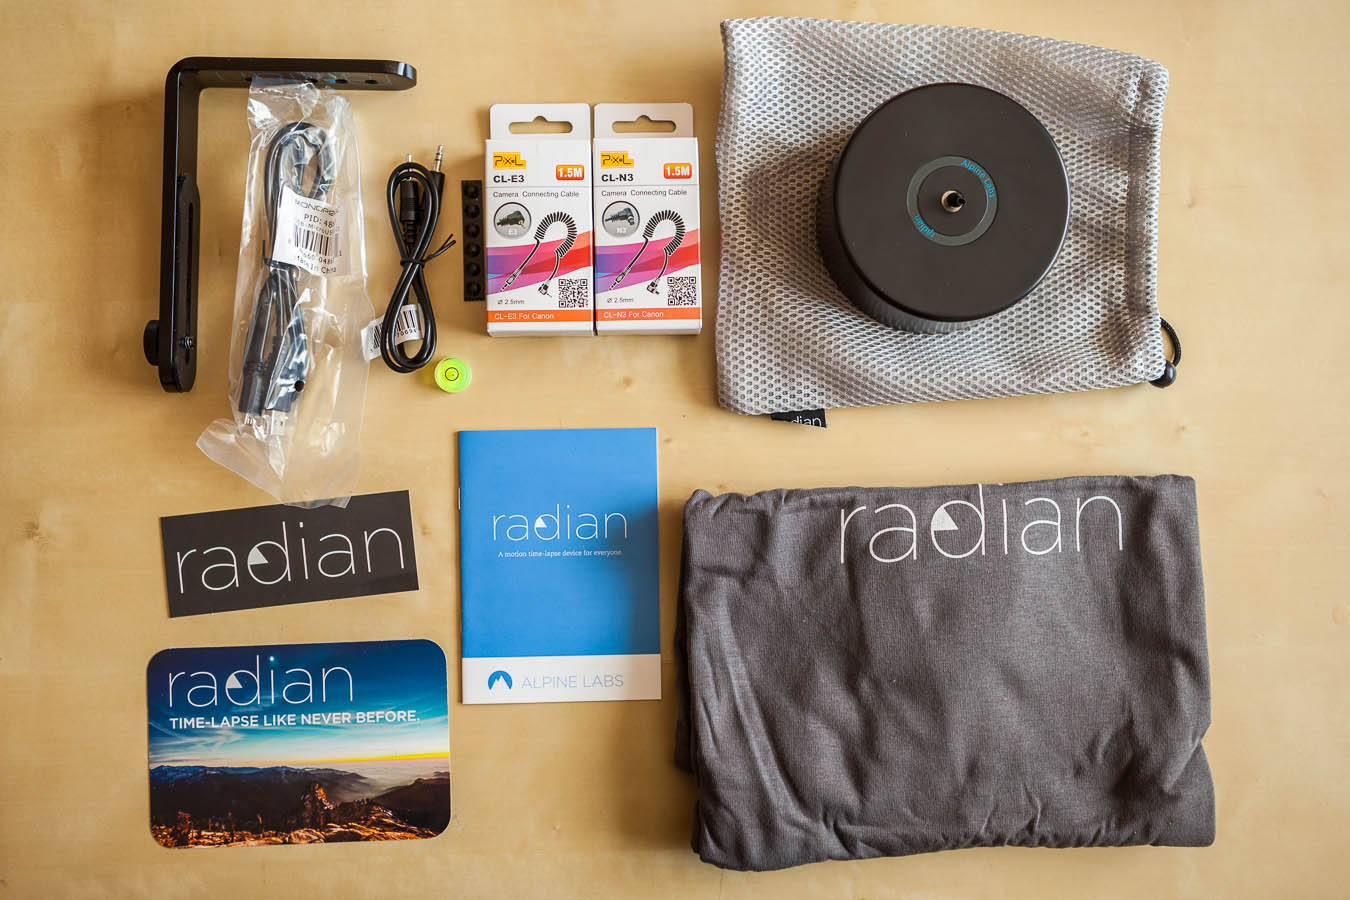
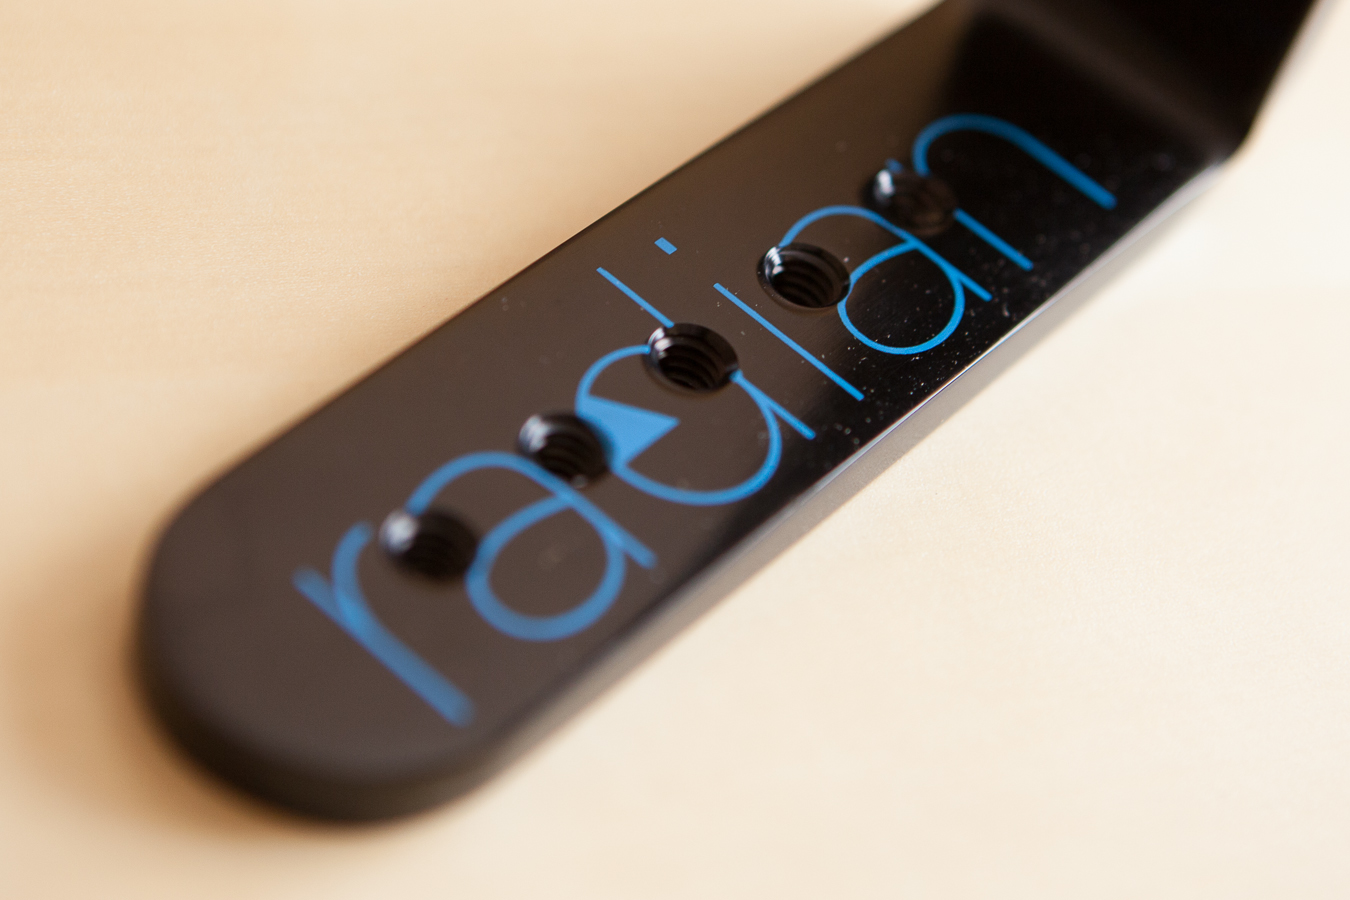
Here is what everything was in my package. I went for the Vertical Radian package, as I also wanted the L-bracket for shooting vertical sequences.

IMG_9384
IMG_9410
IMG_9404
IMG_9403
IMG_9400
IMG_9398
IMG_9395
IMG_9389

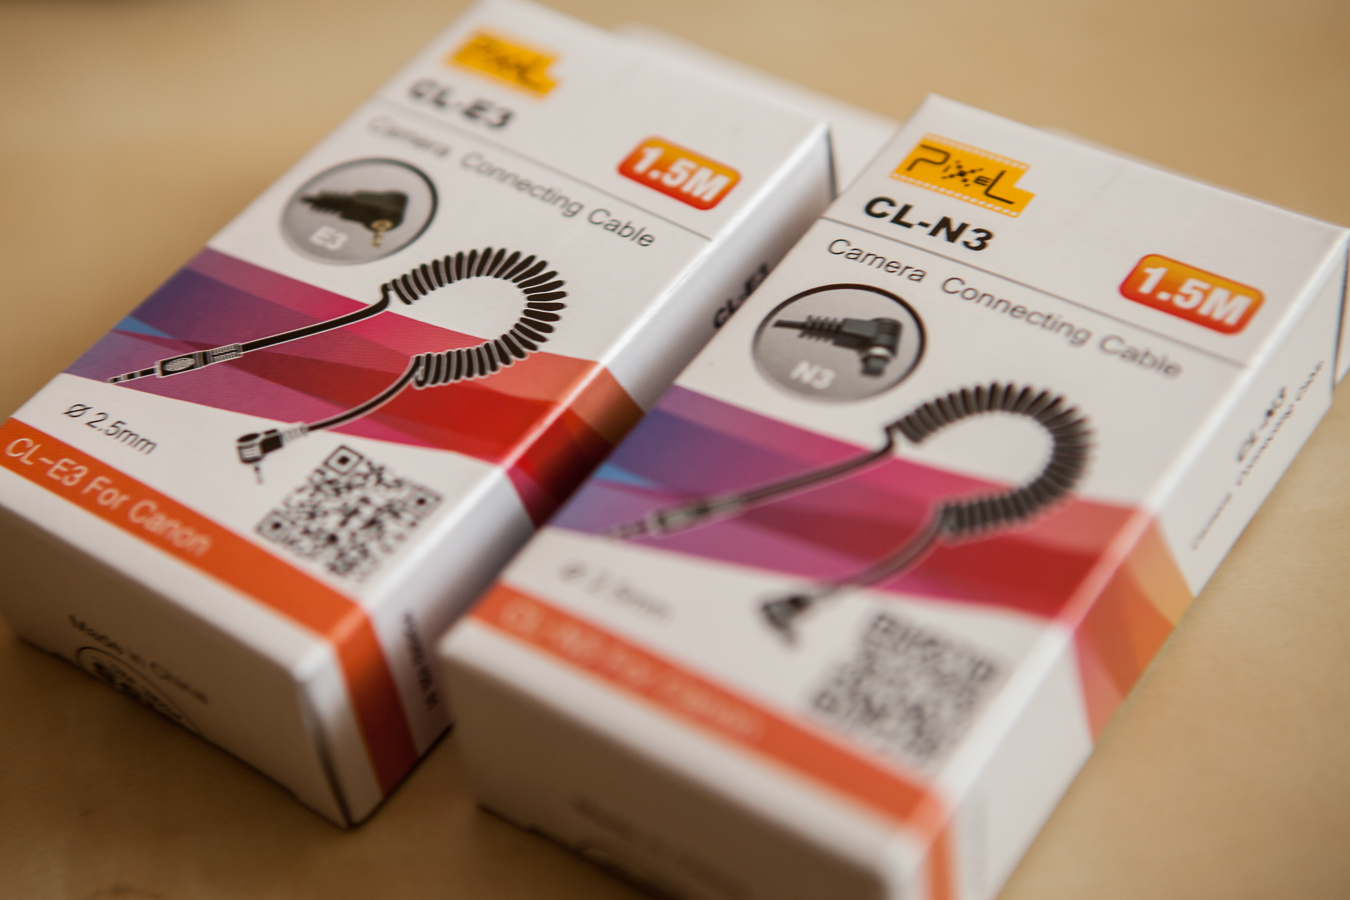
I was a little dissapointed, that I could not make a bulb ramping sequence with just the cables in the box. I had to order another cable that was needed. I probably have missed this in the description before. But as it is a very cheap cable, it’s not such a problem.

Also what I noticed right away, is that there is nothing between the Radian and your camera. If you ever looked at any quick release clamp which attaches to your camera, you would notice a small rubber or different area in the middle, so you don’t damage your camera. And here, as the Radian is plastic, it’s now very easy to scratch the top of it when you attach the camera. On my, the first scratches appeared almost immediately.

So I took the Radian to the city to take some photo sequences, I got this:

As you can see, the Radian works exactly as suggested. You get a very nice panning motion and also vertical movement works as it should. I tried it with a Canon 5D mark II and a Canon 16-35mm F2.8 lens and had no problems with the camera weight.

One thing I didn’t liked is, that the Radian is not stable when it’s off. I mean, that when you put your camera on the Radian and touch it, it wobbles. It makes setting up the camera a little cumbersome. You will also notice this very easily when you try to move your setup to a different location. I really suggest removing the camera from top of the Radian, as the movement will probably destroy the internal gears very quickly.

Other than that the hardware looks nicely made, with no visible defects or problems. The on/off switch could be a little bigger, but that’s my personal preference.

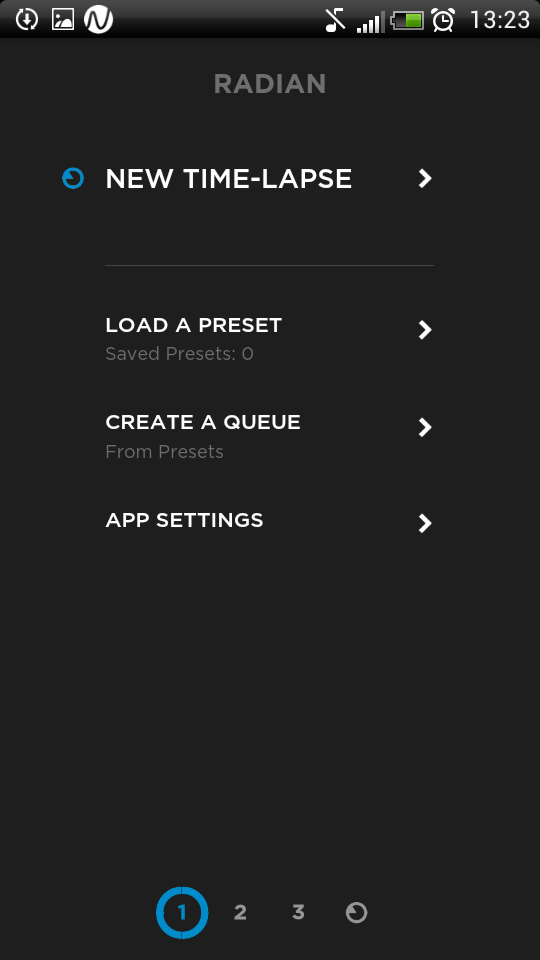
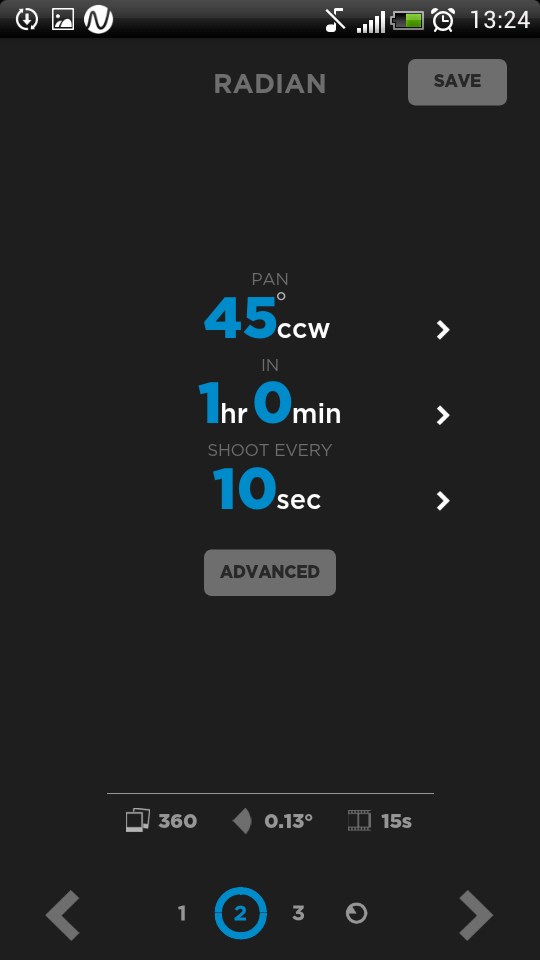
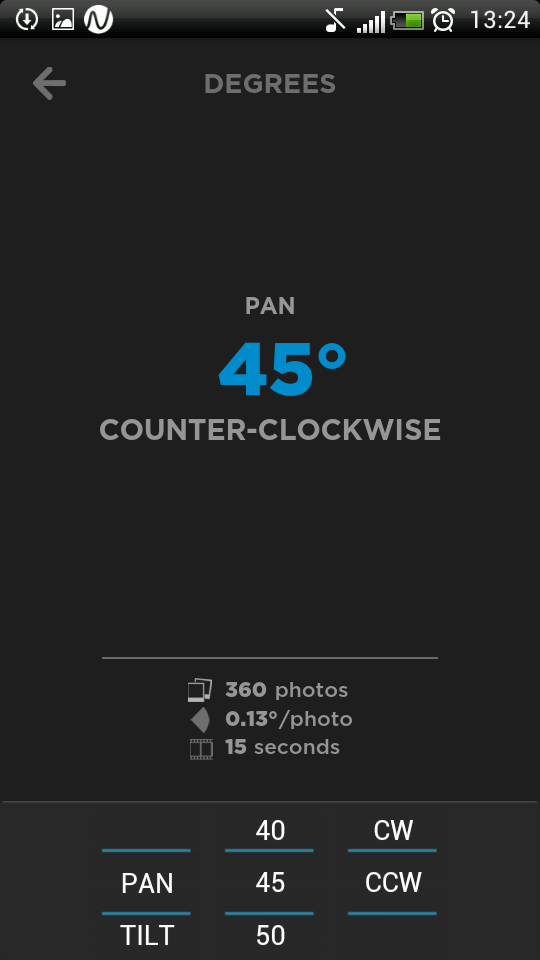
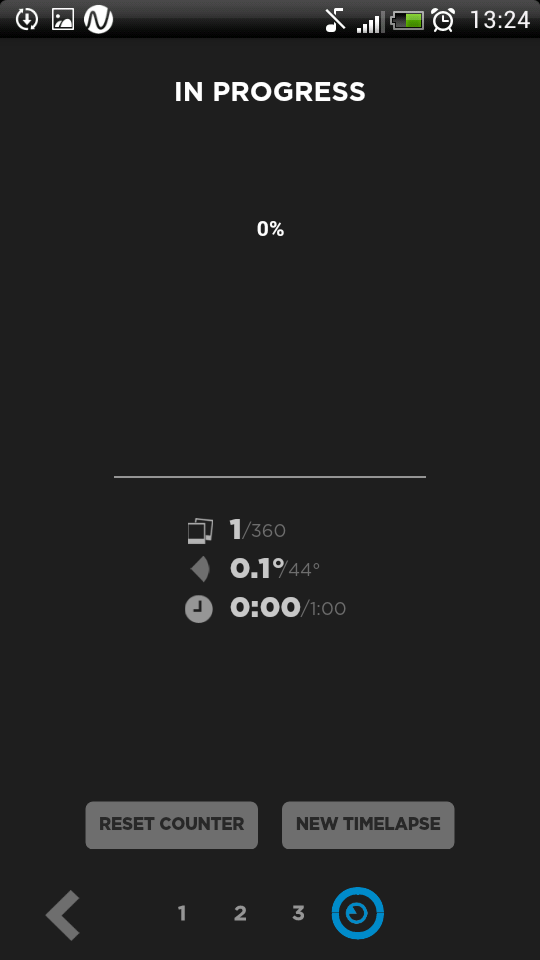
On the software side, I tried it both on an iOS and Android device. Both work fine if you don’t forget to set your device to maximum volume (Radian communicates via sound). All of the time I was able to upload the program on my first or second try. The software is easy to use, but few buttons could be bigger. Even on my HTC Sensation, which is not a small phone, I had sometime problems with hitting exactly what I wanted.

Radian App
Radian App
Radian App
Radian App

It’s very nice that the app tries to show you the progress of the Radian. It’s only an estimate, as it is not connected and it’s usually few seconds off from what the Radian does. In my experience this worked nicely until I switched to a different app on my phone. After that the app reset to the default settings and it forgot about the time-lapse I was shooting.

Pros:

– light device, which can move a lot heavier equipment
– horizontal and vertical movement
– long battery life and can use external battery power
– easy to setup with the companion app
– cheap compared to similar devices

Cons:

– easy to scratch
– not stable when turned off
– the app could be better in few cases

Conclusion

Overall until now I’m very pleased with the device. Despite the few small bugs, it does exactly what it should.

And we are at the end. If everything went as it should, from tomorrow I be back to posting my regular new photos. Hope you liked this little change, and maybe I do it sometime again :). And here is the last photo.
This is the final photo, open the full post to see the original shot and how it looked in photoshop:
The Urban Jungle

FREE EBOOK!!!
Subscribe to my newsletter and get a free Capturing fireworks ebook. 
Subscribe