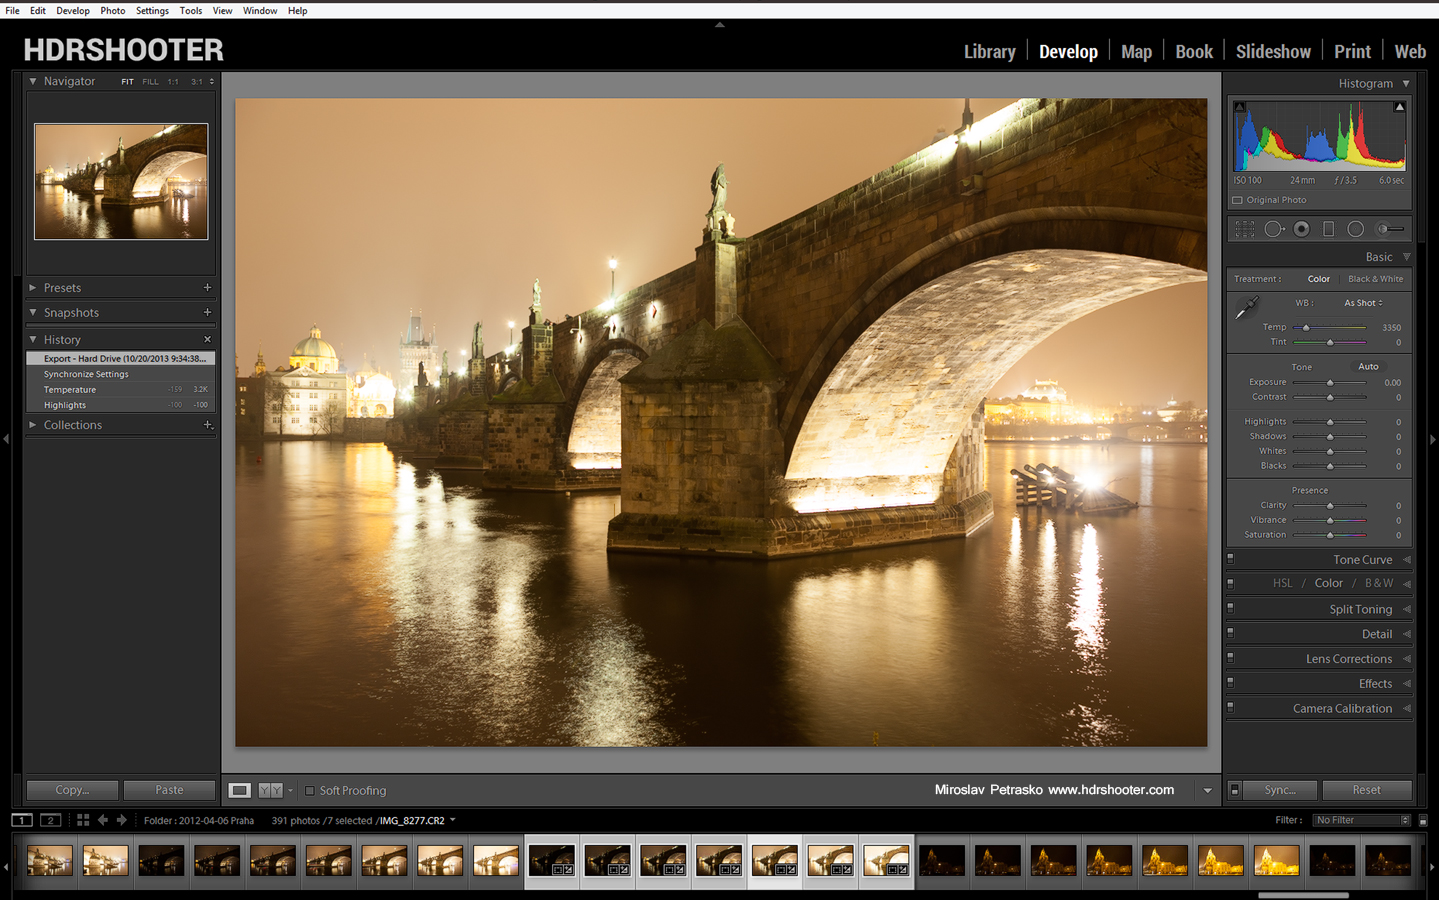
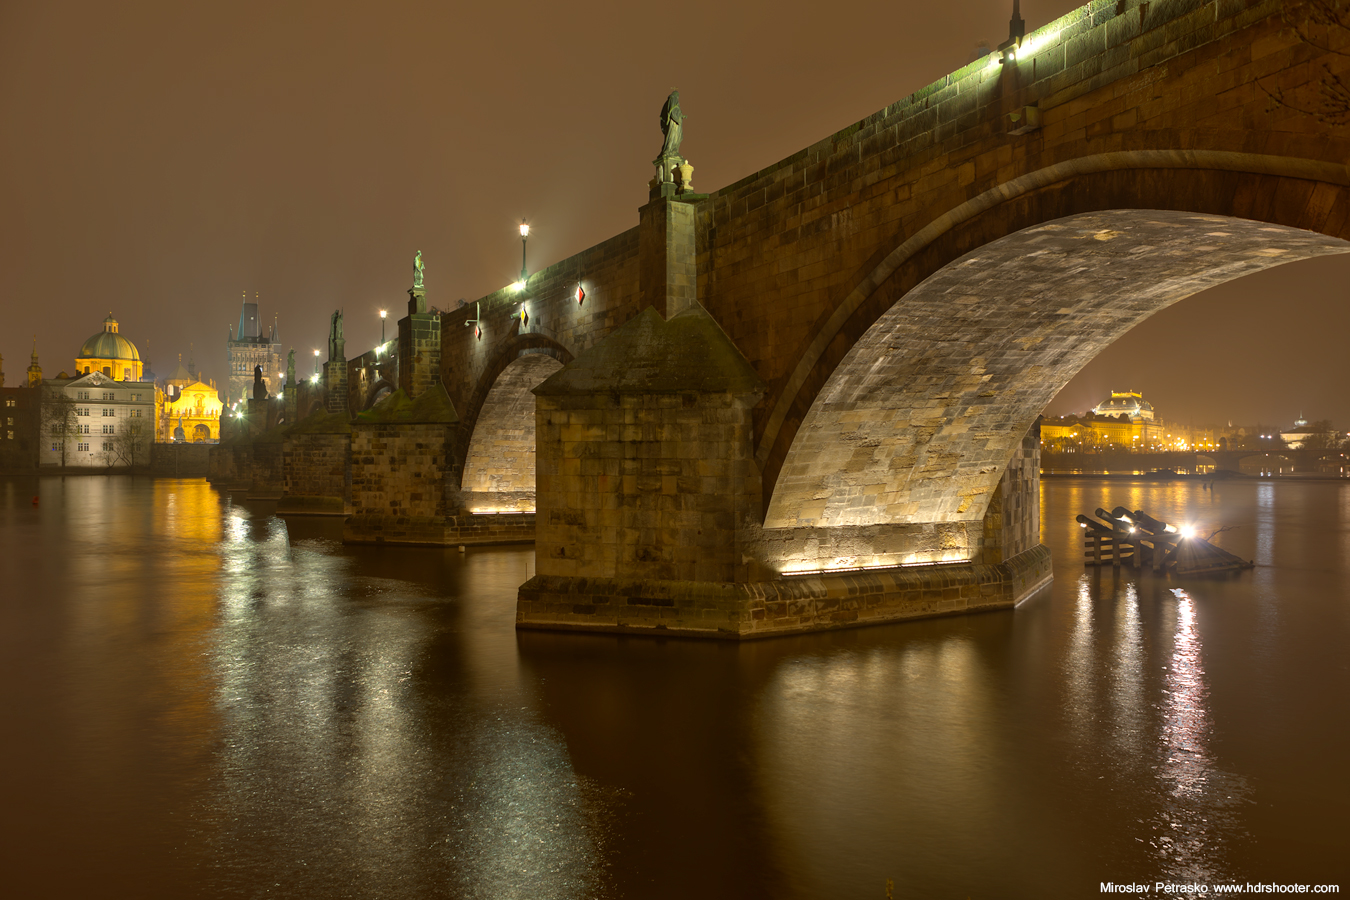
Because of the New years, I missed this weeks processing post. But to correct this, there will be one today. And from next week, it will get back to a processing post every Tuesday. So for today I chosen a photo from Paris, taken from the Tour Montparnasse.

Above Paris

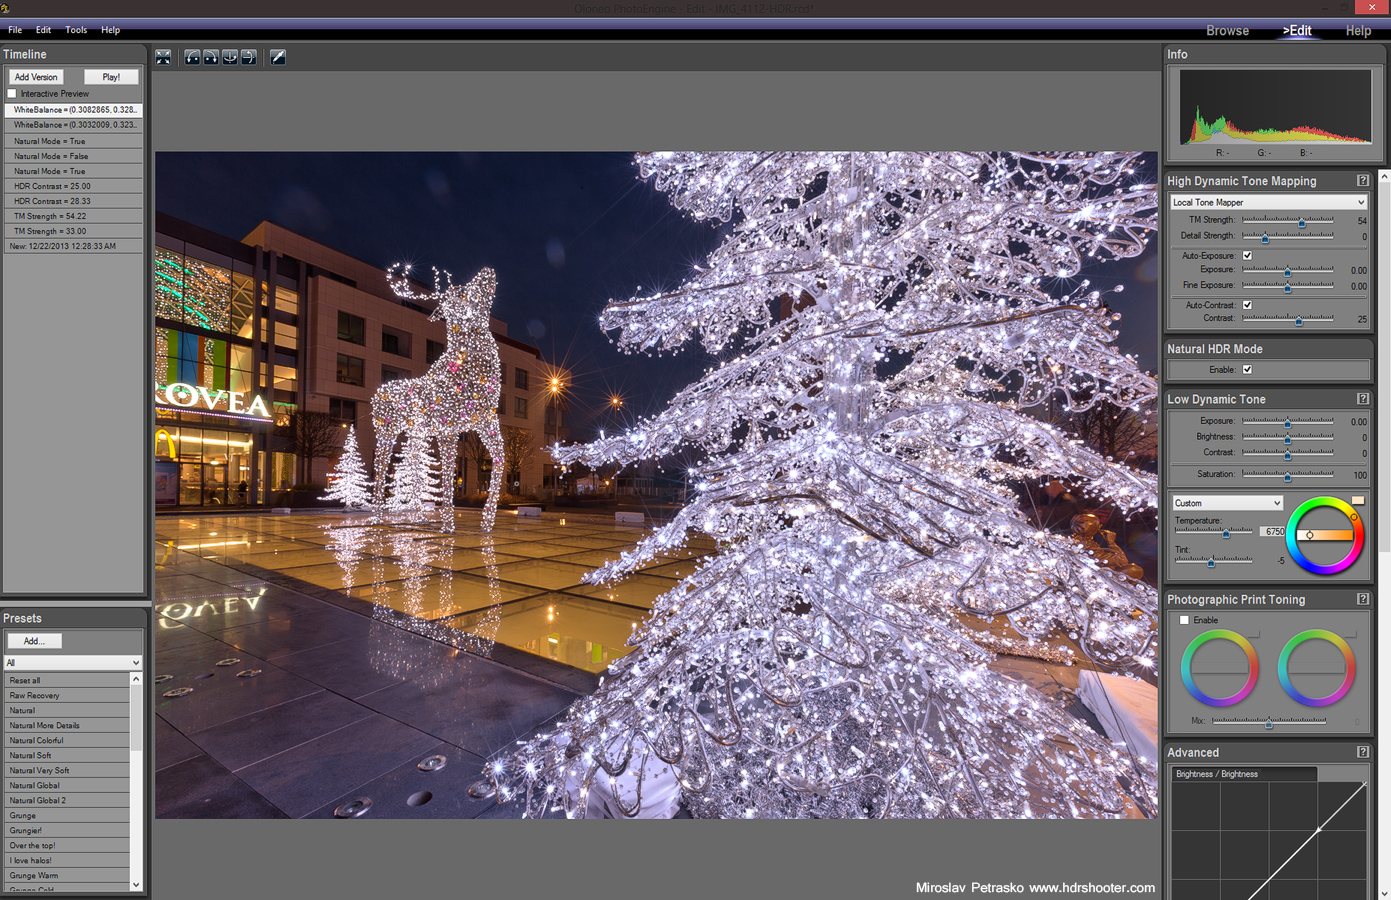
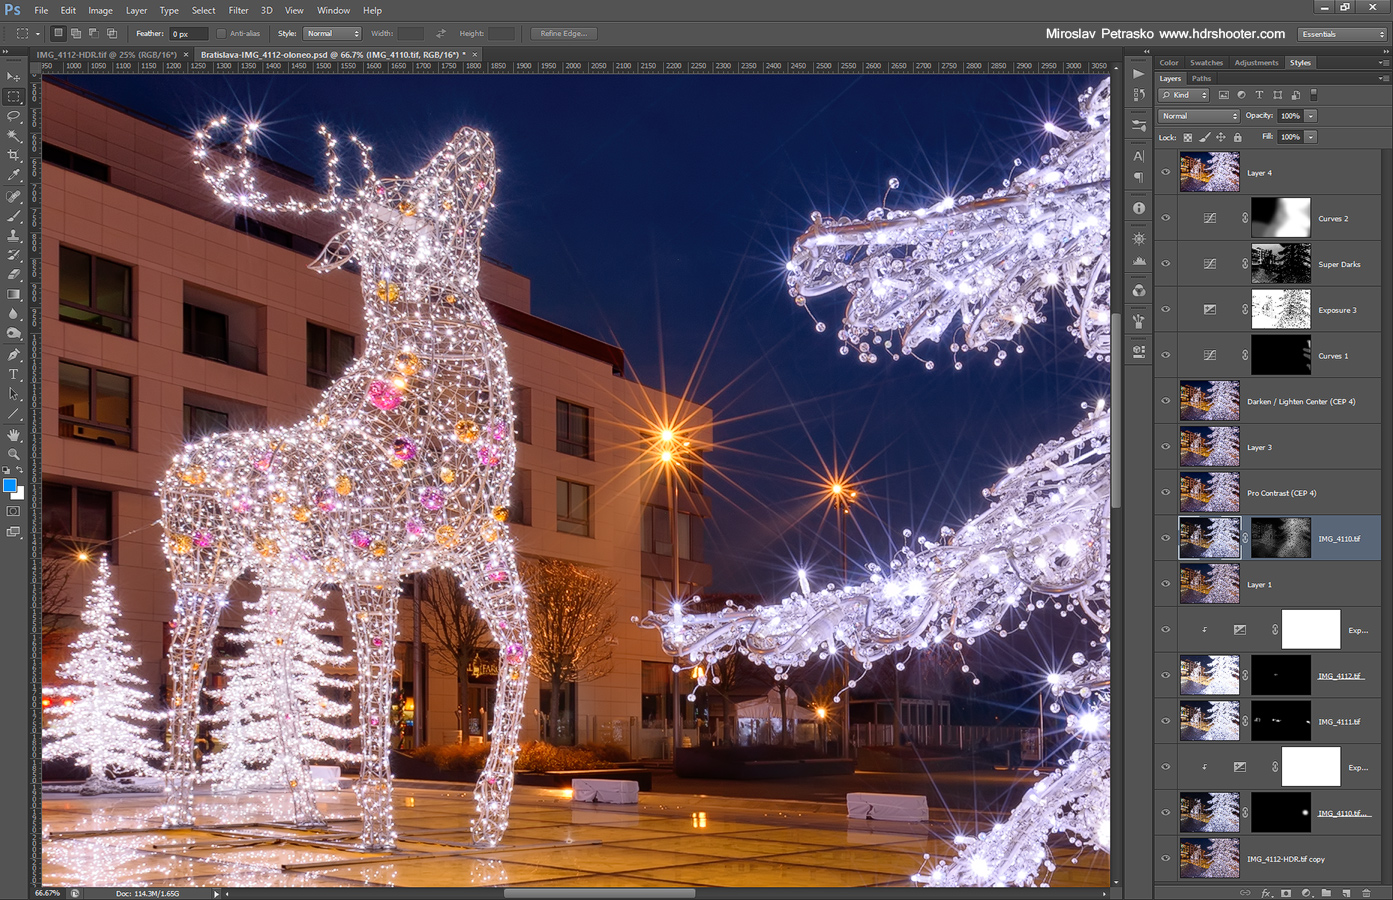
So to get this photo, I as always started in Lightroom. I corrected the white balance and the crooked horizon. After that I exported all the files as 16bit Tiffs and loaded them into Oloneo Photoengine. There I only changed the strength, as that’s all I needed. Using Bridge, I then loaded all the files into layers in Photoshop. From there I did the following tweaks (layers numbered from bottom up):

1. Oloneo Photoengine result
2. 0EV exposure to recover the shadows using a hand-painted mask
3. -2EV exposure to darken the sky even more
4. Color Efex pro contrast, to get more local contrast in the image. Of course I removed the effect from the clouds
5. Color balance on the whole image, as it was too purple
6. High Pass sharpening
7. Added more contrast through a basic midtones mask
8. Desaturated the blue channel on the most saturated areas
9. A little more pro contrast, I felt like I need more detail in the city
10. Added contrast by using curves

Above-Paris-process

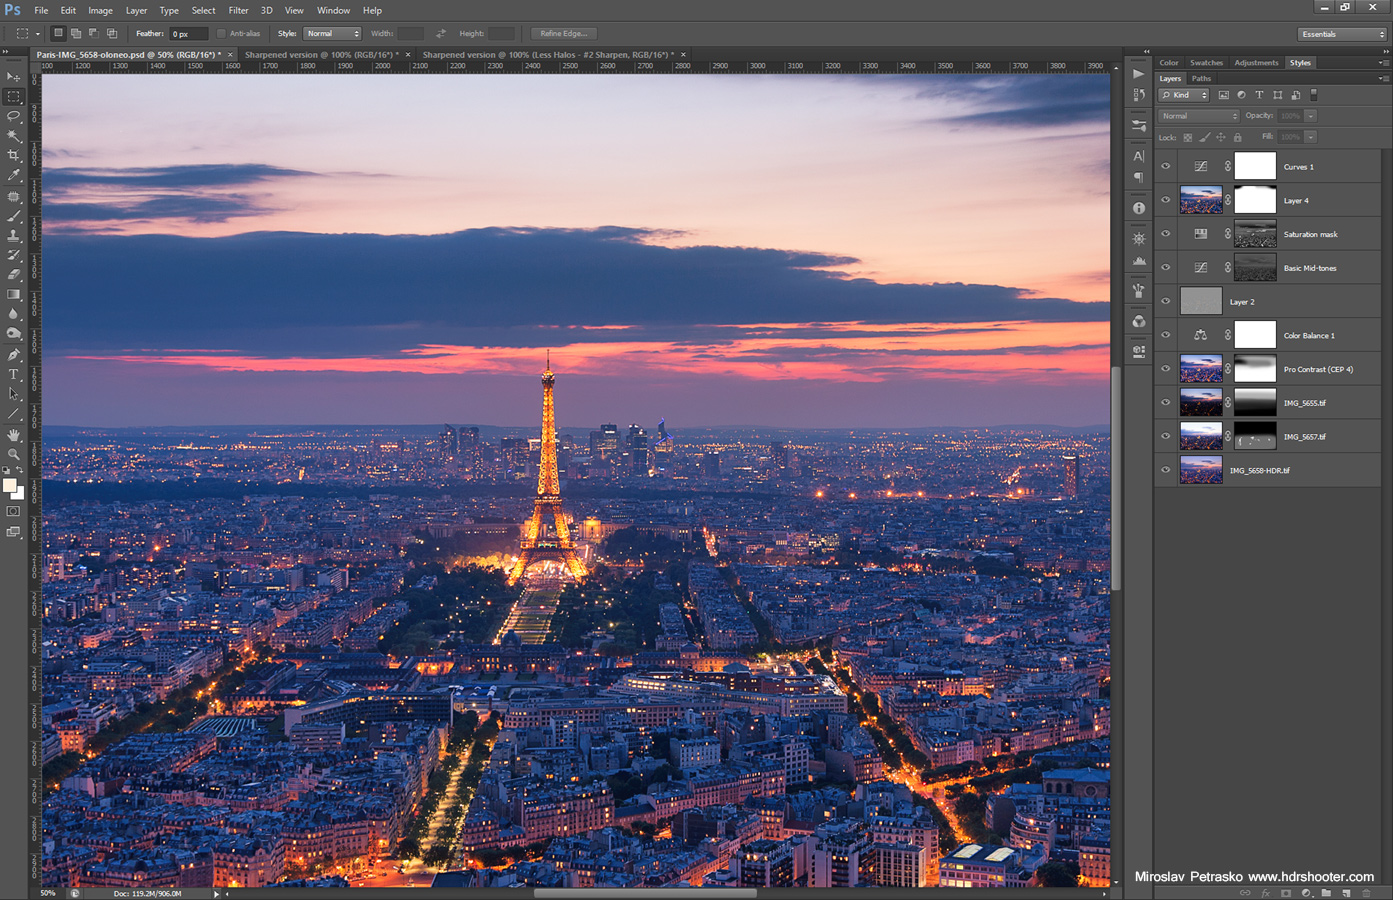
And that was all. Please continue to the full post to see the 0EV exposure and the Oloneo result or to the original blog post to see the exif info for this image.

This week I moved the process post to Wednesday, as you know, it was Christmas yesterday :) And so I also thought I show you a photo with Christmas decorations in it. So to get to this final photo:

Sparkling lights

I started as always in Lightroom. I removed chromatic aberrations and lens distortion. After that I corrected the horizon, as it was not completely straight. Then I synced the settings to all of the brackets and exported them as 16-bit Tiff files.

Sparkling-lights-lightroom

My next step was to merge them into a HDR file in Oloneo Photoengine. I changed the TM Strengths to even out the exposure and then added a bit of contrast and adjusted the temperature of the image. I saved the result as another 16-bit Tiff file.

Sparkling-lights-oloneo-process

I continued by loading the Photoengine result and the original files into layers in Photoshop (by using Bridge to load them). Once there I did the following adjustments (layers numbered from bottom up):
1. Oloneo Photoengine result
2+3. 0EV exposure brightened by one stop and then used to remove a moving person from the photo
4. +1EV to correct ghosting in few areas
5+6. +2EV exposure darkened by 1 stop and then used to remove more ghosting
7. merged the first layers and removed multiple persons from the photo using content aware and other retouching tools. I also removed all the dust spots that were visible.
8. used 0EV exposure with a brights luminosity mas to brighten the tree
9. Color Efex Pro contrast to recover photo contrast lost in HDR blending.
10. Noise reduction using Imagenomic Noiseware
11. Color Efex Darken/Lighten center, to create a vignette effect.
12. Curves used to darken few parts of the corners, that were still too bright
13. Added more exposure to most of the image to brighten it up. The additional brightness was not applied to the brightest parts of the image.
14. Brightened the extreme dark areas of the photo
15. Used curves to add more contrast to the tree

I also used the Perspective Crop tool, to correct the distortion of the photo, as the tree was falling in the original one.

Sparkling-lights-process

Please continue to the full post to see the oringinal 0EV exposure and the Oloneo Photoengine result. Or you can continue to the photo post, to see the camera info and where this photo was taken.

As every year, I’m adding a selection of my favorite shots I took during this year. And what should be a better day for this than on Christmas :). But first of all Merry Christmas to you all.

I visited few new countries (more than last year, but not as much as I would like) this year, and I think I got some great photos. So let’s get the new year started and hopefully it will be filled with a lot of great photos, taken at even better locations :)

Here you can see my favorites from 20122011 and 2010 :)

And here are my favorites from 2013
The perfect sunset
Sunrise at the bridge
The setting sun in Bratislava
Paris sunrise
Big Ben
Photo & Video Sharing by SmugMug
Blue hour by the Charles Bridge
The mirror world
Photo & Video Sharing by SmugMug
St. Stephen's Day Celebrations
Birmingham bus

And another week has passed, and almost another year. It feels like only yesterday I added my first processing post to the blog. And there are already so many of them. But another Tuesday, another one for you.

For today I chosen this very foggy photo from Prague, taken late at night. I used multiple applications to edit it, and I will show you all the steps I took in them. So to get this final photo, I took the following steps:

Foggy night by the Charles bridge

As always I started with Lightroom. I corrected the horizon line, lens distortions, chromatic aberrations and added a little noise reduction. After that I exported all the files as 16-bit tiff files.

foggy-lightroom

I opened them all in Oloneo Photoengine, where only with changing the TM strength, I got this result. My next step was to load all the original files, together with the HDR into Photoshop for further edits.

foggy-oloneo

In Photoshop I did the following (layers numbered from bottom up):

1. Oloneo result
2+3. I brightened the water in the 0EV exposure and blended it into the HDR photos.
4. -2EV exposure to darken few bright spots
5. A little bit of Color Efex pro contrat, to add more detail
6+7. Added more glow to the photo
8. Color Efex Darken/Lighten center to add a vignette
9. Brightened the darkest areas of the photo
10. Overall color balance, -15 in all channels
11. In this layer I removed all the people that were on the bridge
12. Added more contrast to the basic midtones
13. High pass sharpening
14. Used Color Efex tonal contrast to add more detail to the bridge

Btw. You can find my review of Color Efex here.

foggy-process

And that’s all. Please continue to the full post to see the original 0EV shot, or to the original post to see the camera info. Feel free to ask any questions and to share this post (or any other) further :)

You can check the price for the Hoya ND 400 filter on Amazon Store and B&H photo. Just don’t forget to take into account what size you need :)

There are many different filters one can use in photography, and most of them can be simulated, or replaced by using HDR or blending. But there is one that can’t. And that’s a Neutral Density (ND) filter. So what is it? A ND filter is actually just a very dark piece of glass. The only function is to block a certain ammount of light, so forcing the camera to take a longer exposure. And that actually all it does.
hoya-1
You use a ND filter in different situations, but it’s mostly used when you want to do long exposure photography (moving clouds, silky water, blurred moving people in day shots) or you want to use a big aperture during the day (like 1.8 or similar).

There are different strengths of ND filters, depending on how much light they let through. Some of them are even variable. The Hoya ND400 is one of the stornger filters, and lets in very little light. It actually lets in a 1/400th of the available light. That means that looking with your eyes, it looks completely black. It’s designates as a 9-stop filters, so it doubles you exposure time 9times (e.g. if your time was 1s without the filter, with the filter it will be 1*2*2*2*2*2*2*2*2*2=512 seconds. So as you can see, with this you can take really long exposures.

hoya-2
hoya-3

How good the filter is, is determined by multiple points. First is color cast. That is how different the color of the final photo through the filter is, comparing to the photo without the filter. Most ND filters create a green or purple color cast and the Hoya ND 400 is not different here. The color cast is not the strongest, but you still can see a green one on the photos.

hoya-5
hoya-4

Additionally the ND filter introduces more vignetting, chromatic aberrations and softness into your photos. With the Hoya ND400 I noticed all of those, but always the change was wery weak, mostly negligible. You can see the problems only when you really look for them.

I actually had an accident with my filter. While taking photos in Paris, the filter got loose from the lens and fallen onto a rocky road. There it split into all its parts, but luckily the glass was not damaged and In few minutes I could put it back together, and it’s still fully usable. I only had to clean it afterwards.

Overall I like this filter. There are better out there, but not at the price point of this one. If you trying to get into long exposure photography, this can be exactly what you need. If you use also different type of filters, like ND graduated, that you should probably get a filter that is the same as all your other filters (e.g. if you use any of the available systems like Cokin or Lee)

View all my other reviews here.

And here are few photos I took with the filter:
Paris sunrise
Illuminated by the Sun
White fluffy clouds

FREE EBOOK!!!
Subscribe to my newsletter and get a free Capturing fireworks ebook. 
Subscribe