Free HDR video tutorial

Free HDR video tutorial

MASTER EXPOSURE BLENDING

Find the best ones

Find the best ones

TOP PHOTOGRAPHY SPOTS

Free wallpapers

Free wallpapers

HIGH-RESOLUTION WALLPAPERS

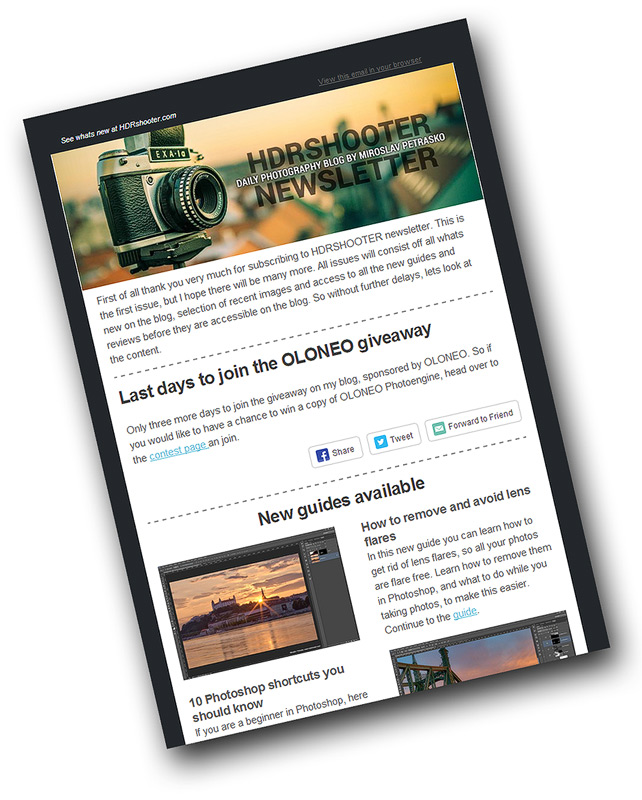
Stay in touch with the blog with the HDRshooter newsletter. I promise not to spam you and never post more than one a week. This will not be a regular newsletter, I will create one every time I have enough content to share with you.

You wonder what the newsletter is about? It will include:

  • Info on any upcoming events or contests on the blog
  • Access to all the new guides and reviews before they are accessible on the blog
  • A list of all the updates to the blog from the recent weeks
  • A selection from the recent photos posted on the blog


Or you can check out the archive to see how it looks :)

newsletter-side
[mc4wp_form]

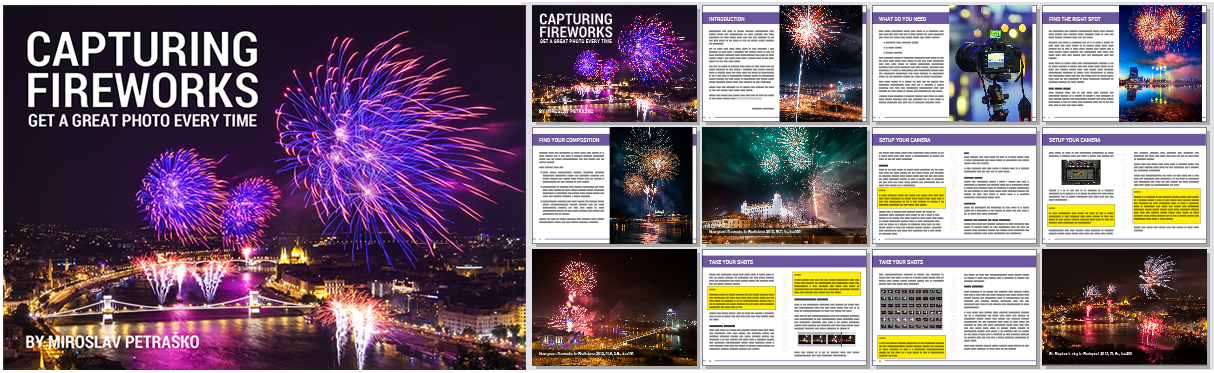
Free e-book for all subscribers – Capturing Fireworks

To say a big thank you to all of you who subscribe, I created an e-book on taking Fireworks photos just for you. Once you subscribe and confirm you email, you will receive a welcome email with the download link. An those of you who already are subscribers, don’t worry, the link will also be in the next edition of HDRshooter newsletter :)

The book is all about how to take fireworks photos, and here is a little preview:
book-preview
newsletter-header-retro

Archive

Issue #1 – How to remove lens flares and much more!
newsletter-sample

A week passed and we are again at the process Tuesday post. And as I’m currently hawing the contest and raffle where you can win Oloneo Photoengine, I thought I show you a photo which I edited mostly in Oloneo Photoengine. And I’m including a special tip today :). So here goes.

Something green

I took this photo two years ago, still with a Canon 7D (my 450D that I had at that time had a broken shutter :)). That’s also why I used only three brackets, as that’s all I could take then. So as usually I started in Lightroom. I corrected the horizon here and also did a little noise reduction.

Something-green-lightroom
From there I exported all three brackets as 16bit Tiff files and loaded them into Oloneo Photoengine. Here I merged them and as you can see, I had to move only one slider to get the look I wanted (the TM Strength). It created a very nice blend, and also opened the shadows more that it was on the original brackets.
Something-green-oloneo-process
My next step was to load this result into photoshop. I haven’t used any original brackets here, as there was no need to blend any parts from them. I then did the following edits on it (layers numbered from bottom up):

  1. the result from Oloneo Photoengine
  2. I removed lens flares from the trees on the right
  3. did more noise reduction
  4. brightened the darkest parts of the image
  5. added glow (view my glow tutorial)
  6. brightened the glow
  7. changed the color of the sunlight (I will explain this in a moment)
  8. brigtened the overall photo with an exposure adjustment, but not in the brightest areas
  9. added more contrast to the basic midtones
  10. added a little contrast to the whole image

Something-green-process

And now for the point 7, where I mentioned I changed the color of the light. A lot of times when I have a photo with the sun in it, I want to have the surrounding area to have a nice yellow/orange glow to it. Same here. The green color was nice, but I wanted more. And to get this I did the following:

  • created a new layer
  • filled it with 50% grey (shift+backspace and select 50% grey and confirm :))
  • set the blending mode to soft ligt, this will make this layer invisible for now
  • picked a color from the sun, something nice and warm
  • chosen a big soft brush, with around 20% opacity and started painting around the sun, the more away from it, the less brush strokes
  • just change the opacity of the layer if the effect is too strong

And that’s it. Looks really great if you need more sun glow, or if you trying to change a color of a certain part of the photo. Here is this layer from this photo, shown without the blending mode selected and at full opacity. I used it in the end at 33% opacity, and as you can see, I also deleted parts of it.
Something-green-grey

And that was all. To see the original 0EV exposure and the Oloneo Photoengine result, please continue to the full post.

Photography contest sponsored by Oloneo

The first week of my photography contest has passed and until now 90 entries have been posted overall. You still have one week to enter and have a chance to win a copy of Oloneo Photoengine. Just head over to the contest announcement here https://www.hdrshooter.com/2013/11/18/photo-contest-sponsored-by-oloneo/ and grab the source images.

And the raffle for another copy is also still running, so feel free to join there also, to have a bigger chance to win :)

The giveaway is over, the winners have been notified

At the party

I know I promised to get back to landscape shots today, but with the quantity of photos I still have to process from this weekend (three parties until the morning worth of photos :)), I just had no time for HDR. But instead, I have for you one of the photos I took during the party. And as I really like portraits, its a portrait.

This is a single image edited in Lighroom and Photoshop. I bounced the flash off the ceiling to get a nice light here.

Big thanks to Dominika for letting me share a photo of her :)
At the party

I’m just crazy busy this weekend, as I’m taking photos at the Bratislava Sensual Dance Festival (you can see them on my personal FB profile), so I had absolutely no time to edit photos. So for today I chosen another photo of the lovely Alexandra, which I edited few weeks ago. Will try to get back to the landscape shots on Monday :)

This is a single exposure edited in Photoshop and Lightroom.
Beauty in the park

New wallpapers

I liked my recent photos with the lighthouse so much, that I thought I will add them to the wallpaper section of this blog. And so here they are. I hope you will like them as I do, and maybe some of you will use them :)

The perfect sunset 1920x1200
On the pier 1920x1200
A sunset lighthouse 1920x1200

In the middle of the day

When I started taking photos, most of my shots were taken in the middle of the day. But now, as more I shoot, I almost never take any photos at that time, and rather focus on sunrise, sunset and blue hours. But that’s not always possible, as sometime you are at a great spot during the day, and you just can’t miss the opportunity to take some photos. Same here, on the Hinterhaus castle ruins. A spot that I need to revisit again, but next time for the sunset :)

This is a HDR created in Photomatix, and then blended with original exposures in Photoshop.
In the middle of the day

FREE EBOOK!!!
Subscribe to my newsletter and get a free Capturing fireworks ebook. 
Subscribe