Photo organization
How do you organize your photos? I prefer to use Lightroom for this. It’s great for quick edits and for RAW corrections. Still I have to do a lot of cleaning in my database, as it’s same as with everything else. When one does not organize everything right away, it starts to pile up and get a little overwhelming. My lightroom currently indexes around 100 000+ photos and I know, when I start to clean it up, I could delete at least 30-50% of them. But this will take a long time.
I also quite like the way Trey Ratcliff handles his photos. He describes it in his ebook Digital Workflow for Photographers and I really want to implement it. But for now I’m still struggling a bit. Will have to do the clean up first :)
On the pier
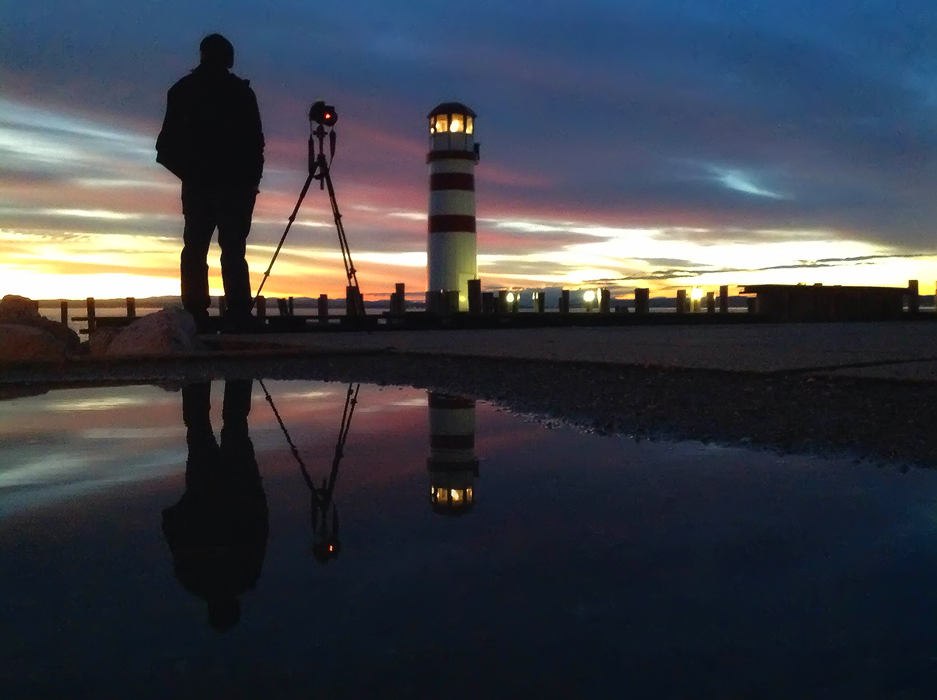
I went out today, hoping to get some new photos. Whole Bratislava is covered by a very heavy fog, so I thought a view from a higher place could look quite interesting. But no luck for me. The two highest spots in the city were not accessible. On the castle fortification they started a renovation project, so they are fenced off and on top of the SNP bridge was a private party. So no nice views for me. So I chosen another photo from this beautiful sunset at the lighthouse in Austria. Btw. don’t forget to visit this blog tomorrow, as there will be a little different post :)
This is a manual blend from 6 shots, created in Photoshop.