
Free HDR video tutorial

Free HDR video tutorial

MASTER EXPOSURE BLENDING

Find the best ones

Find the best ones

TOP PHOTOGRAPHY SPOTS

Free wallpapers

Free wallpapers

HIGH-RESOLUTION WALLPAPERS

DSLR controller app

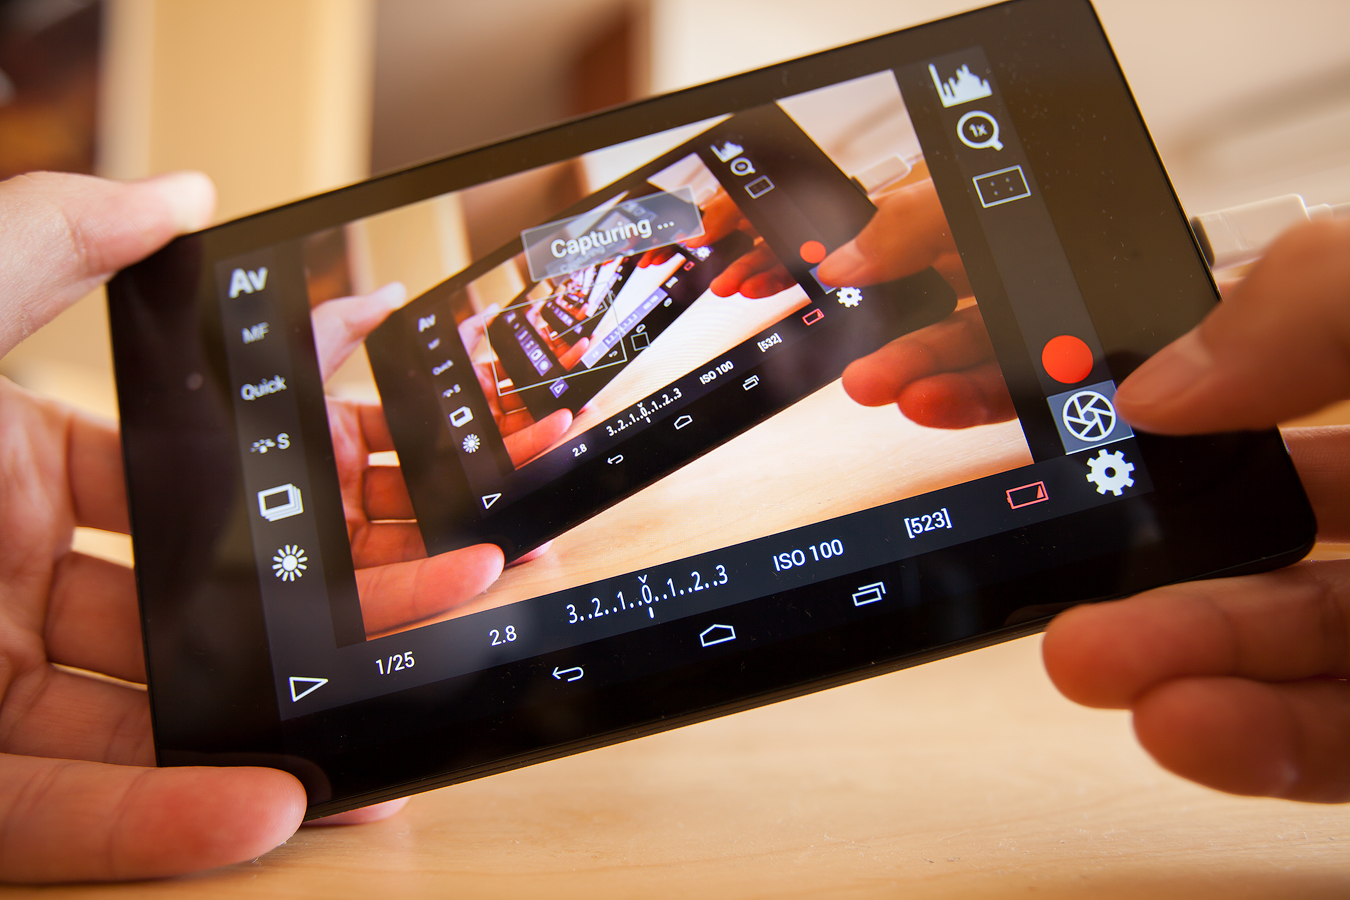
Anyone of you tried this app? It allows you to control the camera using most android devices, via a cable. It looks pretty good and the delay is acceptable. I just cant see myself using it in the field. Maybe for some product style photography. What do you think?

Of course here I played with a recursion, where I placed the tablet in front of the camera. Just having a little fun :)
dslr-recursion

High above the river

I almost posted another lighthouse photo today :) I just like all the photos from that sunset so much. But then I decided for a different one, just so it’s not all the same here. But I will add the lighthouse tomorrow. This is a view of the Danube river from the Aggstein castle in Austria. You just have to wonder how much work it took to build this castle on top of such a high hill. I really would not like to move all the needed stones there :)

This is a manual blend form 5 exposures. Blended in Photoshop.
High above the river

How the week passed quickly. And again we have here another Tuesday and another process post. Today I chosen a very recent photos, as a lot of people liked it. So here goes.

To get this photo
The perfect sunset

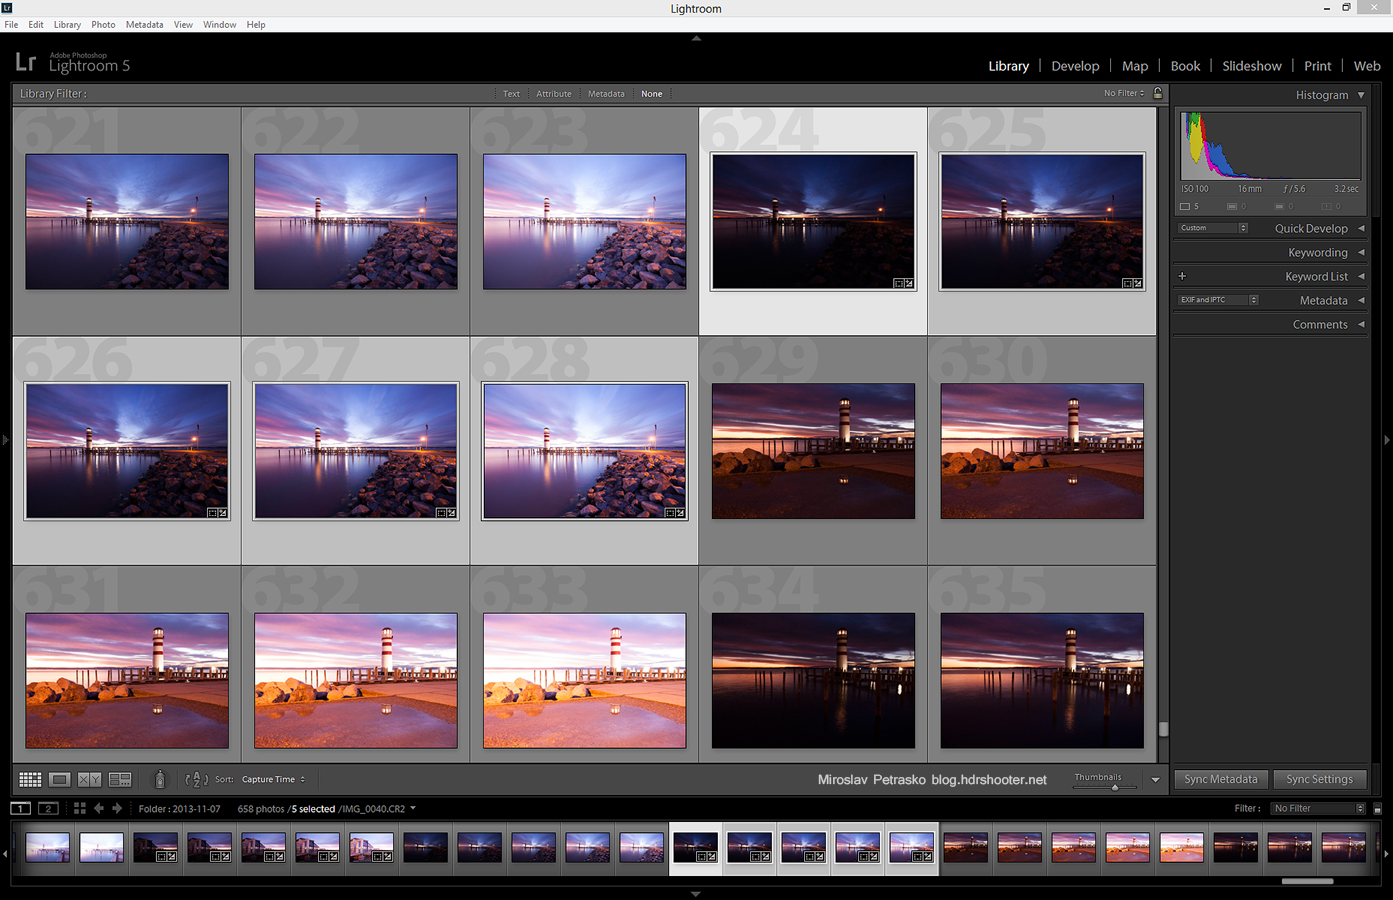
I started as always in Lightroom, where I applied lens correction, removed chromatic abberations and applied a little noise reduction.
The-perfect-sunset-lightroom

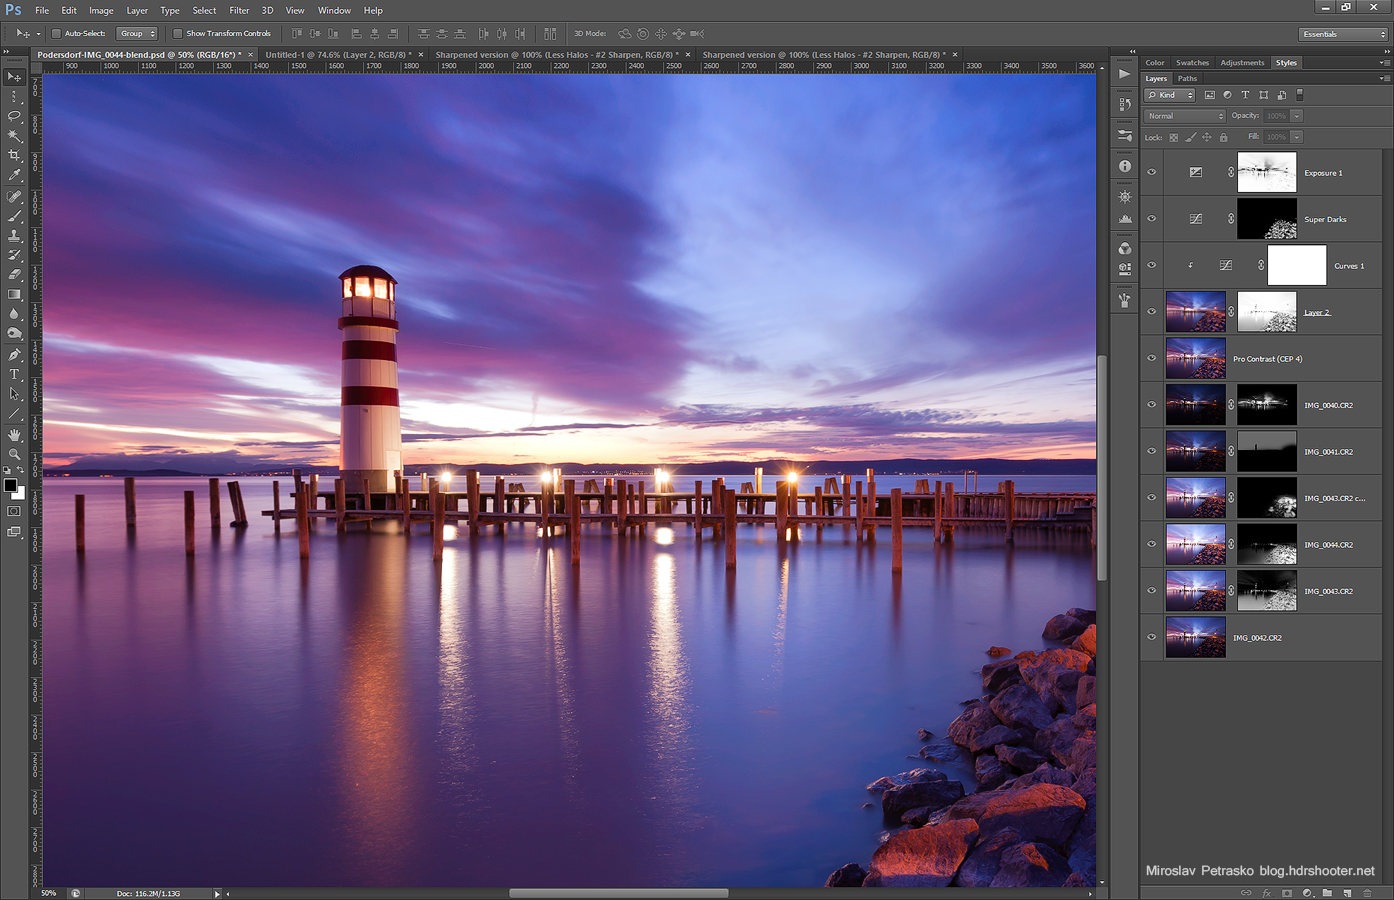
After that I loaded all the brackets into layers in Photoshop. I used the following layers (numbered from bottom up):
1. 0EV exposure
2. +1EV exposure to brighten the foreground
3. +2EV exposure to brighten the foreground even more
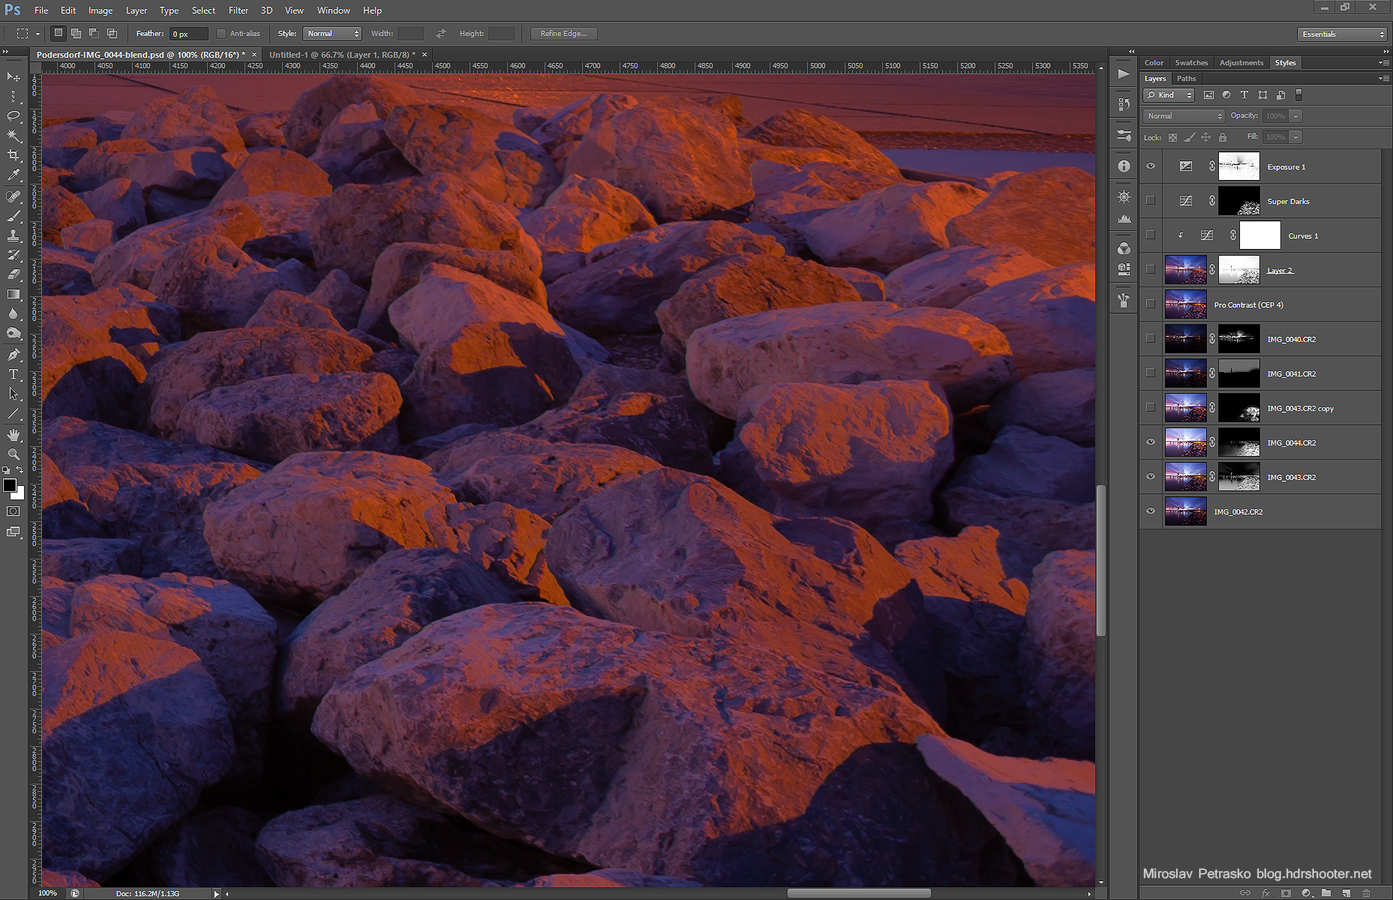
4. +1EV exposure once more, to recover few areas. I’m including here a screenshot of what I had to correct. Blending can make colors look grey, and this has to be corrected.
The-perfect-sunset-process-2

5. -1EV to darken the sky
6. -2EV to darken the brigtest parts of the sunset
7. Color Efex Pro contrast to add more structure and local contrast to the photo
8+9. aded glow (check out my tutorial on this) but I removed it from the darkest parts of the image, as they got too dark
10. brightened the darkest spots on the rocks
11. brightened the whole photo by adding a little bit of exposure

The-perfect-sunset-process

And that was all.
Please continue to the full post to see the original 0EV shot.

I just have the feeling like I’m looking at a toy here, not a city shot. And It would be really enhanced by a tilt-shift lens, I just don’t have one (and I’m not a big fan of the fake tilt-shift effect anymore). I still really like how the buildings here create something like and S curve, even if it’s not so dominant.

This is a manual blend from 3 shots, taken from the Three towers in Bratislava. I think not many people from Bratislava will recognize the buildings here, as you almost never see them from this side :)

Also big thanks to Lucka for letting me occupy her balcony again :)
City blocks

I don’t really like taking photos in the rain, but there is one good thing about it. With all the moisture in the air, it starts reflecting all the lights from the streets and so giving more color and light to the scene. Of course I would’t even try it if I didn’t knew that my camera is weatherproof. But after quite a few photos taken in rain, I’m quite sure that it will survive a few more :)

This is a manual blend from 5 shots, taken in the center of Ljubljana.
Water colors

I just could not get my camera low enough here. When you try to get a nice reflection from a puddle, you have to get as low as possible. Same here. To get the whole lighthouse in the puddle I had to be only centimeters from the ground. My tripod can get quite low, just the middle part is in the way. So in the end I took this shot with the camera upside down. It was quite fun to try and find the controls in that situation. I noticed how many thinks I do automatically, because when I though where the buttons were, I could not remember :)

This is a manual blend from 6 shots, edited in Lightroom and Photoshop. For those curious, I use Lightroom only to organize my photos and do small edits on the raw files. This are usually just the removal of chromatic aberrations (really easy to do in Lightroom, hard to do in Photoshop), white balance and lens correction. I also sometime recover the highlights in the brightest shot and brighten the darks in the darkest shots. I do this if I see that I will need it later in blending, and you get better results when you do this on RAW files than on already exported files.

Reflected lighthouse

FREE EBOOK!!!
Subscribe to my newsletter and get a free Capturing fireworks ebook. 
Subscribe