 And I’m back from Budapest. It was a great week, mostly with great weather, filled with great photo locations and meeting with great people. I’m just completely tired from the lack of sleep I had most of the week.
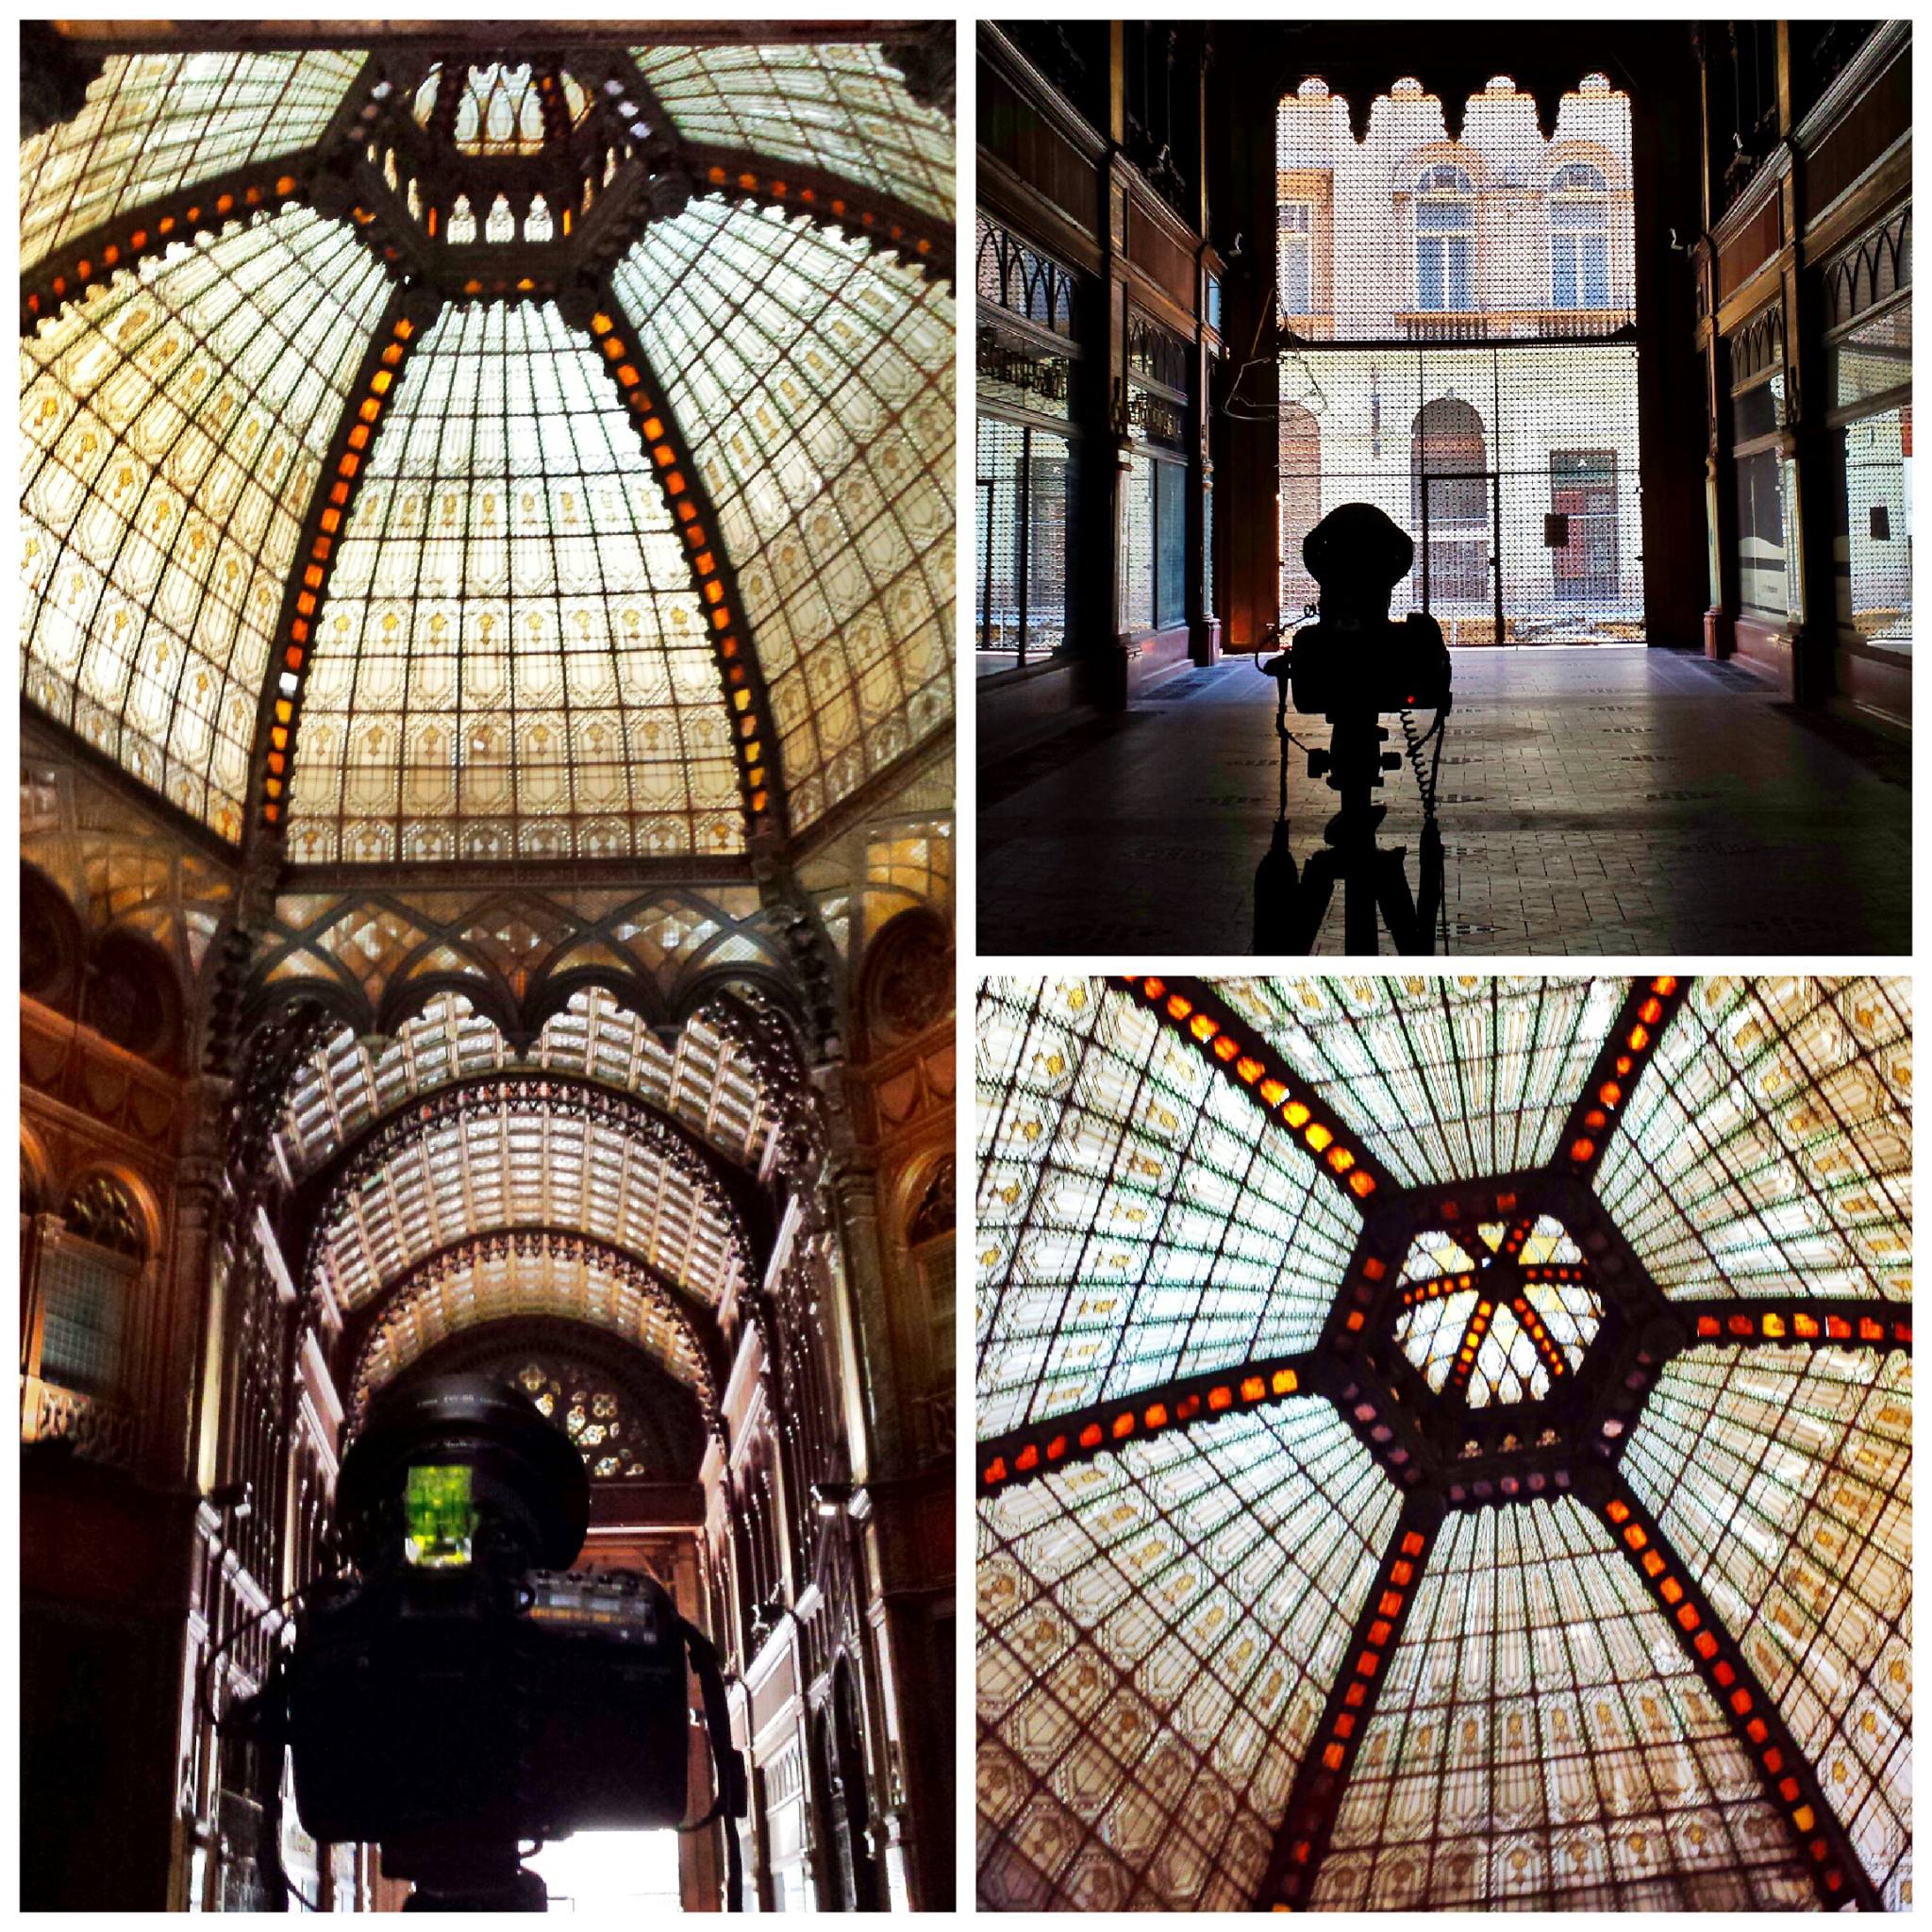
But not to miss a daily post, here is the first edited photo from this trip. This one was taken at the Parisi Udvar, a not used shopping street, which will hopefully be reconstructed. It just looks too good to let it be in this desolated state. You can see a behind the camera shot on the side. I posted a lot like this on FB during the week, and will also share few of them here.
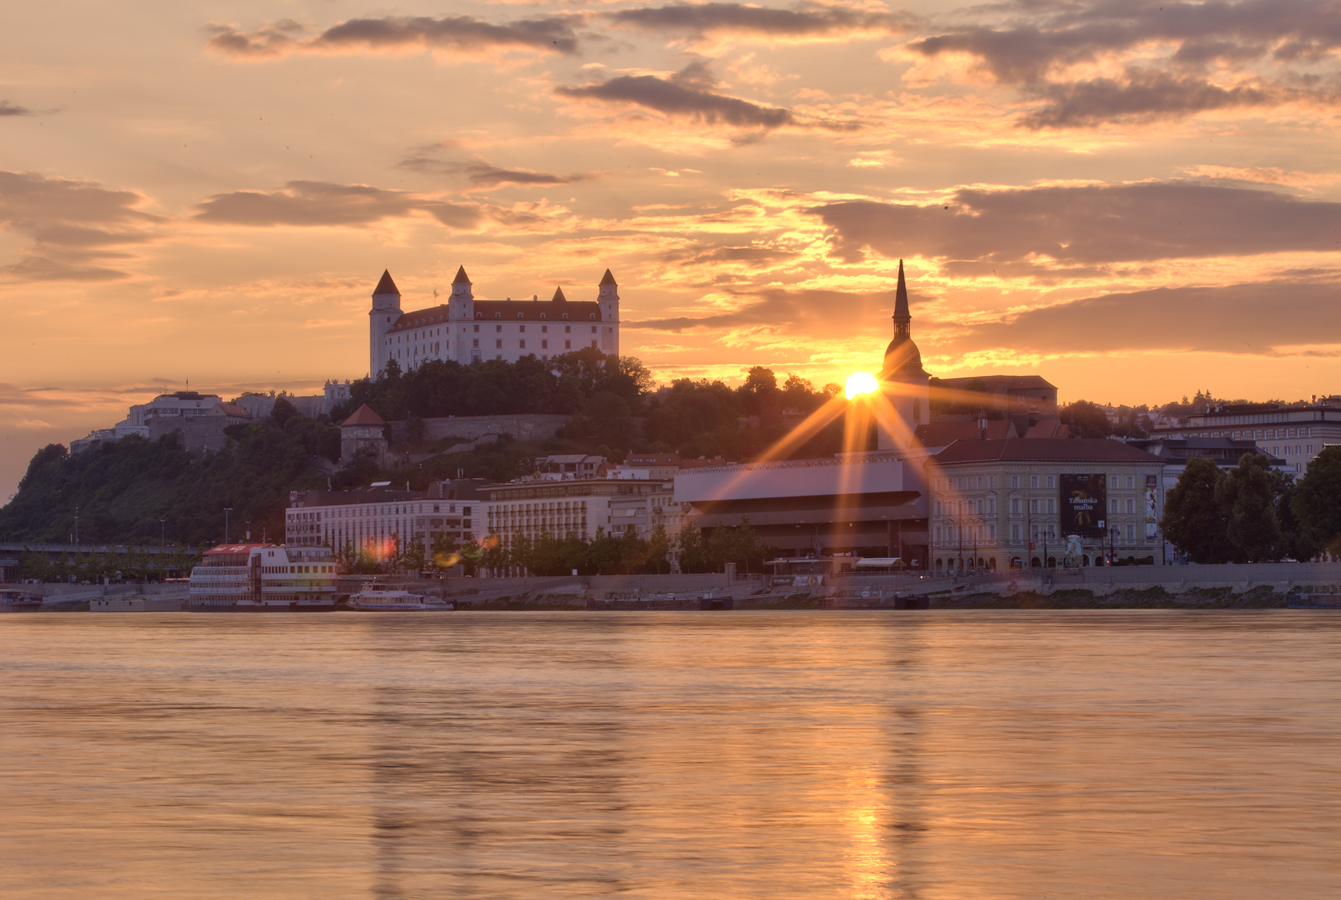
This is a manual blend from 5 shots.