Free HDR video tutorial

Free HDR video tutorial

MASTER EXPOSURE BLENDING

Find the best ones

Find the best ones

TOP PHOTOGRAPHY SPOTS

Free wallpapers

Free wallpapers

HIGH-RESOLUTION WALLPAPERS

Another week just passed, and again I’m getting to another process post. So as always I will show you how I edited one of my recent photos. For today I chosen this photo from Austria, from this stunning sunset at the Neusidler see. So to get to this final photo, I did the following
Crazy skies

As always I started in Lightroom, where I corrected the lens distortion and removed Chromatic aberrations. After that I exported all the files as 16bit Tiff files.
crazy-skies-lightroom
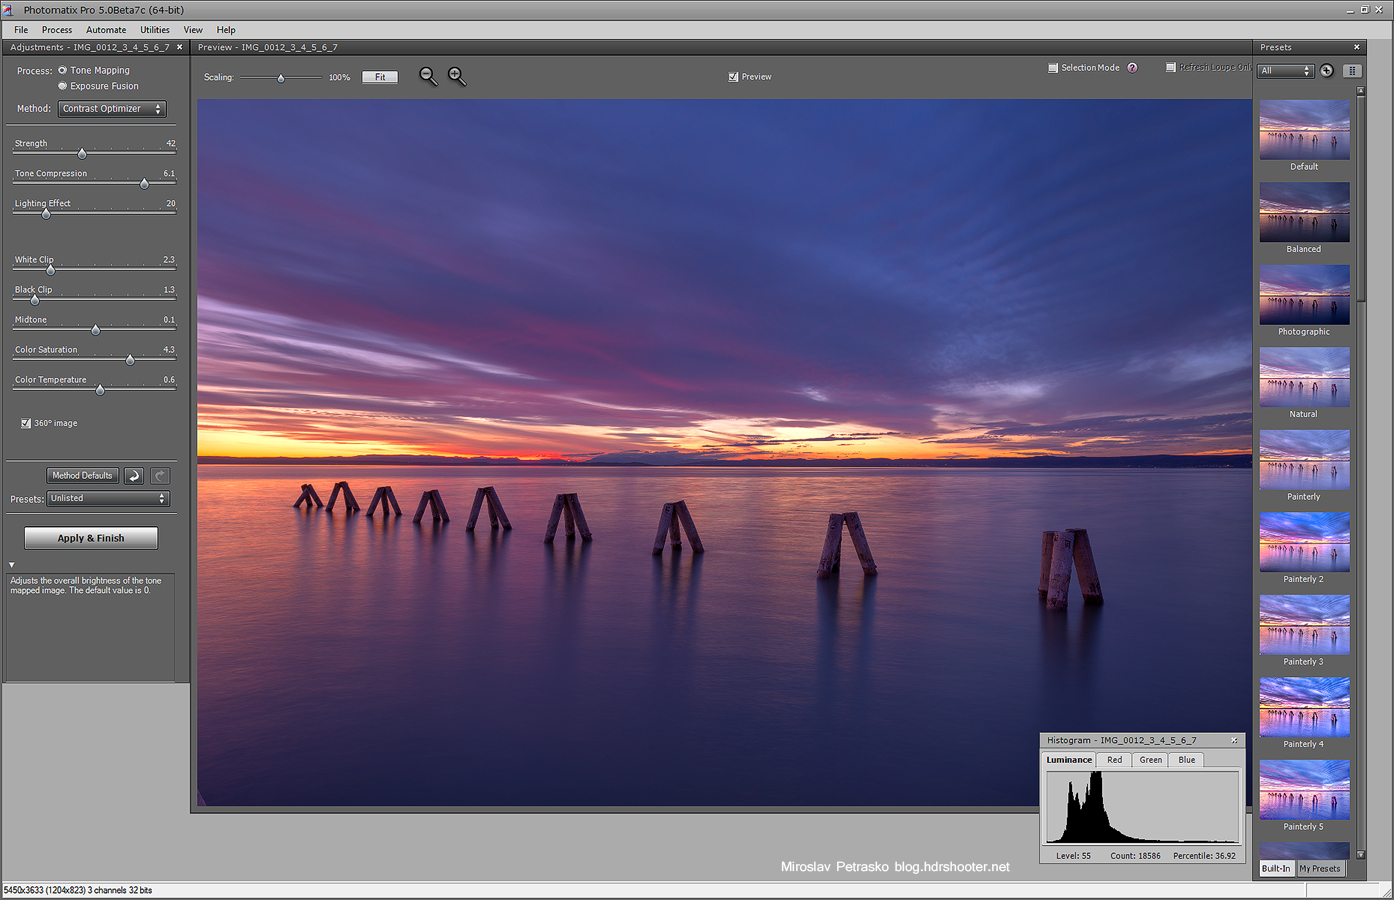
Then I took them and loaded in Photomatix Pro 5. I used the Contrast Optimizer to get a nice even image, a good start for additional blending.
crazy-skies-photomatix
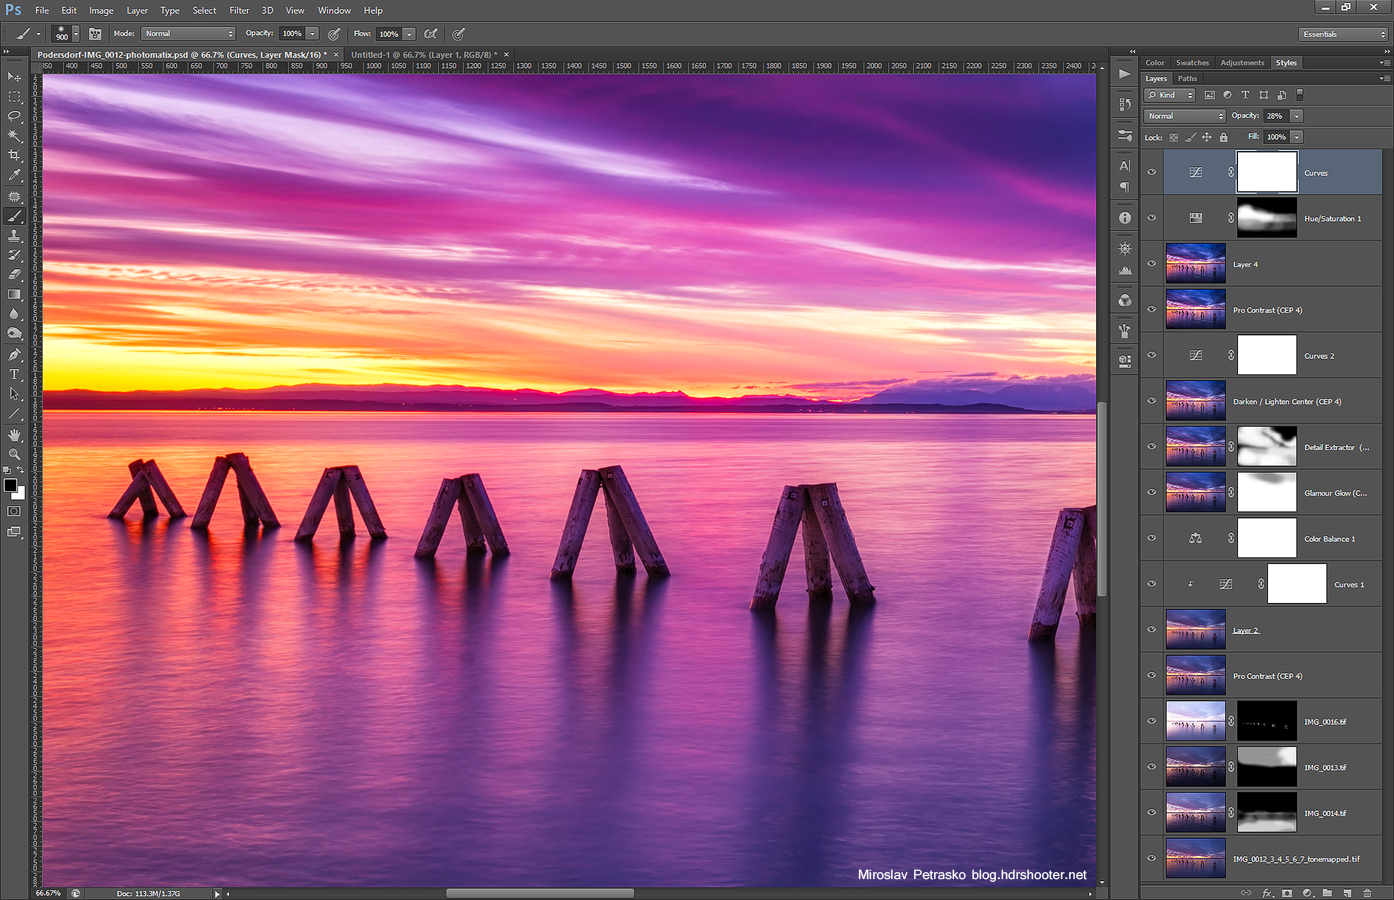
After that I loaded the Photomatix result together with the original exposures into layers in Photoshop, and continues as follows (layers numbered from bottom up):
1. Photomatix result
2. recovered detail in the water from the 0EV exposure
3. recovered detail in the sky from the -1EV exposure
4. brightened the pillars from the +2EV exposure
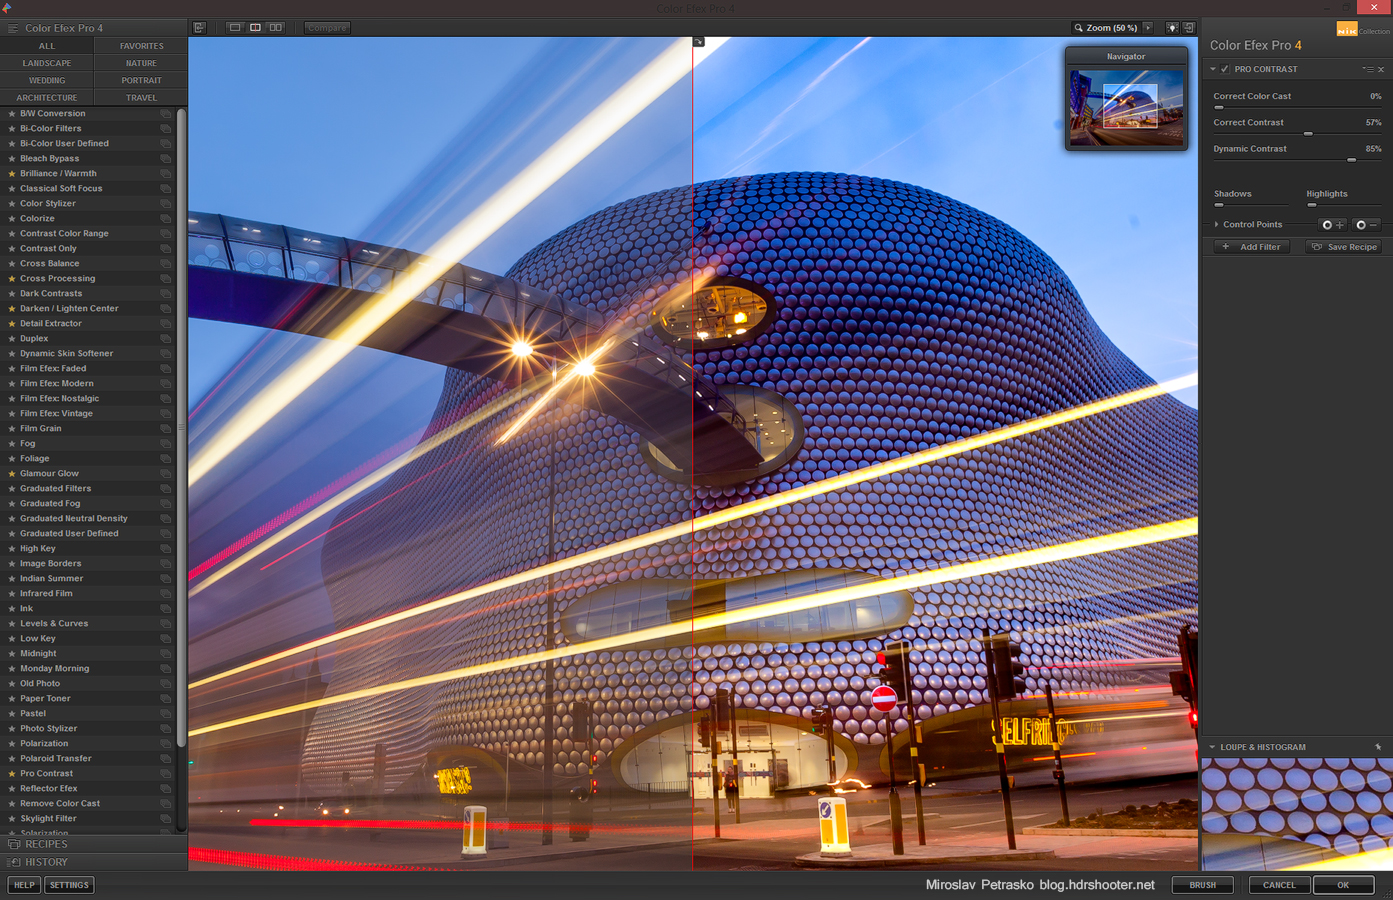
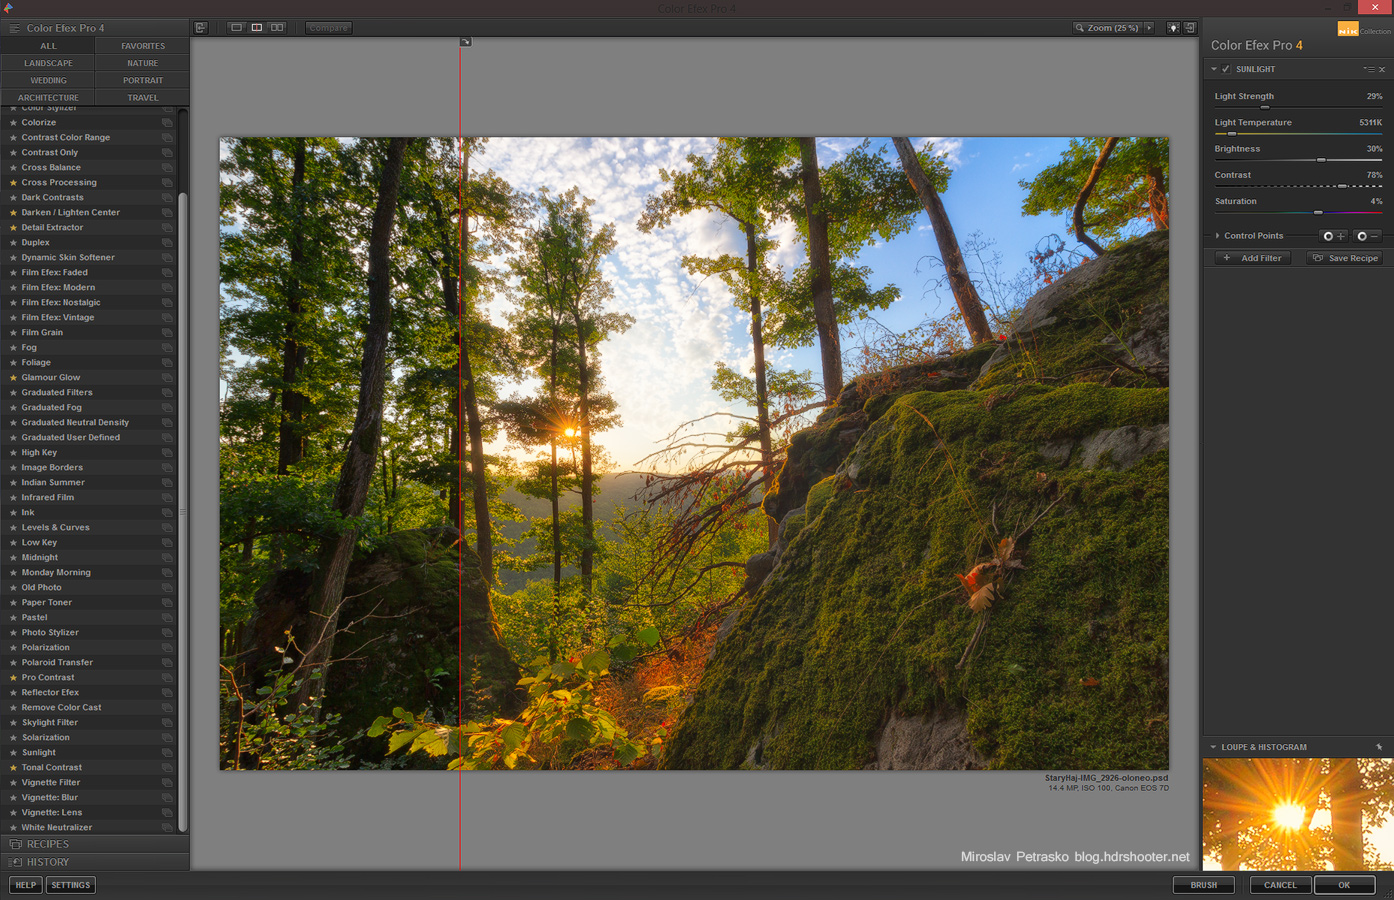
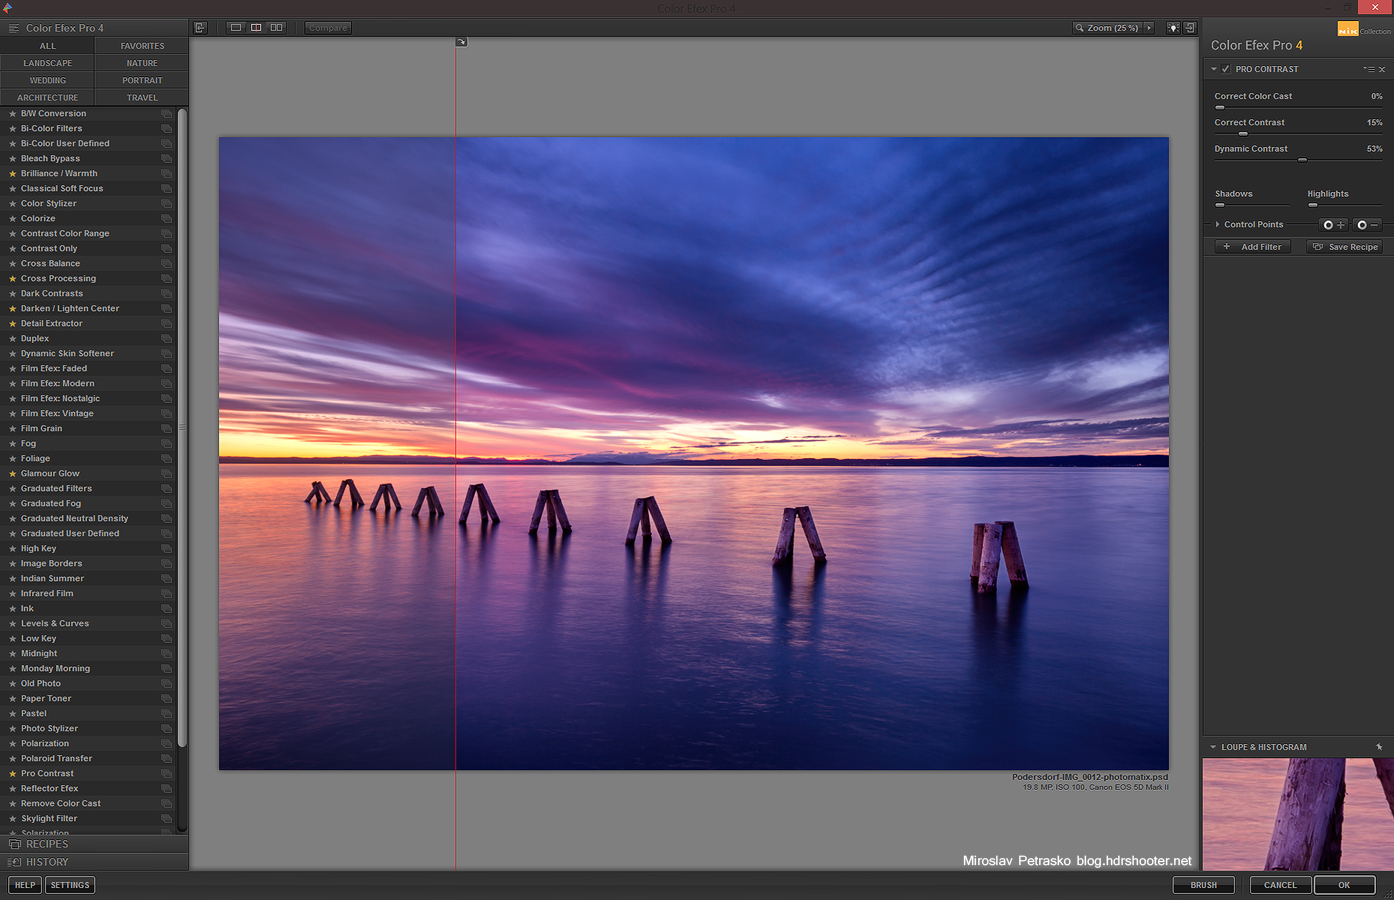
5. used Color Efex Pro Contrast to add more color and contrast to the photo
crazy-skies-color-efex
6+7. added glow (view my glow tutorial for details)
8. color balance to make the photo a little warmer
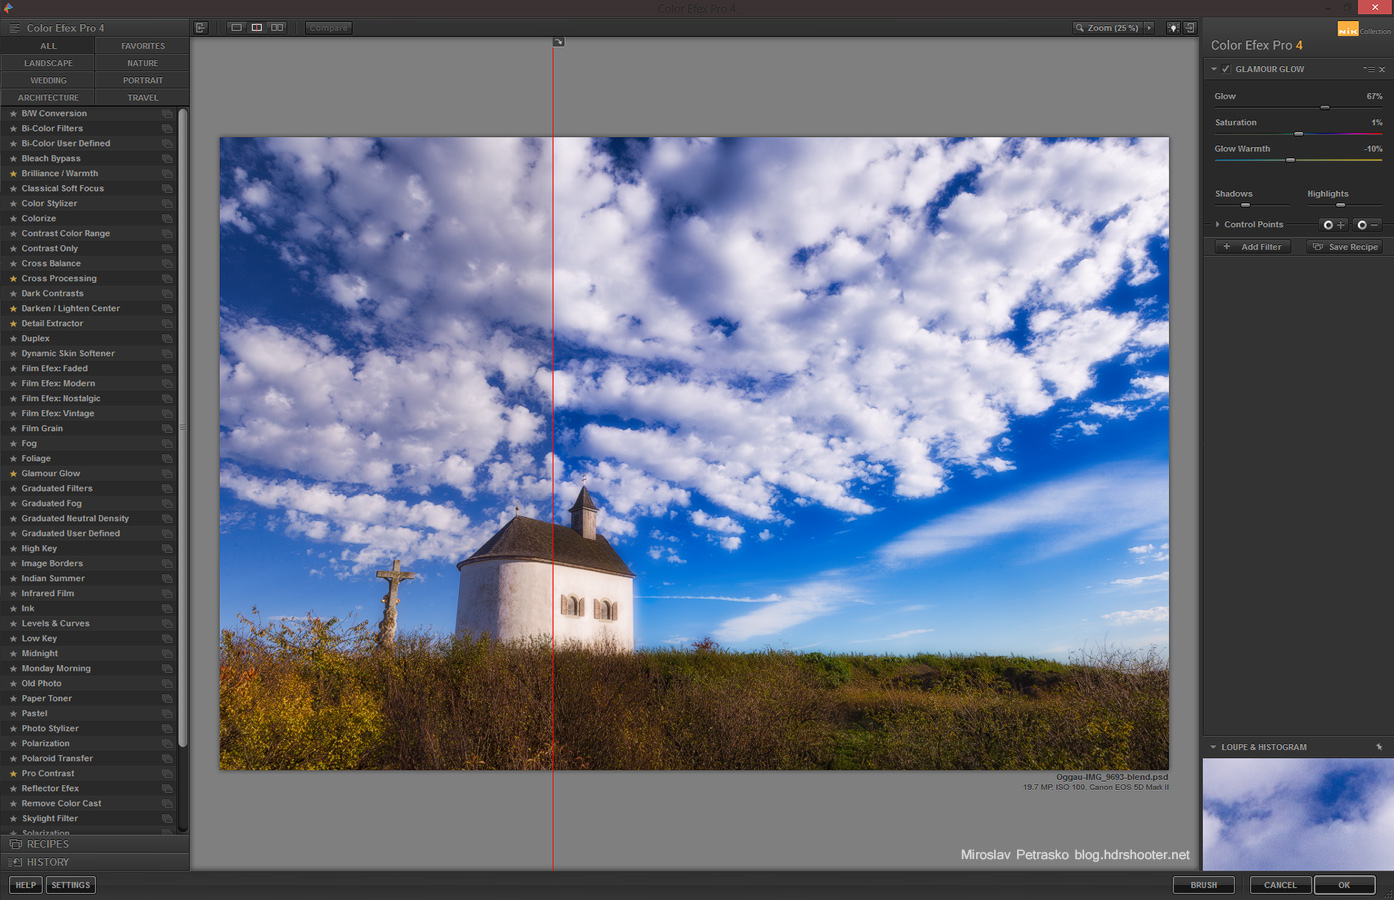
9. used Color Efex Glamour glow to soften the colors a little
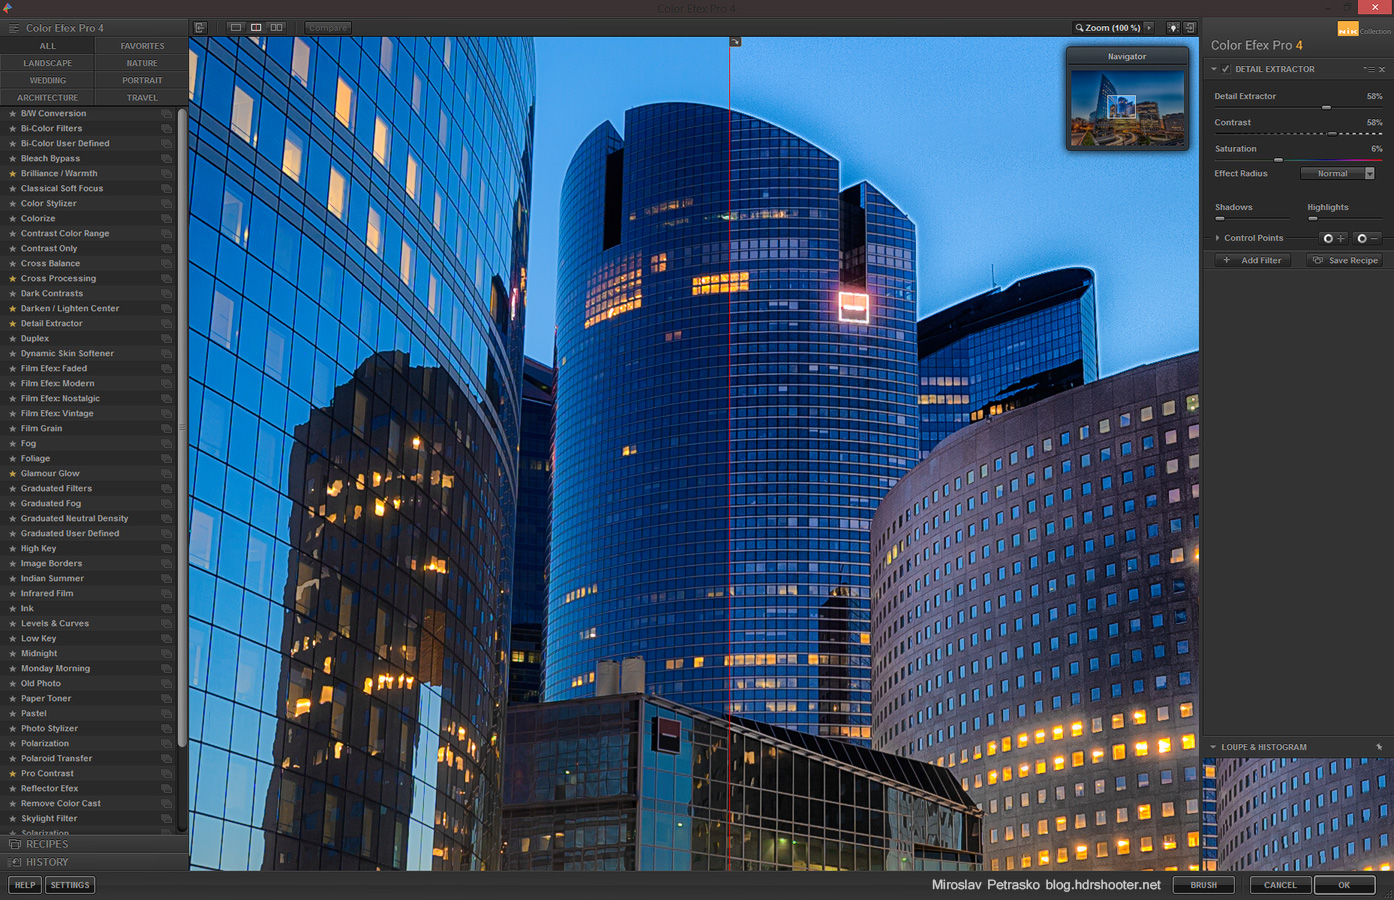
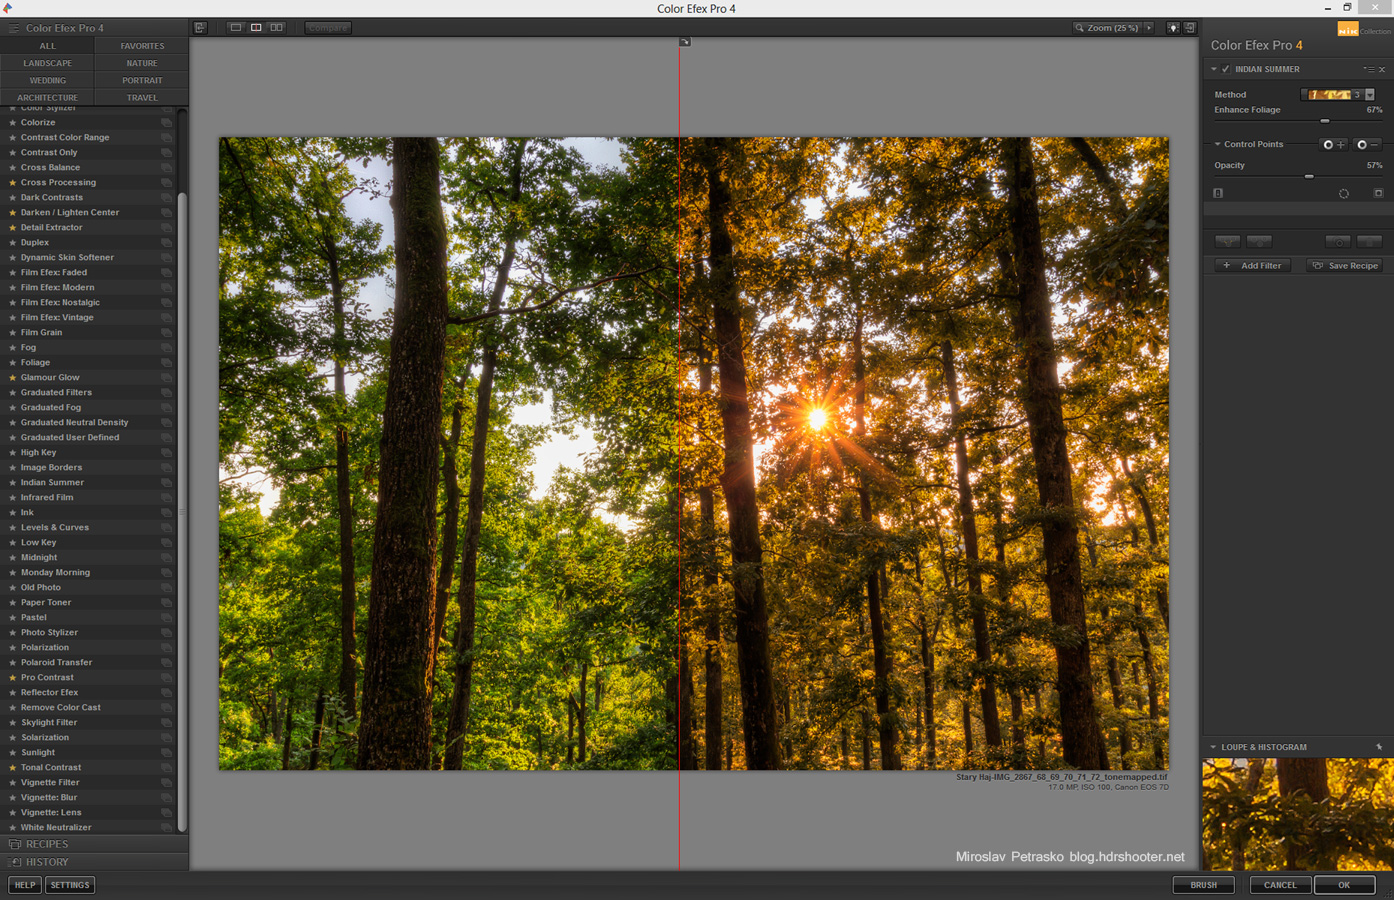
10. used Color Efex Detail extractor, to get more detail in the sky and water
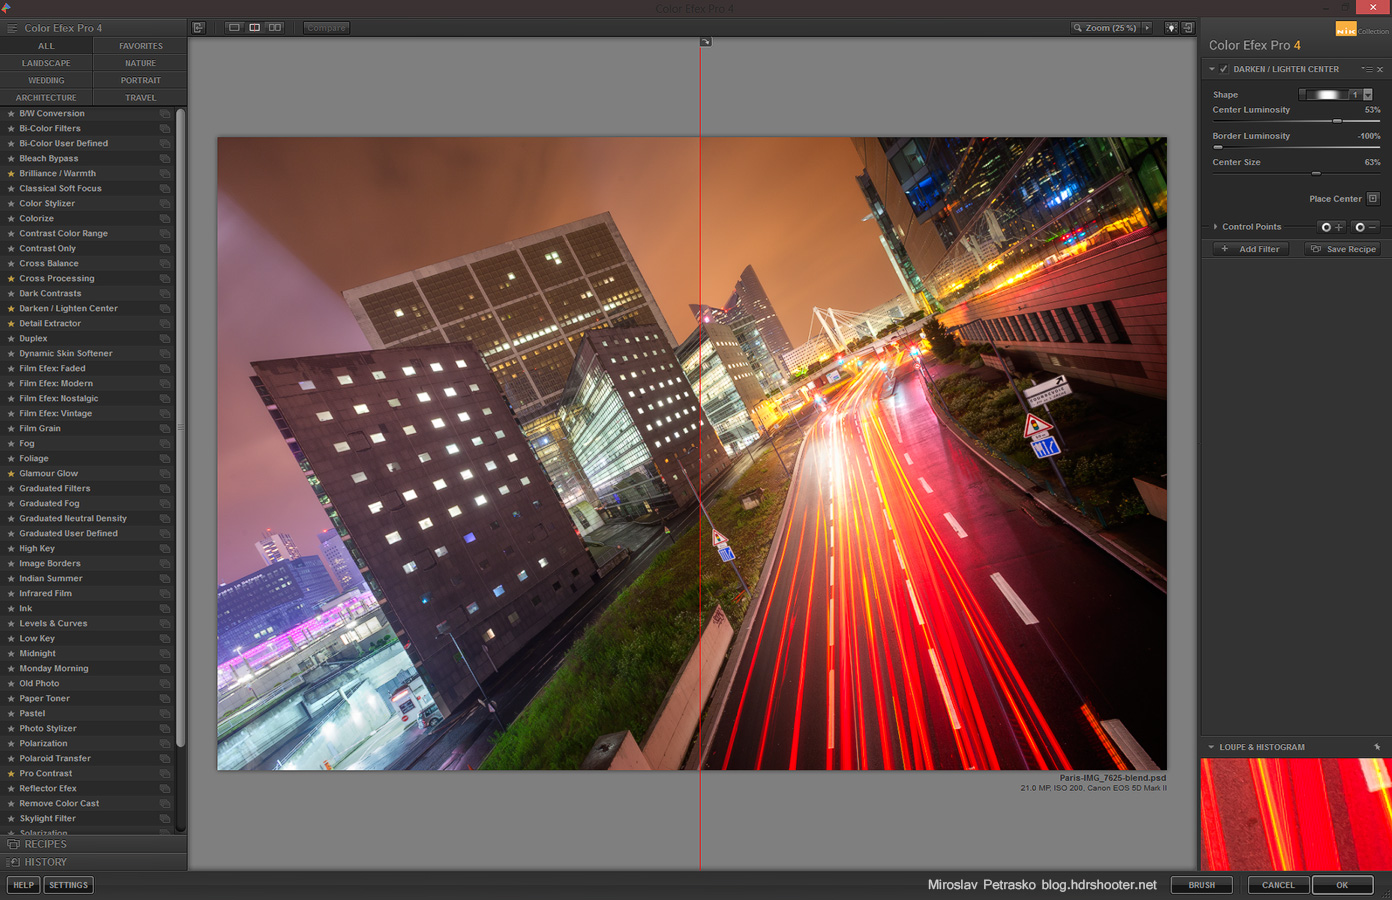
11. used Color Efex Darken/Lighten Center to add a vignette. This should have been the last point, but in the end I did few more edits on the photo.
12. curves to add more contrast
13. a little more Color Efex Pro contrast, as I felt the photo needed more local contrast
14. noise reduction using Imagenomic Noiseware
15. added more color to the sunset
16. finished with a little more contrast
crazy-skies-photoshop
Not maybe the nicest use of layers, but it got me to the finished photo. Please continue to the full post to see the original 0EV shot and the Photomatix result.

Creating a B&W photo is simple. Creating a good B&W photo is hard. And to make your life easier, there are many plugins that can help you. Nik Silver Efex is one of those. As you can see on this blog, I prefer color photos to B&W. Not that I never try B&W photos, I just don’t usually post them.

In its core the plugin is very simple. You have three basic sliders, Brightenss, Contrast and Structure. They all do exactly what they say. Changing these values will change the way the B&W photo looks. Additional you can use control points to affect a certain part of the photo, color filters which simulate that you were holding a color filter in front of you camera, add a look of different film types, vignette, toning and few more. You get everything you need to make your work easier.

Also if you are used to Nik Plugins, like Color efex, working with Silver efex it very easy. They both share the same approach and interface.

As I mentioned I don’t do many B&W shots, but sometime I use a B&W version in my post-processing. I use it to add more detail and structure to my photos. I create it on a new layer and then change it into overlay, soft-light or luminosity blending mode.

Nik Silver Efex comes with a lot of different presets, so I’m including here a few of my favorite ones

Neutral

This is a very good place to start. It gives you a nice even photo.
nik-silver-neutral

High Structure (smooth)

My go to preset in Silver Efex. Especially when I want the B&W version to be used to add more detail to a photo. Just never ad noise in that case.
nik-silver-structure

Hight contrast (harsh)

This wan gives a darker, stronger feeling to your photo. Great for street photography.
nik-silver-contrast

Antique Plate I

A little more vintage feel here. It also adds a lovely color cast to you photo.
nik-silver-antique

Custom settings

Probably when you start using it, you will end with choosing your own settings. Here is a how this photo of Eiffel tower would look, if I chosen to go with a black and white version.
nik-silver-eiffel
And here is one street shots, only edited through Silver Efex Pro 2
nik-silver-street
Overall this plugin will give you better results in B&W conversion than directly Photoshop, and it also gives you the ability to tweak it, without a huge knowledge of Photoshop.

For additional information on Silver efex, you can visit the Nik collection site here http://www.google.com/nikcollection/. Google does not offer any discount codes there, but if you look around, you maybe find one of the old ones, and can get the collection for a little cheaper :)

View all my other reviews here.

The time to submit a photo edit for my Photo contest sponsored by OLONEO is over, so now the voting starts. So all of you who want to participate, just head over to this Facebook photo album  and add a like to one or more photos that you prefer.

The photo with the most likes at midnight the 8th December will be the winner.Also the judges have already been notified, so they will have the second winner selected also by that time.

And if you also still want to have a chance to win  a copy of Oloneo Photoengine, feel free to join the raffle here:

The giveaway is over, the winners have been notified


The winner of this raffle will be announced at the same time as the two other winners.

And for those curious to see how 170 versions of the same photo look like, so here they are:

all-versions

Few more hours

Only few more hours to join my HDR editing contest, sponsored by OLONEO. So don’t forget to send or submit your entry. And for those who miss it, don’t worry, you still can join giveaway, which will be running for one more week. To join, please visit the contest page here: https://www.hdrshooter.com/2013/11/18/photo-contest-sponsored-by-oloneo/

Determining the sun position

One thing that you need to know, as a landscape photographer, is the sun position. There are many tools to find it out, so I thought I share with you the ones I use. When I’m on my desktop, I use Suncalc.net. It’s very straightforward, clean and easy to use.
suncalck
When I’m on the road, or already on the spot, I use one one of these two apps for Android. Either Sundroid or  The Photographer’s Ephemeris. Both give me the same information about the suns position, but Sundroid also includes information on moon and planets position. But the interface is a little more cumbersome. So I use them both.

Sundroid
Sundroid
The Photographers Ephemeris
The Photographer’s Ephemeris

Which one do you prefer? Or any tips for even better ones?

In the bar

I’ve been out taking photos again today, but as I haven’t posted any interior shots for a long time, I thought I post one today. So here is a photo from the Mirror bar in Carlton hotel in Bratislava. It’s a really nice small bar, perfect to get a coffer and a cake :). Maybe for my next business meeting.

This photo is a combination of all the techniques I use. I created a HDR in Oloneo Photoengine, one in Photomatix Pro 5 and then I blended these two together with the original exposures I had. I had to also tone down the colors a lot, as the combination of red carped, red walls and reddish/brown wood gave everything a really strong red color.

In the bar
All rights reserved, this photo is a property of Carlton Property s.r.o. Please do not use without permission.

If there is one essential plugin for Photographers, I think this is the one. Color efex from Nik (now a part of Google) is a huge collection of filters, each one with its own set of parameters. Just by using it, you can create a lot of stunning looks, and also correct many photography problems. To go through all the available filters would make this review huge, so I will go through my favorite ones, that help me the most in my photos.

Pro contrast

This is the most useful one. It can correct color cast, contrast and also add more dynamic contrast, which created more detail and local contrast in you photo. It also gives a certain pop your photos, so they just look better and catch the viewers eye much more than before.
nik-color-pro-contrast

Detail extractor

Can add crazy amount of detail to your photo. I’am always very careful with this one, as it can easily be overdone. But when you need to pull out detail from shadows, this filter will help you (just don’t use it on object edges).
nik-color-detail

Glamour glow

This is primary a filter for portrait photos, but it can also be used for landscape shots. Especially fluffy clouds looks better after this is applied. It gives a glow and contrast to everything and you can also choose the temperature of the glow.
nik-color-glow

Darken/Lighten center

Creates a vignette around the photo, but also brightens the center. This is currently my favorite way to add a vignette. Adding a vignette can help guide the eyes into the center of the photo, so making it more interesting.
nik-color-darken

Cross processing

Cross processing simulates an effect from analog photography, where chemical solutions intended for different types of films were used to develop the photo. This creates a color shift in all color channels. There are multiple color shifts available and and you can specify the strength used.
nik-color-cross

Brilliance/Warminth

This one adds color. And it you push it into higher settings, you will see colors you didn’t even know were in your photo. Again, should be used with lower settings, not as in this example screenshot.
nik-color-warmith

Sunlight

Fills you whole image with light. It really feels like if you took your photo during a very sunny day. It can help you  a lot when you have taken your photos during a grey, very cloudy day.
nik-color-sunlight

Polarization

This one simulates the polarization filter that you attach to your lens. You can specify the rotation and strength, and it will saturate and darken all the blue areas in you photo.
nik-color-polarize

Indian summer

Change your summer shots into autumn shots. That’s exactly what this filter does. It takes all you green areas and changes them into yellow, orange or red ones.
nik-color-indian

Tonal contrast

Tonal contrast filter created a lot of local detail. You can specify how much the highlights, mid-tones and shadows are affected. This one can get you that grungy HDR look.
nik-color-tonal

Additional you can use control points, to specify areas where the effect is used/not used. This is very hand if you don’t want to mask the layer with the original picture afterwards. It can help you to be faster in your processing of photos.

Color efex also always creates a new layer on which it applies the filer, which is very hand if you want to use it only on part of your photo. But be careful that you have no selection made, as that will make the effect only on the parts of the selection. Also if you want to have it effecting all layers, create a merged copy first.

Overall Color efex is one of the best plugins for photography editing you can get. It makes the work faster and easier. The only thing I don’t like, is that the Color efex window always wants to be in focus, so it forces you to look at progress bars. If you use it a lot, this can be so irritating. But that’s only a minor issue and it does not effect the performance of the plugin in anyway.

For additional information on Color efex, you can visit the Nik collection site here http://www.google.com/nikcollection/. Google does not offer any discount codes there, but if you look around, you maybe find one of the old ones, and can get the collection for a little cheaper :)

View all my other reviews here.

And here are few photos I used this plugin on. You can actually say, I used it in almost every single of my photos, in one way or another.
Easter Market
Summer colors
Bridges over Vltava

FREE EBOOK!!!
Subscribe to my newsletter and get a free Capturing fireworks ebook. 
Subscribe