Free HDR video tutorial

Free HDR video tutorial

MASTER EXPOSURE BLENDING

Find the best ones

Find the best ones

TOP PHOTOGRAPHY SPOTS

Free wallpapers

Free wallpapers

HIGH-RESOLUTION WALLPAPERS

Flares are one of those things that can add to a photo, but usually you don’t want them. Especially if you are doing a nice landscape shot, flares can completely destroy your photo. There are multiple ways of avoiding them and removing them, so lets take a look at those.

Behind the camera Just a shot of my camera :)

Avoiding lens flares

The best approach is to avoid lens flares in the start. This is not always possible, but few simple steps will help you.

1. Use a lens hood – even if you think you don’t need it. Lens hoods are specially designed to block stray light getting into you lens. And that’s exactly the light you need to avoid. Also when you are doing night photography, a lens hood can help you avoid stray light from street lamps and similar sources.

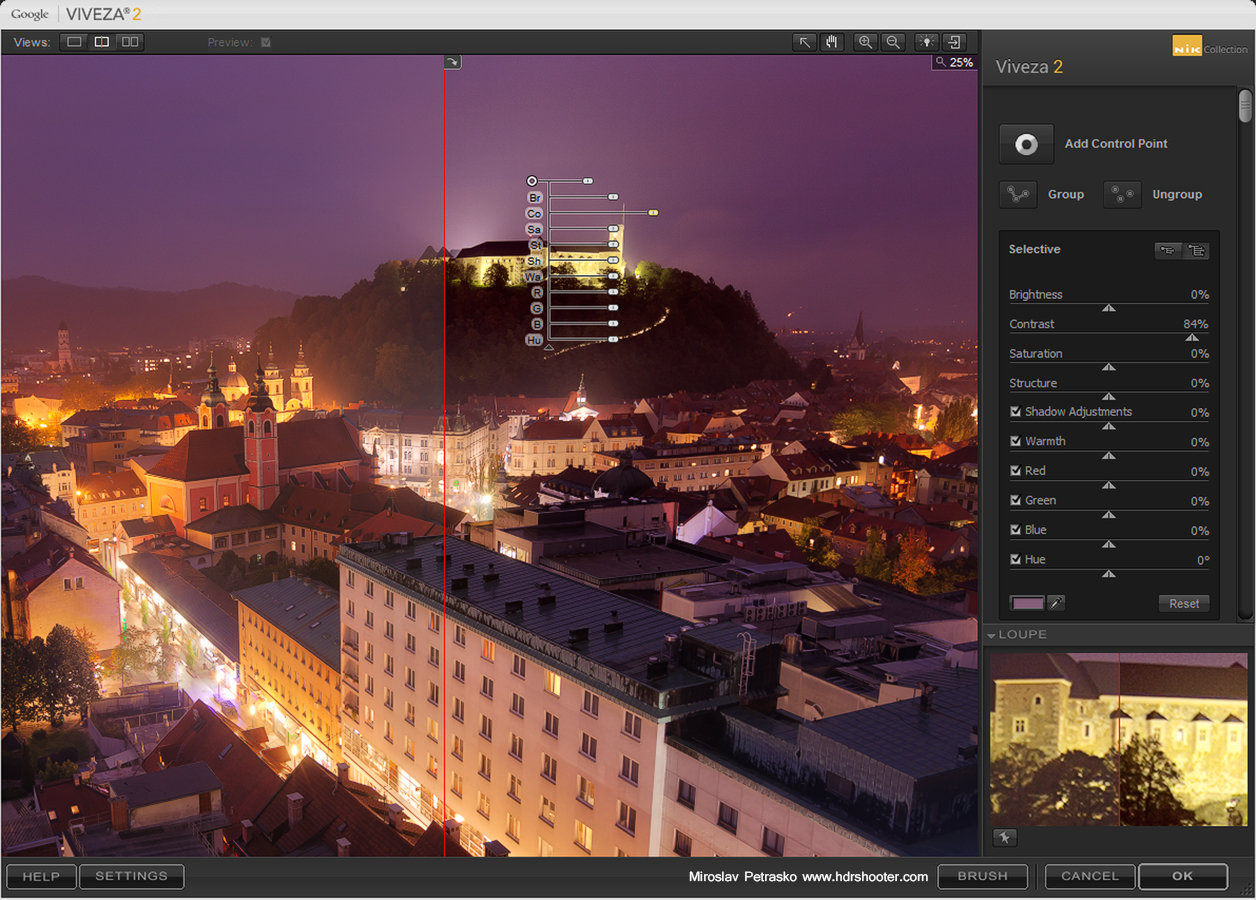
2. Be aware of the suns position – when shooting landscapes, you should always take into account where the sun is. If its anywhere else than behind you, check for lens flares. You will not see them through the viewfinder, but they will be visible in live view. You can even take a test shot, to check for them.

3. Don’t use filters you don’t need – this is especially true for UV filter. These filters can create much more flares, than you would have without them

4. Get a better lens – I know this is not cheap, and should not be your first approach, but better lenses catch much fewer lens flares than the budget ones. They have special coatings that prevent this.

Removing them using Photoshop tools

flare-photoshop

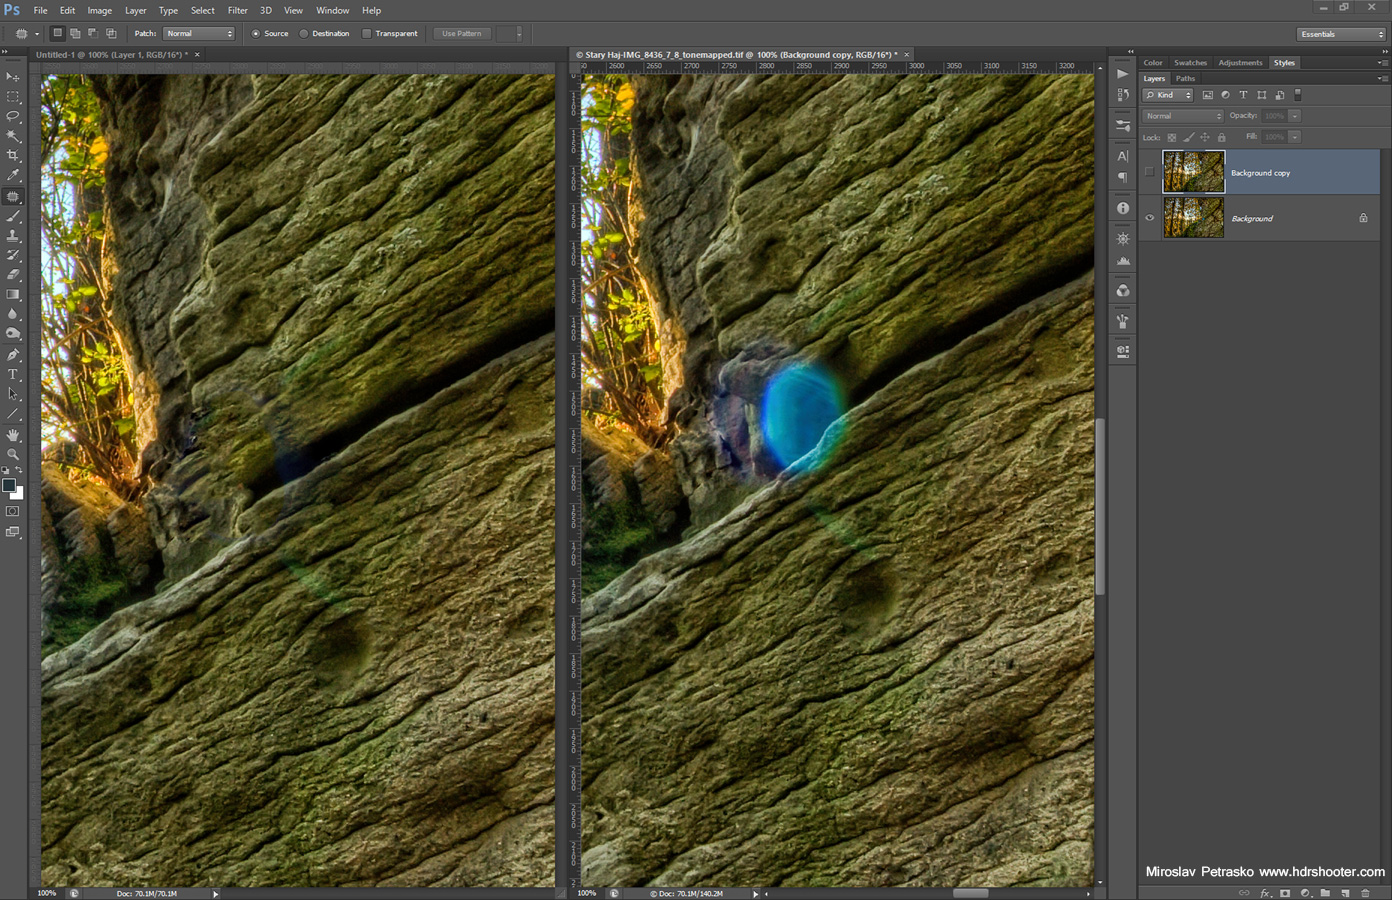
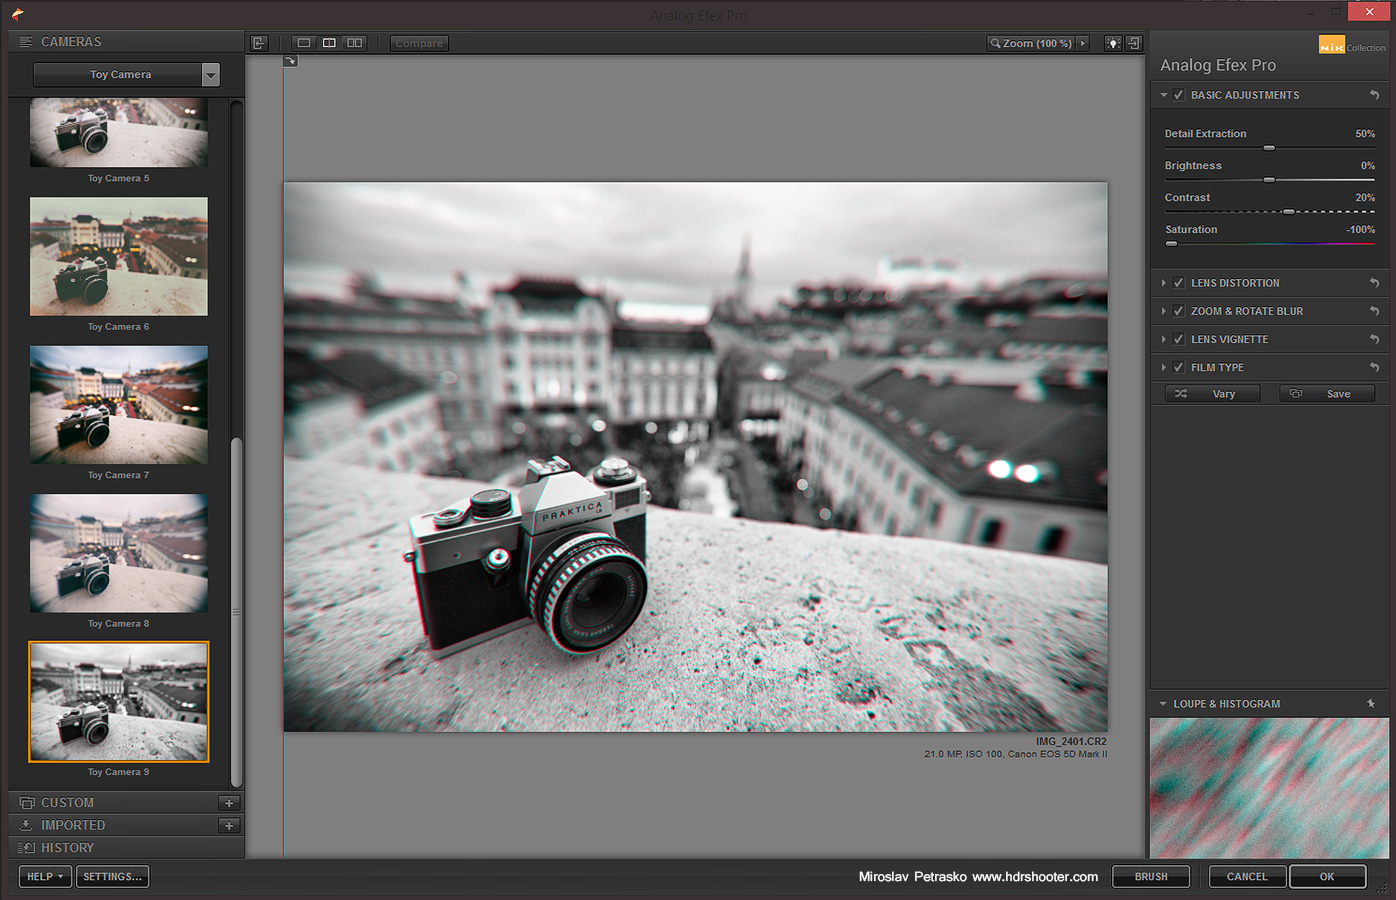
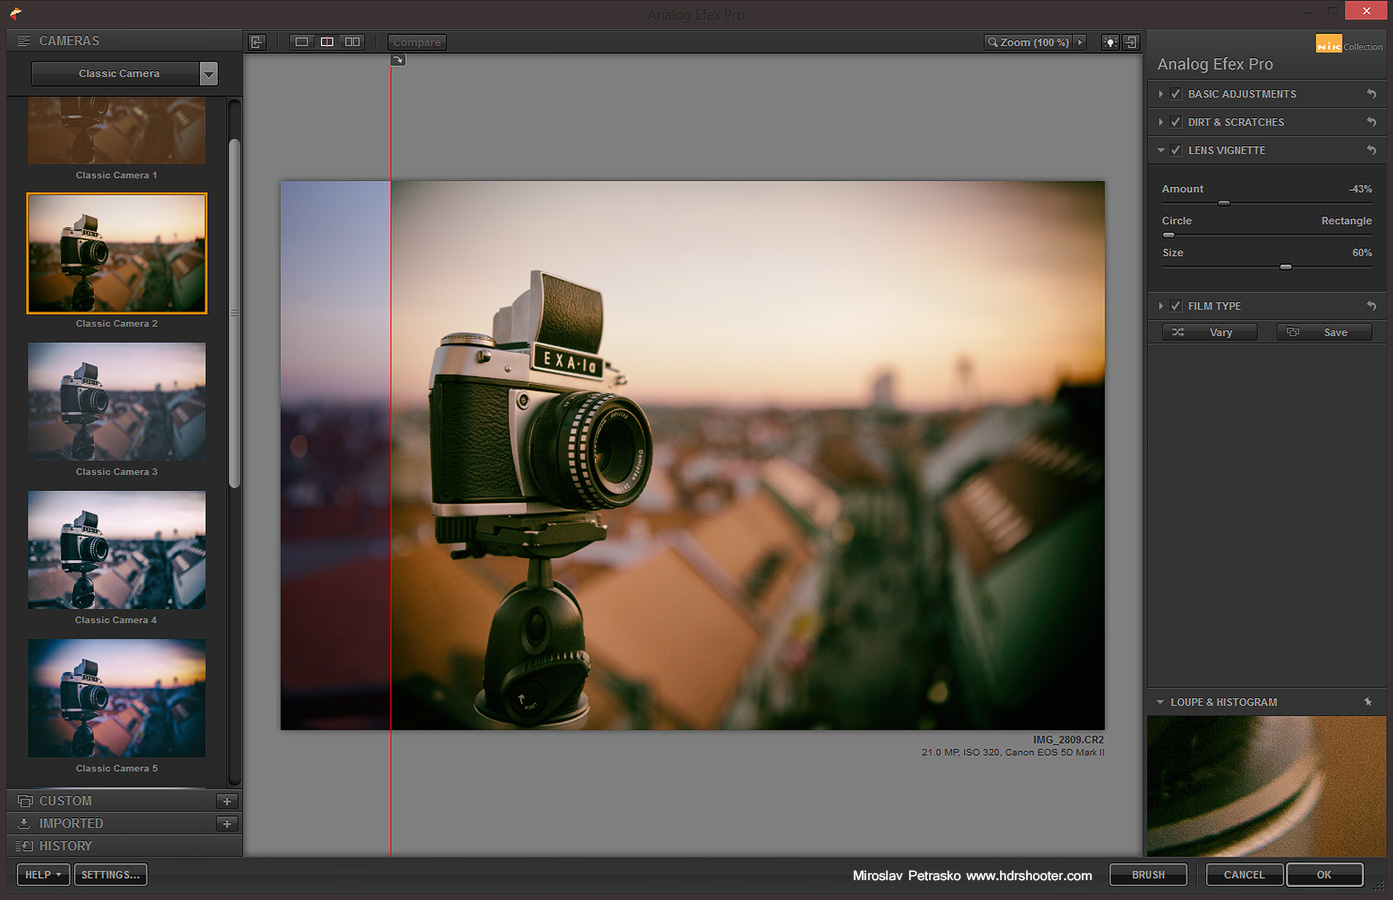
If you didn’t managed to avoid them, and you don’t like to have them in your photo, you can remove them in Photoshop. Photoshop has many tools for photo retouching and some of them can also work on Lens flares. The most useful are Patch tool, Healing brush tool and Content aware fill. In a way, they all work the same, you just select the area you want to replaced and then either move it over a clean area (Patch tool), Fill it using content aware fill (Shift + Backspace and select content aware fill) or you paint over using the Healing brush. This works well only in some cases, having a flare over a very detailed part of the image can cause problems in retouching.

Here you see an example of this. I used the Patch tool to select the flare and drag it over the area to the right. Don’t worry, you don’t have to be absolutely accurate, because with the size of photos, any error you leave will be only visible at 100%, so not even if you print the photo.
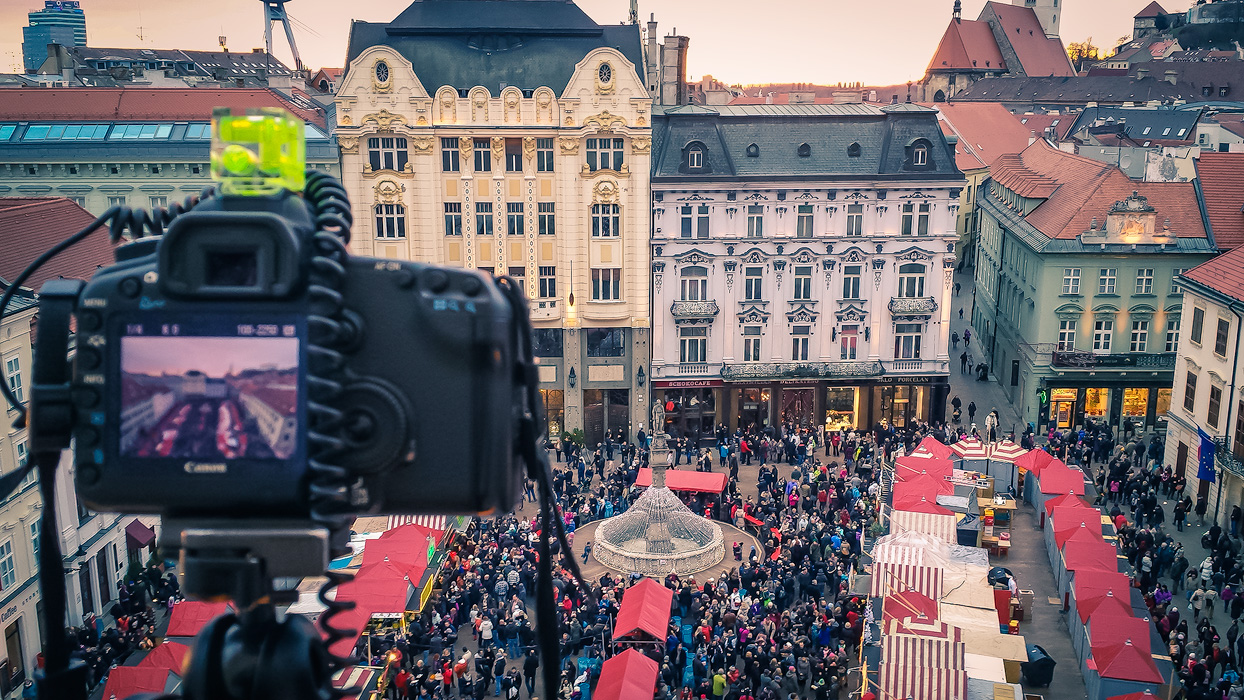
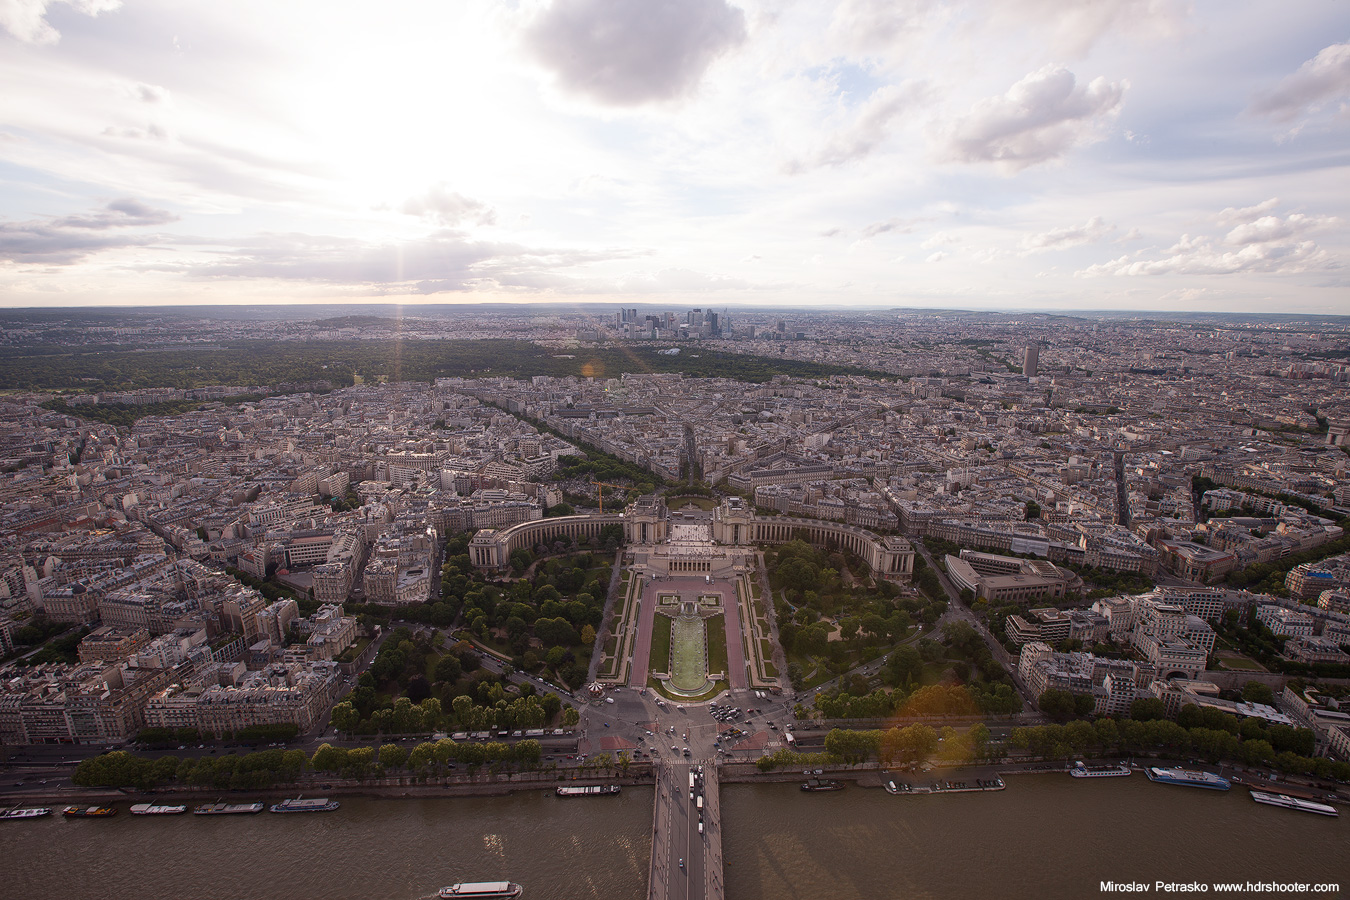
Blocking the sun

An advanced approach to dealing with lens flares, is to prepare for their removal right during the photo shot. This works for photos taken from a tripod, not so well for handheld shots. What you need to do, is shade the sun with your hand (or something dark) if its to the side of you camera, while taking the shot. If the sun is in your shot, than take two shots, one normal and one with your hand in front of the sun. This two should have the same settings, as you will need to merge them later. This works best if you are in Manual mode. Here you see an example of two such shots:

flare-example-1
flare-example-2

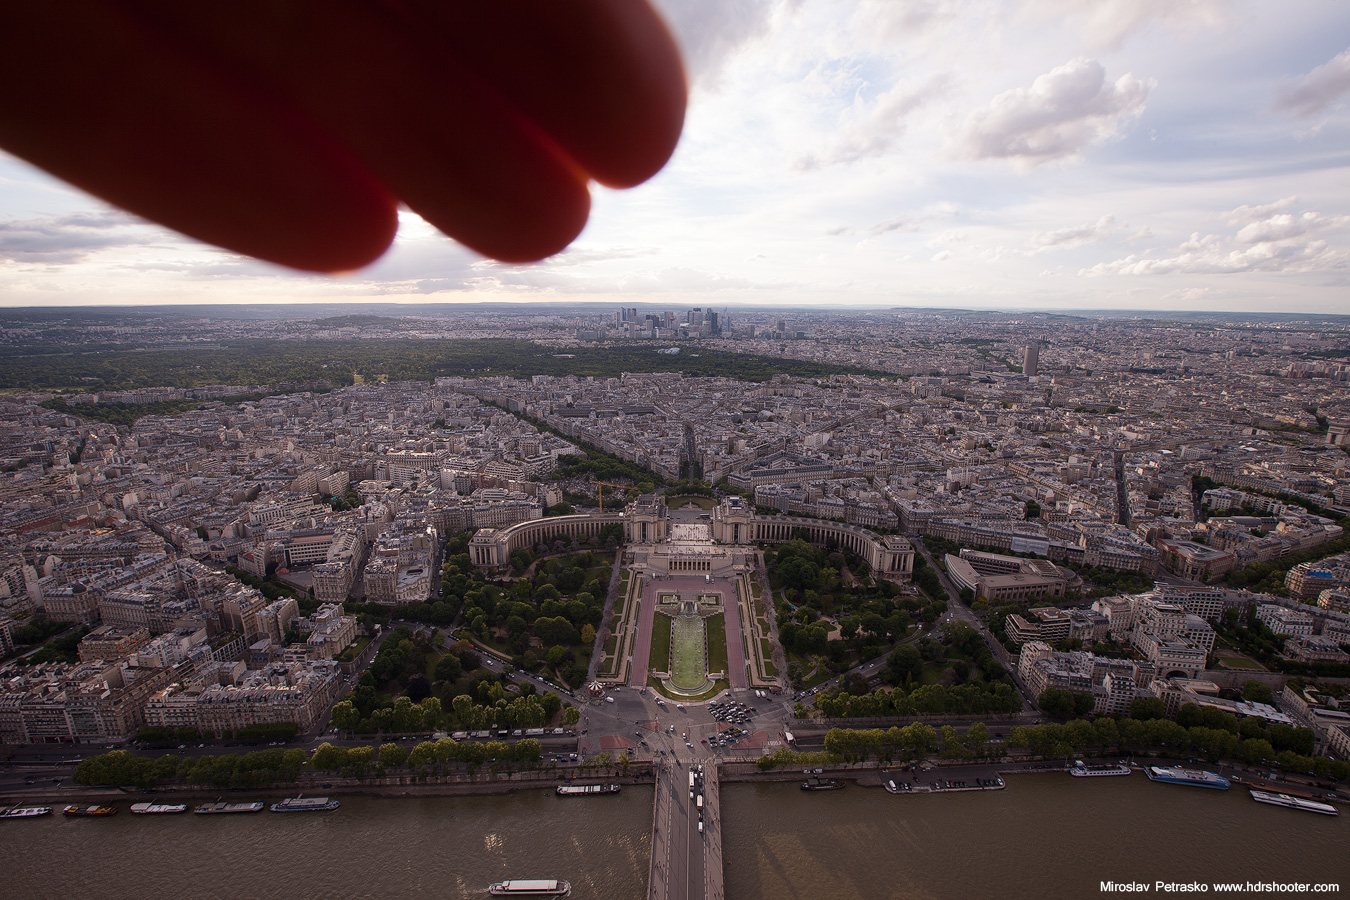
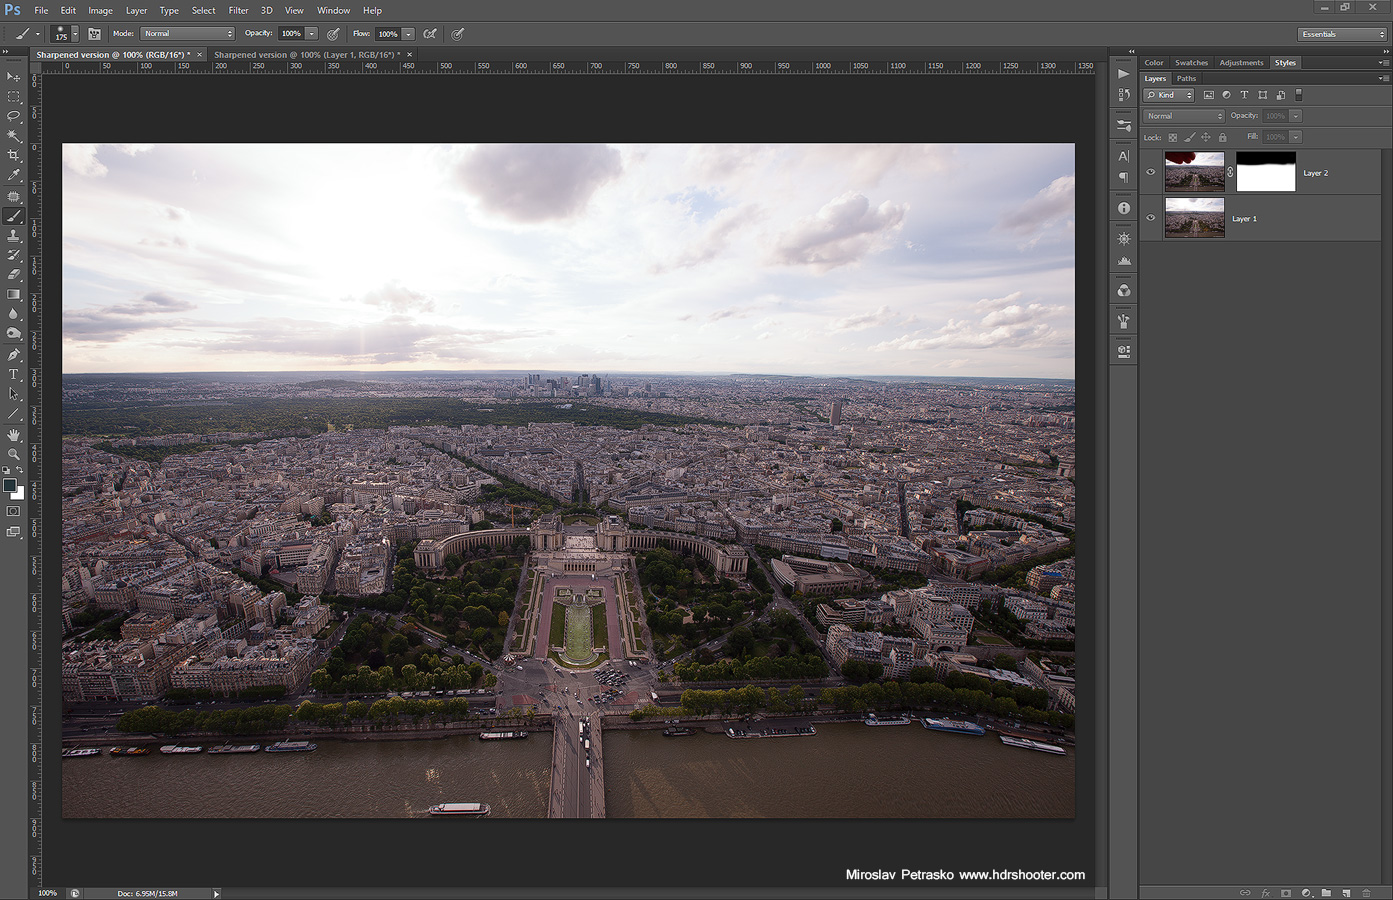
These you can then load into separate layers into Photoshop and easily using layer mask (check my tutorial on those here) correct the problem. Be careful with the color cast, as the shaded photo can be a little colder than the one with the sun. This can happen even if both photos have the same white balance and it  has to be corrected.
flare-blend

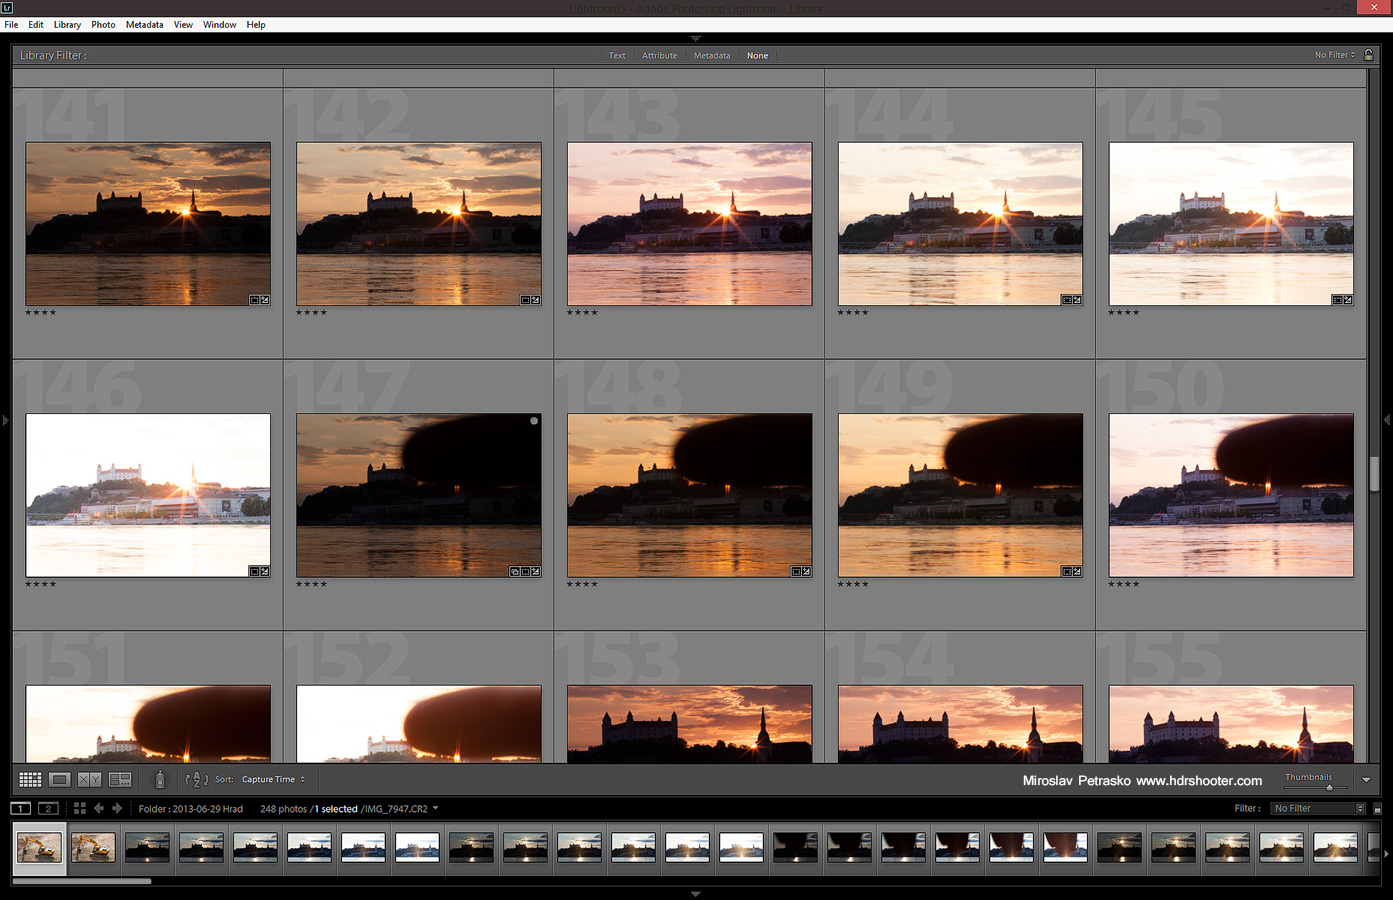
If you are doing a HDR bracket series, you do the same, you just take one series normally and one series with your hand in front of the lens. You usually need only one photo with the shaded sun, It just hared to say which one, so its better to take the whole series. Here you can see a sample series of this:
flare-set

After that you continue as before, jut merge the normal exposures as you want (Oloneo, Photomatix, Manual blending) and then repair the lens flares from the shaded shot.
flare-blend-2

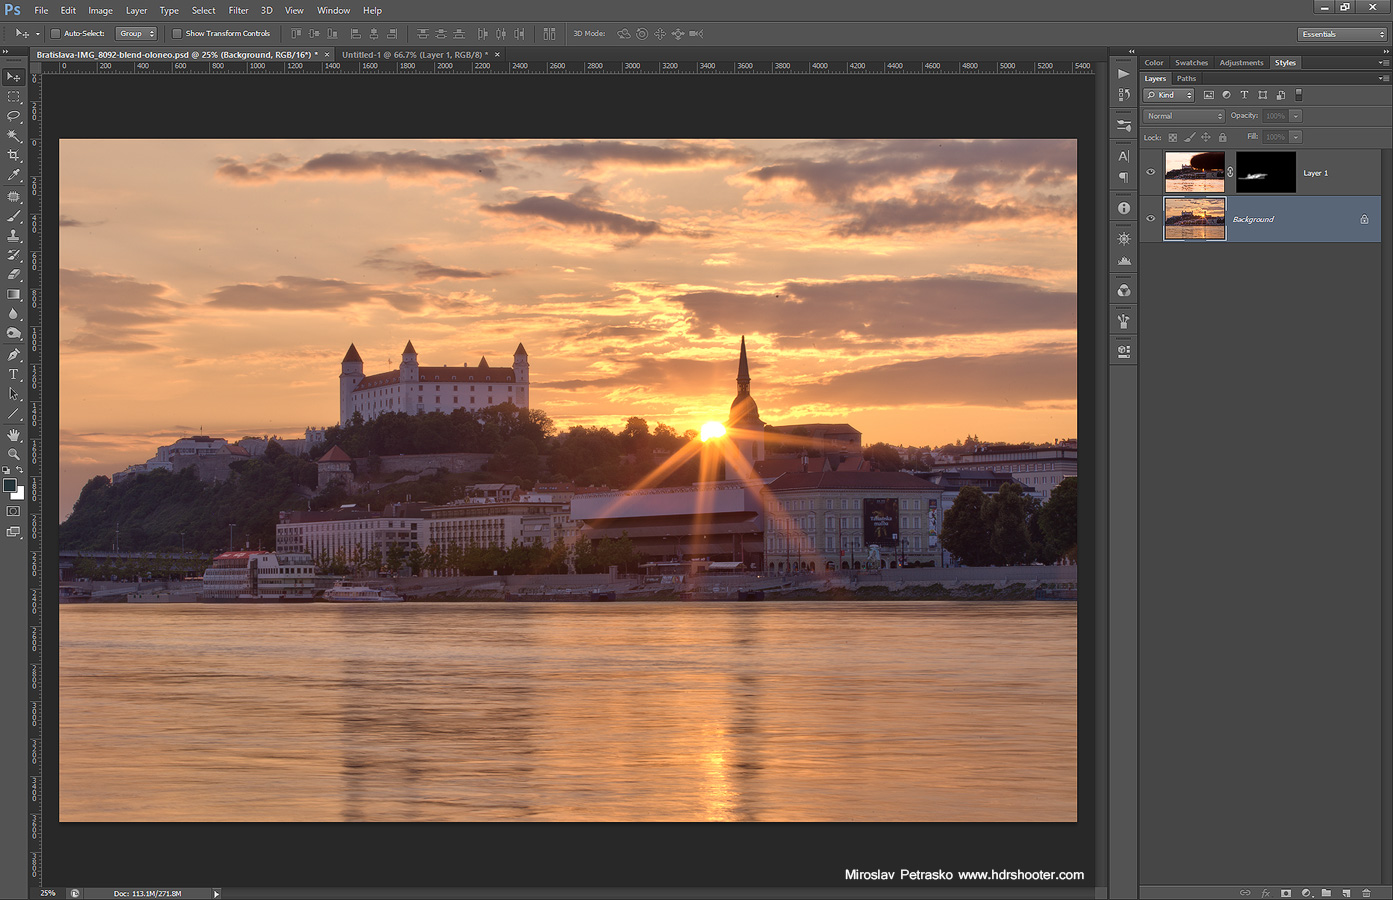
And here you can see the finished photo, nice and flare free :)
The setting sun in Bratislava

I prefer the third method, which gets all my photos flare free. I hope you find this guide useful, and if you have any questions, feel free to ask.

And here you have a video where I go through all of this together in one spot :)

Giveaway reminder

For all those who still haven’t joined my Oloneo Photoengine giveaway, you still have 3 more days to do so. The winner will be chosen this Sunday at midnight. To join, just go to the contest page and use the Rafflecopter widget.

trey book

How to organize photos

Just finished reading (and watching) Trey Ratcliffs latest book/tutorial Organize Your Photos – The Three Level System. I’ve been using Treys approach to organization for a longer time, since I read his older book about this subject. But the new version now splits this into three levels based on your obsession with your organization. I can honestly say, I’m level 3, I’m very obsessive with my organisation. But as my Lightroom library is around 100 000+ photos, I have to be. Still the new book gave me a few new ideas what to change and tweak, even if I still have to clean up a big part of my own library.

So if you are looking for a way to organize you photos, this new book could be for your. You can find it here Organize Your Photos – The Three Level System (BONUS), and if you decide to buy it, you can use the code “SIC-6591” for a 10% discount :)

Almost perfect reflection

I think I mentioned it before, but the Kuchajda lake is the best place for reflections in Bratislava. It’s always very calm, and the sunset look just great there. You can almost think that this reflection is fake, created in Photoshop, as it just looks too perfect. But I can assure you, this is really how it looked like. And since the whole week we have great sunsets in Bratislava, I had one also yesterday. This photo is even taken a little later, after the best colors already faded, when the blue hour already began. But I processed it first, as in the sunset photos you cant see the building lights so much. Either way, I will get to those later anyway.

This is a HDR created in Oloneo Photoengine and then blended with original exposures in Photoshop.
Almost perfect reflection

Analog Efex is the latest addition to Nik Collection. For the first week I hated it, as it’s in the menu before Color Efex, so I always opened it by accident, when trying to get to Color Efex, but after a while I got used to it.

As already the name suggest, Analog Efex simulated different effects of analog cameras. I’m only a partial fan of such effects. I like them on street shots, portrait shots and overall shots with a vintage feel (that’s why I chosen the sample photo of a vintage camera :)). But that usually does not fit with landscape or architecture photos. It also removes too much of the original photo.

nik-analog-1

But there are situations when this is preferable. For instance if you are making a page, that has a overall vintage feel, the photos would fit to it.  Of course with services like Instagram, this look is very popular. One can’t argue, that this type of filter hides a lot of problems with photos. If your photo is noisy, blurry, dirty and so on, it will be just more authentic. But if you do it through a plugin like the Analog Efex, the result will bu much better, and you also have much more control of it.

nik-analog-2

In the Analog Efex you can either choose from predefined presets from Classic cameras, Wet plates, Toy cameras or Vintage cameras. Or you can start from scratch, and put together effects to get a look you want for yourself. There is a big list of effects, including Lens distortion, Bokeh, Blur, Light leak, Dirt, Scratches, Vignette and more.

nik-analog-3

So in the end, if you have a need to use such a vintage look in you project, or you are a fan of this look, I suggest you give this plugin a try.

For additional information on Analog efex, you can visit the Nik collection site here http://www.google.com/nikcollection/. Google does not offer any discount codes there, but if you look around, you maybe find one of the old ones, and can get the collection for a little cheaper :)

View all my other reviews here.

Contest voting

The contest voting over on Facebook is up to a fast start, with hundreds of likes already given to the submitted photos. Check them all out in this Facebook album.

nik-color-cross

Nik Color Efex Pro 4 Review

I’m slowly adding more reviews of all the software and hardware I have been using. This time it is of the Nik Color Efex Pro Photoshop plugin. My reviews focus more on what I like and use about the software, but I think some of you will find them helpfull :)

Christmas market in Bratislava

Bratisalva-behind-the-cameraAs in a lot of cities, there is also a Christmas market in Bratislava. And as I didn’t get any photos of it last year, I was searching for a nice vantage point to take a photo now. But I was not in the mood to take photos in the middle of all those people, so I went up to the Town Hall tower, to take photos from there. The view was nice, it was just freaking cold there :).

This is a HDR created from 5 exposures in Oloneo Photoengine and the combined with original exposures in Photoshop.

Recently I’ve been taking more “Behind the camera” shots, so I’m also including one from that evening.
Christmas market in Bratislava

Compared to Nik Color Efex or Silver Efex, this one is a little different. Where others are a group of different filters, or a group of presets of one filter. This one is a tool to adjust the basics of a photo. You get only four basic sliders (Brightness, Contrast, Saturation and Structure) and 6 additional sliders (Shadows, Warminth, Hue and the Red, Green and Blue channel adjustment). The list is finished with a curves adjustment, you can use on any of the channels.

nik-viveza-1

So as I said, the Viveza only has a basic set of tools. But it has one trick up it’s sleeve. It allows you to add control points to your photo. Once a control point is dragged onto a photo, it creates and automatic selection, based on the color it was placed on. Once this is done, you have all the mentioned sliders available for that specific point. So you don’t affect the whole photo, but jut the selected part. It’s similar to using Color range in Photoshop to define your selections.

nik-viveza-2

You can also affect the radius around the point, in which this selection is made. Don’t be surprised if the effect is also outside the radius, as the area is determined by both, the radius and the similarity of colors.

Another nice thing is, that you can group points into groups and so are able to affect multiple parts of the image at once.

nik-viveza-3
Overall Viveza can make you editing process faster, as it takes away the need to mask out areas for where you want to apply an adjustment. I suggest you give it a try.

For additional information on Viveza, you can visit the Nik collection site here http://www.google.com/nikcollection/. Google does not offer any discount codes there, but if you look around, you maybe find one of the old ones, and can get the collection for a little cheaper :)

View all my other reviews here.

FREE EBOOK!!!
Subscribe to my newsletter and get a free Capturing fireworks ebook. 
Subscribe